




































































G code, sometimes called g-code, is a simple programming language for CNC machines.
Listed below are the codes that use the G word. These codes are preparatory commands.
This means that they set modes or prepare the machine for various actions.
We have put together a complete list of G codes for your reference.
Not all codes are used often.
Below is a list of G codes. They have been organized into group types based on how the machine reacts to the individual code.
If you are new to G code, you should review the code groups and compare the codes within a single group.
You will quickly see they handle the same function, such as one code to turn something on and one code to turn something off.
This makes learning the codes twice as easy.
Moves the CNC around at the maximum possible speed. Often called rapid traverse.
Move the CNC in a straight line to a specific location. The speed of this movement is determined by the feed rate (F).
Move the CNC to specific location along along a specified arc or radius traveling clockwise. The speed of this movement is determined by the feed rate (F).
Move the CNC to a specific location along a specified arc or radius traveling counterclockwise. The speed of this movement is determined by the feed rate (F).
Tells the CNC not to move for a certain amount of time.
The vast majority of movement in CNC programs will be relative to the XY plane. Plane selection affects how G02, G03, cutter compensation and some canned cycles are handled.
Plane selection affects how G02, G03, cutter compensation and some canned cycles are handled. G18 tells the machine you are machining radii around the Y axis.
Plane selection affects how G02, G03, cutter compensation and some canned cycles are handled. G19 tells the machine you are machining radii around the Z axis.
All size and location commands will be in inches until changed.
All size and location commands will be in millimeters until changed.
Turns off any cutter compensation modes (G41 or G42).
Shifts the machine tool path to the left based on the radius of the cutting tool.
Shifts the machine tool path to the right based on the radius of the cutting tool.
Adjusts a tool’s location based on a specified tool height (H) offset.
Turns off the tool length compensation set by a G43 or G44 command.
Sets a specific location in the CNC as the zero location for the program.
Sets a specific location in the CNC as the zero location for the program.
Sets a specific location in the CNC as the zero location for the program.
Sets a specific location in the CNC as the zero location for the program.
Sets a specific location in the CNC as the zero location for the program.
Sets a specific location in the CNC as the zero location for the program.
Peck drill a hole by repeatedly drilling, then retracting a small amount, then drilling deeper. Often used to break up chips when drilling.
A tapping cycle for left-hand or reverse threads. The spindle must be running in reverse during this cycle. The machine will feed to the bottom of the hole and then reverse the spindle direction and back out of the hole.
Bores a hole then stops the spindle, retracts the tool from the surface and rapid retracts the tool out of the hole.
Drills a hole then rapid retracts out of the hole.
Drills a hole, dwells at the bottom of the hole for a set amount of time and then rapid retracts out of the hole.
The machine will drill in pecks while rapid retracting out of the hole between each peck to help clear chips from the drill.
The standard tapping cycle with the spindle running clockwise. The CNC will feed to the bottom of the hole and then reverse the spindle direction and back out of the hole.
The machine will feed to the bottom of the hole and then rapid retract out.
The machine will feed to the bottom of the hole and then rapid retract out. The tool is not pulled away from the surface which can leave a tool mark on the hole.
Bores a hole from bottom to top. This is the reverse direction of the G86 code.
Bores a hole and then dwells at the bottom for a set amount of time.
The machine will feed to the bottom of the hole, pause for a set amount of time and then rapid retract out. The tool is not pulled away from the surface which can leave a tool mark on the hole.
Turns off scaling mode.
Cancels any active canned cycles for drilling, boring, tapping, etc.
All movement locations are relative to a fixed zero such as the work offset (G54, G55, etc.) or machine home location.
All movement locations are relative to the machine’s current position.
Sets the feed rate to units (inches/mm) per minute. The tool will move at a set rate.
Sets the feed rate to units (mm/inches) per revolution. The tool will move a set rate for every spindle rotation.
The spindle speed will vary to maintain the same surface speed of the material.
The spindle will operate at a consistent RPM.
After a canned cycle the tool will retract to the start of the canned cycle.
After a canned cycle the tool will retract to a specified location. Can be useful for avoiding workholding fixtures.
Causes the machine to come to a stop after each command. Useful for making sharp corners. It causes the machine to stop after executing the current line.
Adjusts offset values. Can change work offset, tool length offset and/or cutter compensation offsets.
Turns on a set safety zone that will cause the machine to alarm out if it enters.
Turns off the stored safety zone.
Rarely used. This command checks to see that the machine has moved to the zero return position.
The machine will move to a specified location and then to the zero return (home) position.
The machine will move to the position referenced in the last G28 command. It will then move to the location referenced with the G29 command.
Similar to G28 the machine will move to a specified location and then will move to a secondary reference point in the machine such as a tool changer location.
Often used with probing, it is used to move the probe until it hits an object.
Rarely used. Adjusts a tool’s location based on a specified height (H) offset in the opposite of the normal direction.
Rarely used.
Rarely used.
Rarely used.
Rarely used.
Scales the machined part size by a scaling factor.
Scaling factors >1 make it bigger. Scaling factors <1 make it smaller.
Shifts the program zero location based on a location specified with the command.
Rapid moves the CNC to the machine reference position.
Forces the machine to approach each XY location from the same direction. Helps eliminate location errors caused by machine backlash.
The machine will come to a stop after each line of code.
Cancels both G60 and G61 modes.
A macro is similar to a subprogram but it allows you to use variables in the program.
Makes the machine call a macro, similar to G65, with every new location given until turned off.
Cancels any active custom macro modal calls.
Rotates the machine coordinates at a given angle around a specified location.
Turns off coordinate rotation mode.
Sets a work offset based on a specific location in the machine.
We listed 70 G codes in our list alone but in reality there are many more.
Some will have different meanings on lathes vs mills. Also, different CNC controller manufacturers will include their own special codes. For example, some will have codes such as G103 or they will switch the meaning of a code.
You should always know how your individual machine will react to a specific code.
Anyone who works with a CNC machine would benefit from understanding G code.
While it may not be a requirement for their job depending on where they work, these positions would benefit from understanding G codes:
Learning G code can be a daunting task when there are so many codes to understand.
While it is true that there are a lot of codes that can be used, you should know that most shops will only use a small selection of codes which cuts down the number you need to understand before you are up to speed.
Don’t be overwhelmed. Figure out which codes are the most commonly used ones and start your learning there.
Whether you are a seasoned machinist or a machine operator starting a new career, a good book can go a long way towards developing your understanding of the parts, pieces and processes involved in the machining trade.
We have laid out our recommendations for all skill levels and even included some quality choices for topics such as CAD and GD&T.
Check out Machinist Guides picks for best machining and CNC related books!
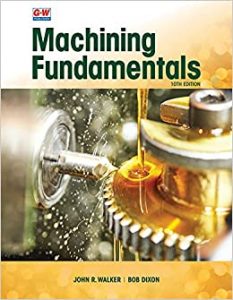
Machining Fundamentals
It’s not quite machining for dummies, but this text is easily the most beginner friendly book while also going in depth on the subject.
If you take a beginner machining course, this is likely the textbook that will be used. It covers everything from manual machining to CNC and everything in between. This textbook does a good job of not assuming you have previous knowledge and instead teaches all the basics and then some in an easy-to-understand format.
One of the best things about this title is that there are a lot of pictures to show you what is being taught. There is no better beginner’s book for machining. If you are looking for something that is primarily focused on CNC machining then look for one of the books listed below instead.
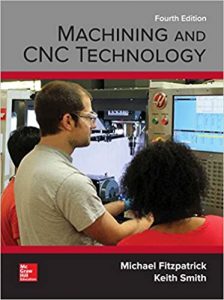
Machining and CNC Technology
Machining and CNC Technology is a great overall machining book similar to our Best Beginner Machining Book.
Where this book excels is in providing an excellent introduction to CNC related topics. Too often the actual operation and setup of the machine are not given enough coverage.
This book gives a great introduction to CNC machining and covers everything from machine setup to program planning and g code tutorials.
Machining and CNC Technology is another textbook that is so thorough it is often used for training in machine tool classes.
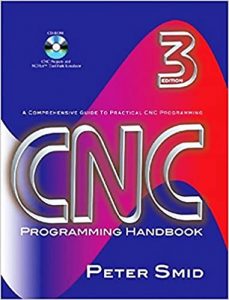
CNC Programming Handbook
Not a book for beginners. The CNC Programming Handbook by Peter Smid goes in depth on just about every CNC programming related topic.
Everything is covered and in great detail. Personally, this isn’t the type of text I would read straight through. Instead, I recommend using it like a CNC version of the Machinery’s Handbook.
This is absolute CNC reference grade material.
The CNC Programming Handbook makes a great comprehensive desk reference. When it comes to learning CNC programming, if this book doesn’t have it then most likely no book does.
You won’t need it on a daily basis but when you come across a topic that you don’t understand, it will be an invaluable resource.
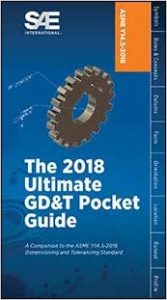
2018 Ultimate GD&T Pocket Guide
GD&T can be a complex topic to learn. Our best GD&T book recommendation is 488 pages! That’s a lot of information to take in.
Luckily, there are many different “pocket guides” out there that condense it down to a beginner level so you can comprehend the basics.
This pocket guide does a good job of covering the most common applications of GD&T and it’s likely that unless you are working in inspection, it will cover everything that you need.
Even experienced inspectors can benefit from having a quick reference handy.

GD&T: Application and Interpretation
Geometric dimensioning and tolerancing can be a difficult subject to tackle. Fortunately, this book by Bruce Wilson does a great job of breaking it down into smaller pieces.
In my opinion, when it comes it GD&T related matters, a picture says a thousand words. Luckily this book contains countless examples to make understanding some of the more difficult concepts of GD&T much simpler.
One item worth noting is that this book is based on the ASME Y14.5 2018 revision. This is the most recent revision of the drawing standard and many other textbooks available are based on older revisions of the standard. For reference, 2009 was the previous revision of ASME Y14.5.
Note: If your shop doesn’t have a copy (which they should), more experienced GD&T users may want to consider a copy of the ASME Y14.5-2018 standard to have around for reference as well.
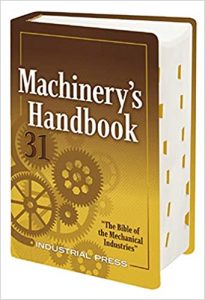
Machinery’s Handbook
This is the book by which all other references are judged. Machinery’s Handbook, which is often referred to as the Machinist Handbook, is the quintessential reference for all machining.
This is not a book for beginners, but instead for someone who already has some knowledge of machining. Every machine shop should and likely already does have a copy or two laying around. Each new edition continues to add new and relevant content to an already extensive collection of important information.
Don’t be afraid to pick up a previous edition if you can find it used or cheaper. The difference between one edition isn’t that great. Just avoid a copy that is five or ten editions out of date.
Every machinist should have a copy of this book available to them.
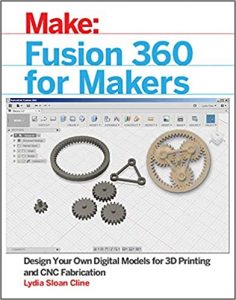
Fusion 360 for Makers
If you are just getting started with CAD, then in all likelihood you will be working with Fusion 360. Fusion 360 is a free (for personal use) piece of CAD software from Autodesk, makers of Inventor. Inventor is one of the most popular pieces of drafting software used in machine shops around the world.
Learning Fusion 360 will teach you skills which will transfer to other more advanced pieces of software. Although, I should point out that Fusion 360 is no slouch and will allow you to create some pretty advanced widgets and doodads if you take the time to learn it.
Fusion 360 for Makers is a great starting point for newbies to learn the basics and get acquainted with the software.
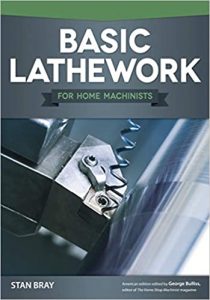
Basic Lathework for Home Machinists
If you are just getting started with lathes and are looking for a guide to start you off cheap then this is the book. It is not the most comprehensive, but it does a good job laying things out for beginners.
The abundance of pictures helps machining newbies wrap their head around the parts and processes involved with metal lathes. The only complaint would be that the pictures are in black and white which makes it a little bit harder to see some of the finer details in the photos.
If you aren’t ready to dive into a literal textbook yet, then this book can get you started at a budget friendly price.
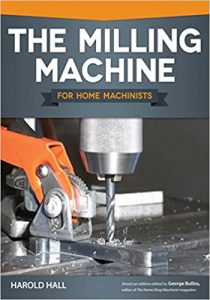
The Milling Machine for Home Machinists
Just like Basic Lathework for Home Machinists, this book is a good starter book.
One area where The Milling Machine for Home Machinists excels is the color pictures. There are a lot of them and they make it easier to understand the topics being covered.
This is not the book you want if you have been running a mill for any length of time. It covers entry level material only. Once you fully understand the information covered, think about stepping up to one of the more comprehensive machining books for beginners such as Machining Fundamentals or Machining and CNC Technology.
Thanks for checking out our guide to the best machining and CNC books. Hopefully they help add to your physical and mental library.
P.S. If you have a good recommendation for a machining book please share it in the comments below.
For more information check out these related articles:
Why do they have to make so many cool toys for adults?
Actually, I suppose it’s not the toys that are the problem, but instead it’s the cost of the toys.
Luckily if you recently purchased a 3018 series CNC such as the SainSmart Genmitsu series, MYSWEETY or one of the numerous other manufacturers out there, there are some relatively cheap or homemade upgrades to trick out your new machine.
Check out our list below to find out how to improve your 3018 CNC without breaking the bank.
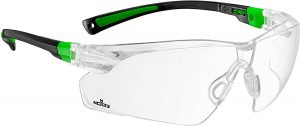
First and foremost, you should make sure you have a quality set of safety glasses. While these are small machines that are not as high powered as industrial CNCs, they are still dangerous.
Read your instructions. Wear safety glasses and it’s a good idea to have ear protection too.
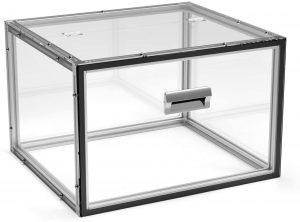
An enclosure is one of the best upgrades for any hobbyist CNC. These machines can create a lot of dust and noise. It is a good idea to reduce both, especially if running the machine in your normal living area.
The enclosures are pretty straight forward. Assemble the box and place it over your machine to start reducing the volume of dust and noise created by your CNC.
If you have a 3D printer and are so inclined, it is possible to construct your own with some PLA, pieces of plexiglass and a little elbow grease.
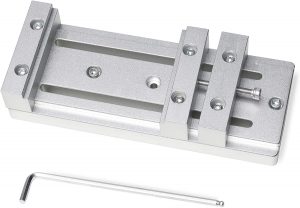
Larger CNCs use a machinist vise to hold the workpiece. This vise is a smaller version for the 3018 series of CNC machines. They work great to secure a variety of materials.
This tool is especially useful for holding parts which are an unusual shape such as jewelry or some electronics.
Many different forms of work holding are available such as clamps and T nuts but a vise is a simple way to hold a large assortment of material. Compared to other types of workholding, a vise will decrease setup time and increase productivity.
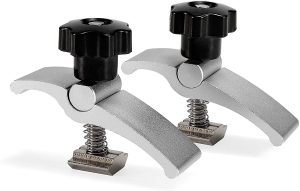
If a vise is too costly for securing your workpiece. Think about some T nuts. They aren’t as fast but they are versatile and a vast improvement over the typical clamps included with most of the 3018 series CNCs.
Check out our bonus tips for ways to protect your workpiece while using T nuts.
Upgraded router bits and end mills are an important addition.
But not every type of bit is worth buying.
Check out our Beginner’s Guide to CNC Router Bits to figure out which ones you need to get started and which ones are fun toys for later on.
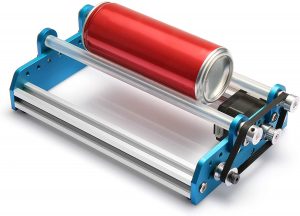
The 3018 series of CNC are capable of laser engraving but for anyone looking to laser engrave cylindrical objects such as cups, tumblers, etc. this is the perfect solution.
The rotary engraving module will allow you to rotate the workpiece to allow the part to stay in the lasers ideal path. This will allow uniform engraving of the workpiece around the circumference of the engraved piece.
This isn’t an upgrade for everyone but if you have a specific application in mind which requires laser engraving a circular object then think about checking out this upgrade.
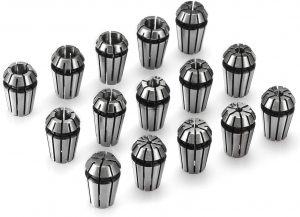
Different collets are a great addition for a 3018 series CNC. They allow you to use many different size bits or end mills to machine your workpiece with. At the bare minimum it would be wise to consider adding a ¼” ER11 collet. For a little more you can get a set that will allow just about any bit or end mill that you would want to use.
There is no need to break the bank on ER11 collets for a 3018 CNC. The added quality and reduction in runout won’t translate to a big difference in quality for your projects. A simple set is the best choice.
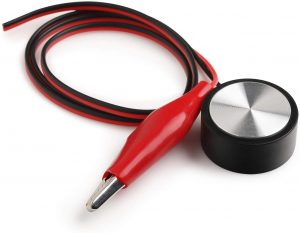
No one likes setting Z axis heights with paper. It feels imprecise and clumsy. Luckily, there is a simple and cheap upgrade which will allow you to make the process simpler and more accurate.
The probe is very easy to use. First connect the probe to your control board. Now measure the height of the probe with a tool such as a digital caliper or micrometer.
The thickness of the probe now needs to be entered into the CNC software. Place the probe on the workpiece and then connect the clip to the cutting tool. Run the probing program and lower the cutting tool slowly until it contacts the probe. The Z axis will now be set.
For more detailed instructions check the manufacturer’s website, they have a nice tutorial.
You can make your own if you wish but for the price it is hard to justify messing with a homemade tool.
If a homemade tool is more your speed then check out this tutorial which will walk you through creating your own Z axis touch setting probe.
The cost of the homemade tool is close to the cost of an actual probe but you might have some of the supplies on hand already which will bring the cost down.
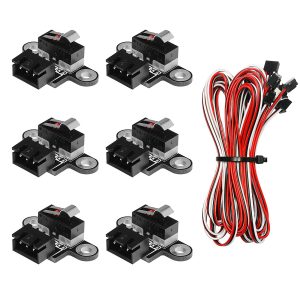
Limit switches are a great addition to a 3018 CNC machine. Without them it is all too easy to crash your machine. While crashing the machine won’t always cause damage, it is a definite possibility.
Honestly, the machines should all come with limit switches to protect the machine from damage but I am sure that the manufacturers are trying to keep the cost down as much as possible and therefore did not include them in some versions of the 3018 CNC.
The 3018 series of CNC machines are pretty budget friendly but that doesn’t mean you want to scrap the machine right away.
Take note that adding limit switches will reduce your work area by a small amount. While this is unfortunate, it is definitely a recommended upgrade to protect your machine especially at the relatively small cost of the upgrade.
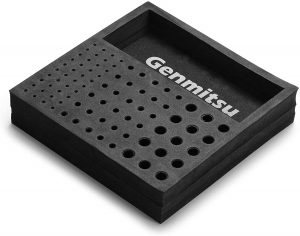
As you gain more experience with your CNC machine, it is inevitable that you will develop quite the collection of bits and end mills. A good storage solution is a must to protect your bits from damage.
The storage tray has holes for many different sizes of bits and end mills along with storage for miscellaneous other tools. The tray from Genmitsu does a great job of organizing all the little odds and ends along with your cutting tools.
If you have a 3D printer then check out Thingiverse for storage trays. You should be able to find something similar that will meet your needs. If you don’t have a 3D printer then you might be able to find something that will work at the dollar store.
The important thing is to keep your tools organized and protected so that they will remain sharp and ready for your next project.
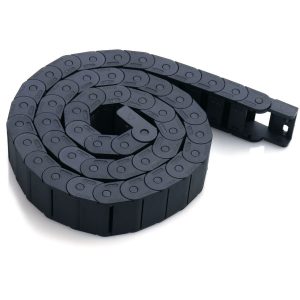
Those with experience working with a 3D printer will likely recognize the value of a good wire/cable protector. This is often one of the first things printed when someone buys a new 3D printer and for good reason.
The movement of the machine back and forth in the process of cutting or engraving means that there is some risk that the wires will snag on some portion of the machine. The cable protectors will keep this from happening.
If you have a 3D printer already, take a peek on Thingiverse to see if there are any plans or find a premade alternative somewhere else like Amazon.
One great way to hold down projects that are difficult to secure for all types of reasons is to place blue painters tape on the bed and the workpiece. Now use an adhesive to glue the two sections of painters tape together. The tape and glue combo will hold the part and once you are done, you can simply peel the painters tape off.
3D printed holding fixtures can be a great addition and allow more versatility in what you can machine. Check out Thingiverse for all kinds of 3D printed addons.
Use felt furniture sliders from the dollar store with clamps or t nuts to protect surface of delicate workpieces.
If you have any additional tips you learned experimenting with your 3018 CNC please let us know and we will happily share them here to save others some of the headaches that come with learning how to work with a new machine.
For more information check out these related articles:

Machinists, CNC Machines Operators, and hobbyists often need to work with complex engineering and mathematical equations daily. With practice they get easier to work with, but a good calculator tailored to machining can speed up the learning process.
After all, a miscalculation can be the difference between a scrapped part or crashed machine and a perfect part.
Standard hand-held calculators are designed for basic arithmetic calculations of addition, subtraction, multiplication, and division.
A good machinist calculator will perform all the functions of a standard calculator along with other specialized functions such as trigonometry, logarithms, and exponential functions.
At the very least you will want to get a calculator that can perform all of the necessary operations.
If you want to step things up and make those calculations easier, then some of the specialized calculators below simplify the formulas and calculations.
In this article, we discuss some of the best machinist calculators and apps for machinists available while including tips for making the most out of these mathematical tools.
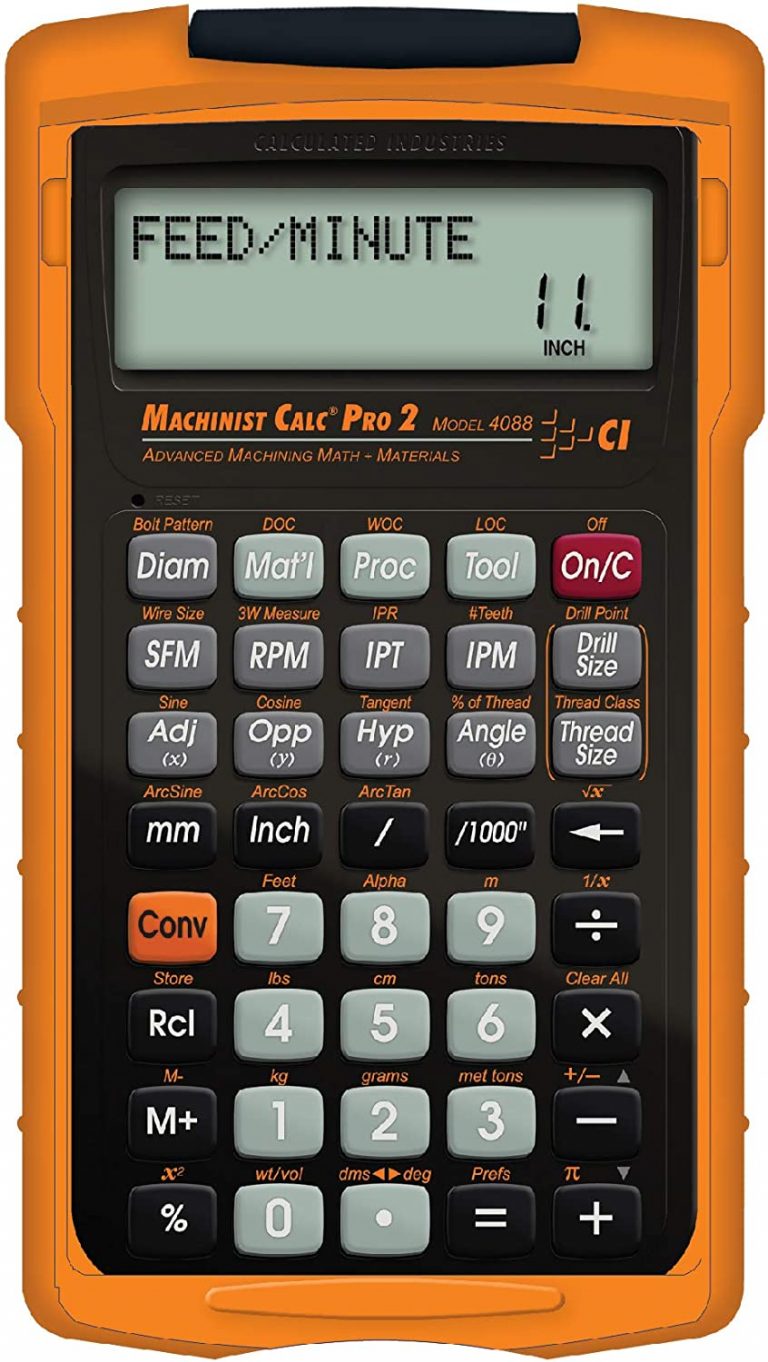
Our pick for the best machinist calculator is the Calculated Industries 4088 Machinist Calc Pro 2.
The Machinist Calc Pro 2 Model 4088 easily ranks among the best machining calculators because of its ease to use, and rugged build. This calculator is ideal for machinists, engineers, programmers, and hobbyists.
The Machinist Calc Pro 2 Model 4088 makes solving the most common formulas used such as speeds, feeds and trigonometry super simple. Adjusting those calculations, with a larger depth of cut for example, is also easy. A couple button pushes to adjust the value in the calculator and it quickly spits out your new speeds and feeds. No need to run through the whole calculation step by step again.
It also solves right-angle triangle and bolt-circle patterns problems with ease. The trig functions are great. Enter what you know, any combination of angles or sides, and the Calc Pro 2 will spit out all the unknown values.
Also, the calculator comes with built-in charts that you can look up information for calculating milling, boring, spindle speed, cut speed, chip-load, etc.
Back to speeds and feeds because that is a large portion of what this calculator is so good at.
The calculator makes solving for any of these values quick and easy:
On top of this, there are a ton of variables that can be adjusted to accurately setup your machine. You can pick the type of cutting tool you are using as well as the material you are cutting.
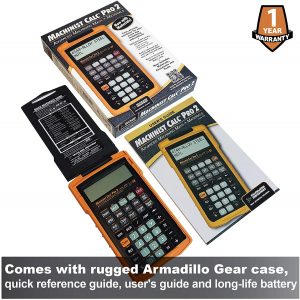
It comes loaded with material info for various steels as well as aluminum and titanium alloys among others. The tool choices are high speed steel, carbide, and high-performance tools.
The pre-programmed processes built in are:
The Machinist Calc Pro 2 is handy but also built tough. Things don’t always get treated as carefully as they should in the shop which is why the included case/cover is important. Just remember that the case isn’t waterproof, it is only meant to protect it from a splash, don’t go dipping it in your coolant.
The case has a quick tips guide to the most important functions and this thing practically comes with a textbook. It can seem overwhelming, but it is pretty well laid out and you can find what you need pretty quickly.
The Calc Pro 2 isn’t necessarily a calculator replacement. It isn’t meant to do all math calculations, but it is meant to do a large selection of the ones that anyone working in machine shop would need.

Let’s be real, not everyone wants to break the bank when picking up a calculator. If you fall into this category, keep it simple and go with one of the classics.
The TI-30XIIS scientific calculator by Texas Instruments is solid calculator fully capable of any calculation the average machinist or CNC operator might need.
While it won’t step you through the formulas and calculations like the Calc Pro 2, it is still more than capable of getting to the end result.
The TI-30XIIS has all the functions you will need for solving your machining formulas. Algebra, geometry and trigonometry functions are all built in.
The TI-30XIIS is both solar and battery powered, and the battery practically lasts forever. I have used literally dozens of these calculators in my time working in machine shops and I can’t recall ever having one that had a dead battery.
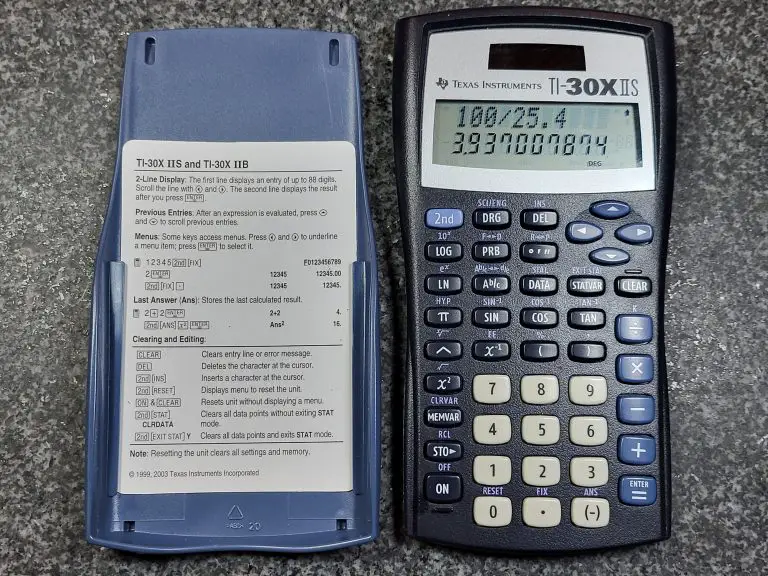
They are simply built to last. This isn’t cheap plastic. I feel like you could use the thing as a hammer and it would keep on ticking.
Please don’t though. Using the calculator as a hammer will likely void your one-year warranty.
The only thing I have seen kill one of these calculators is chemicals. But in fairness, a heavy dose of acetone will put an end to most things plastic.
If you simply need a calculator to do your job and aren’t looking for something super specialized, then stick with one of the classics and grab a Texas Instruments TI-30XIIS scientific calculator.
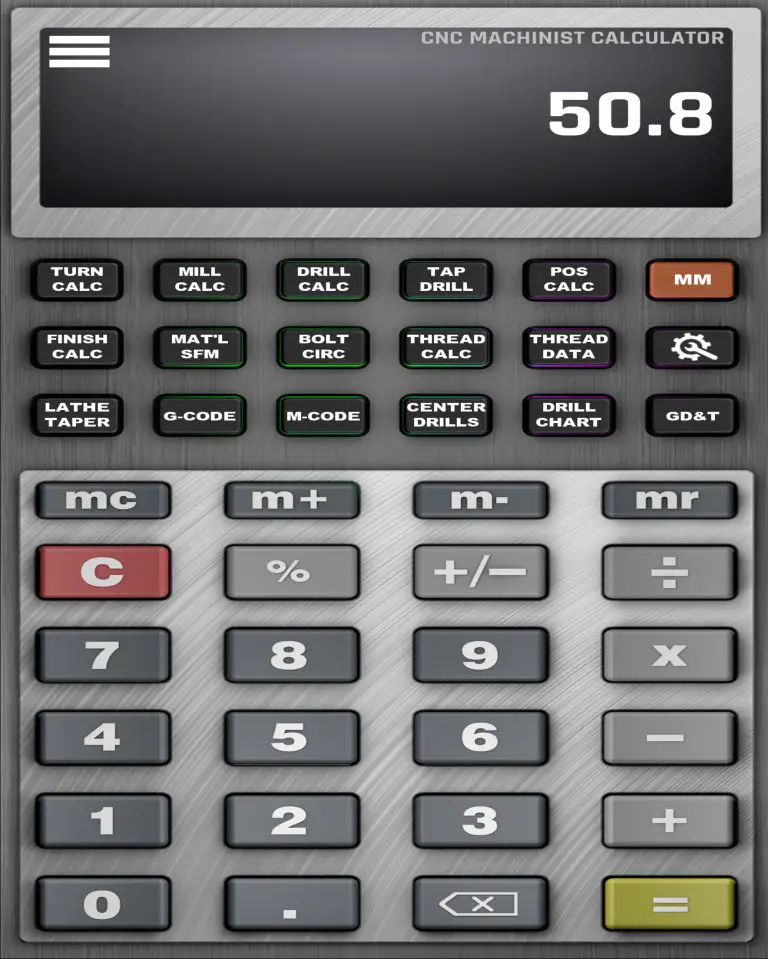
Everyone uses the calculator on their smart phone. But this is not your ordinary calculator app.
The CNC Machinist Calculator Pro app is an extremely powerful machining tool. It features all the standard calculator functions you would expect along with a wide assortment of specialized functions.
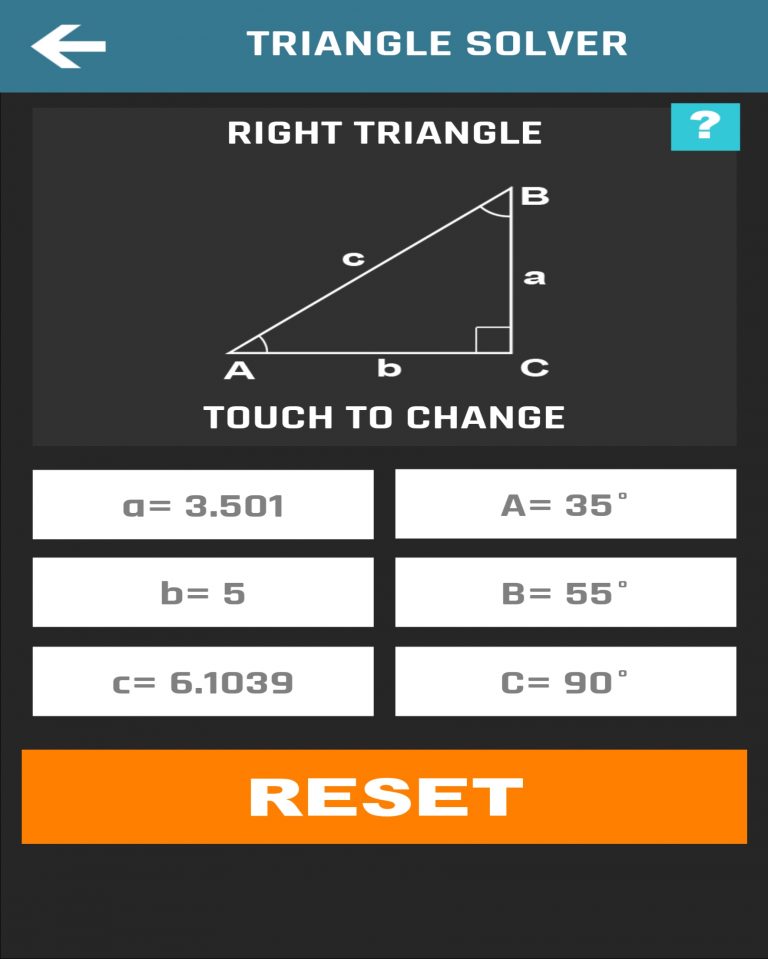
It has functions for milling, drilling and turning calculations.
The app also includes a nice variety of charts and references to use. This is a great all around app that has a little bit of everything and enough of it to help anyone using the app along.
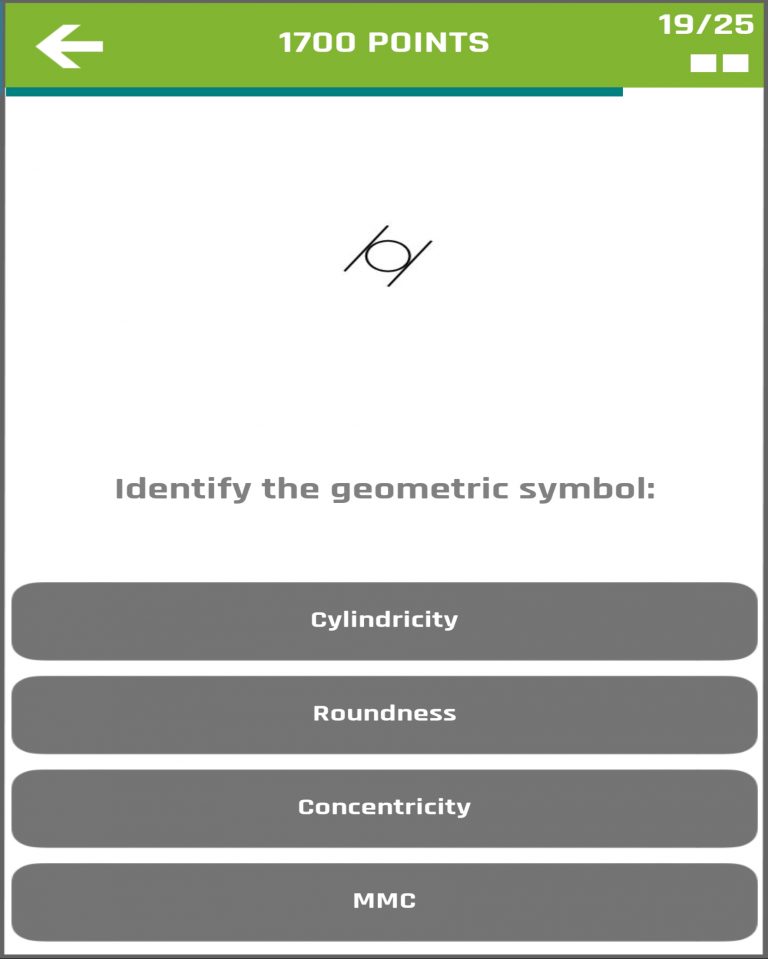
For example, not everyone will need to reference the G code library or the GD&T symbols guide but both sections of the include a nice amount of info and examples to prove useful.
I really like the mini apps that are included in the Machinist Calculator Pro app.
The trigonometry solver and geometry solver are very handy.
I also really enjoy the quiz function called Brain Check. It has various quizzes on different machining related topics. Seems like a fun way to figure out what you might need to brush up on for subjects.
Overall, the app is well made and easy to use. While it isn’t a $1 or $2 app, it does pack an extensive amount of functions into the package while still being quite a bit less expensive than some of the competing machining apps.
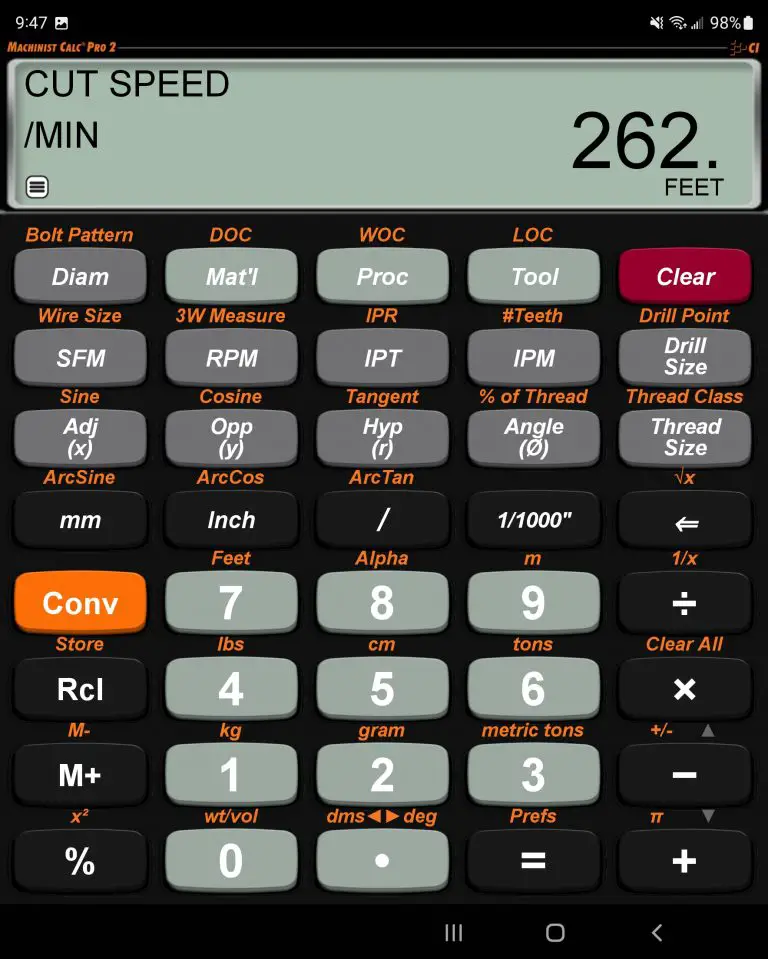
There’s an app for nearly every gadget, tool, or piece of equipment you can think of. This even applies to calculators for machinists.
The best premium app is a no-brainer. It is Machinist Calc Pro 2. Yeah, you read that right. Calculated Industries have literally made an app that replicates their physical calculator.
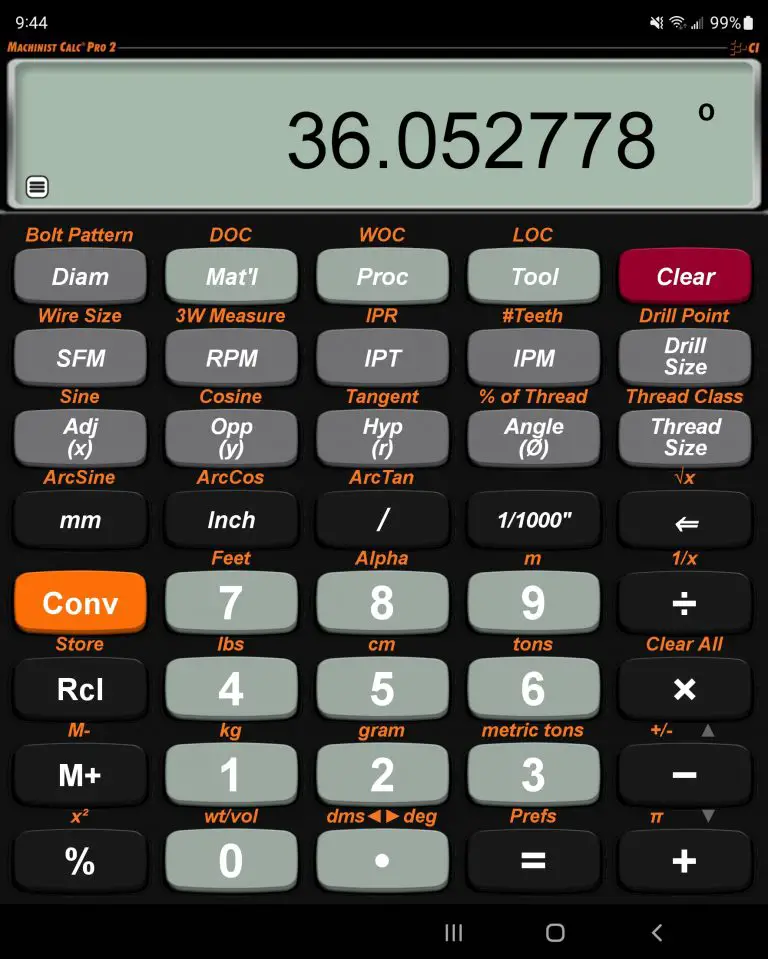
The mobile app features all the same functions of the handheld version with a built-in help function for when you can’t figure out your next move. By pressing and holding specific keys, the app displays clear explanations of what the key does alongside elaborate examples.
Everything we said about the physical calculator still applies to the digital replica.
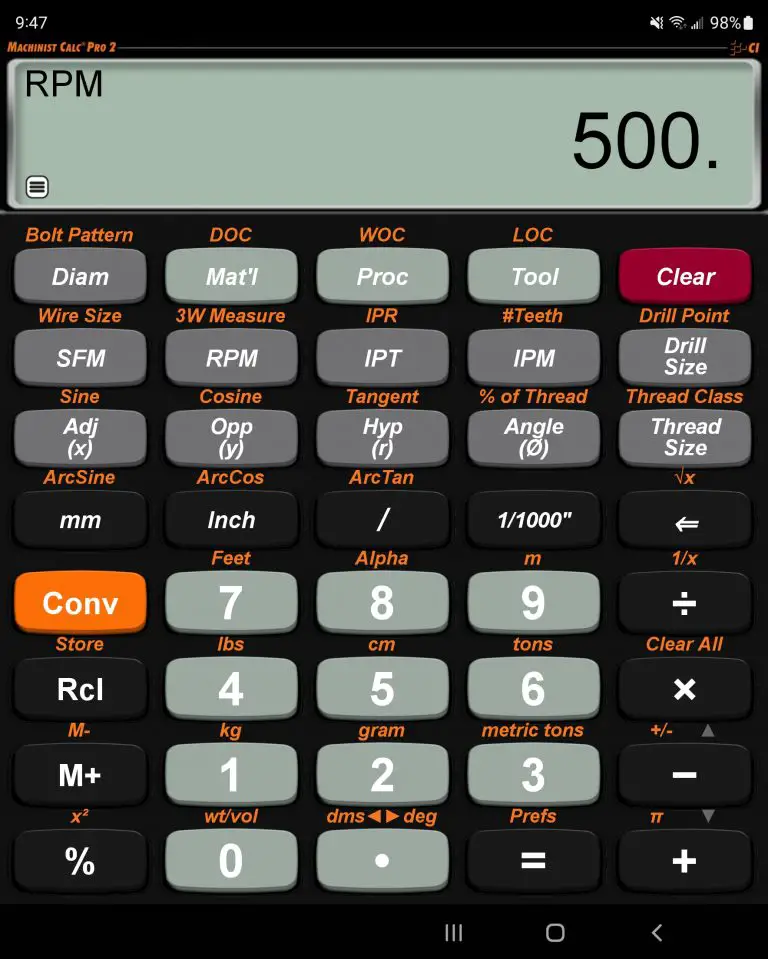
The app is available for all android and iOS devices and the best part is that you can get it for about half the price of the physical handheld version.
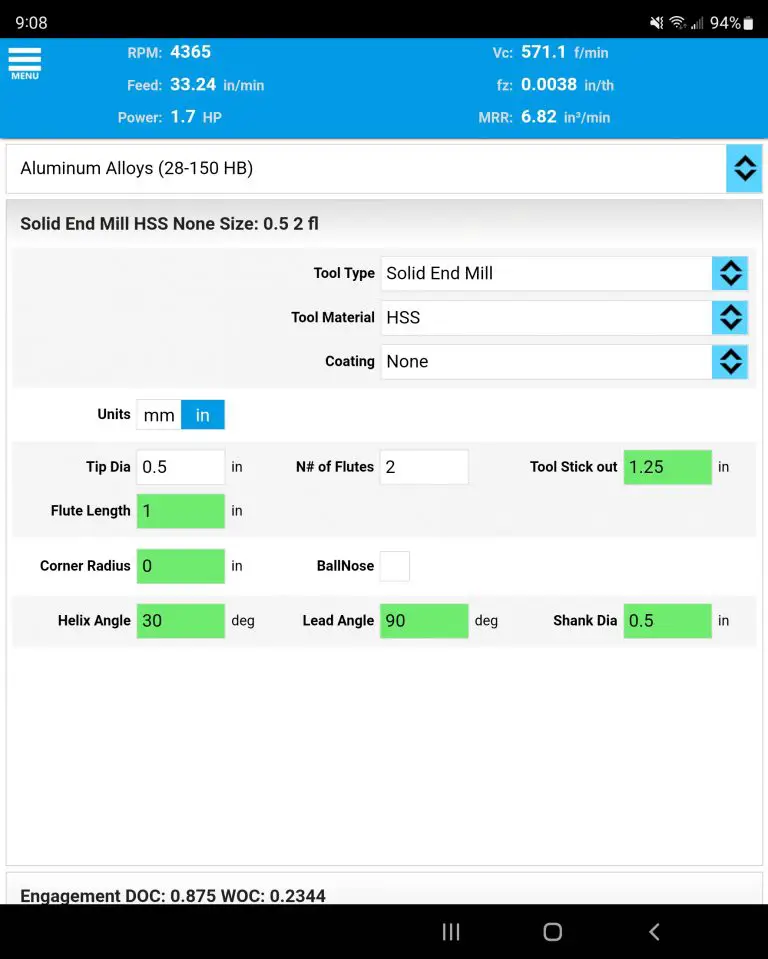
FSWizard Machinist Calculator by Zero_Divide is an amazing calculator and overall machining resource especially considering the price of admission.
It has a ton of different calculators for things such as speeds and feeds, triangles, bolt circles, and more.
In addition, there are a huge quantity of references and charts that will come in handy. Most of the references aren’t intended to be the ultimate resource on the topic but instead simply a quick reference.
Many machinists, especially those just starting out, will enjoy the all-in-one app that includes GD&T, G code and speeds and feeds info all in one place.
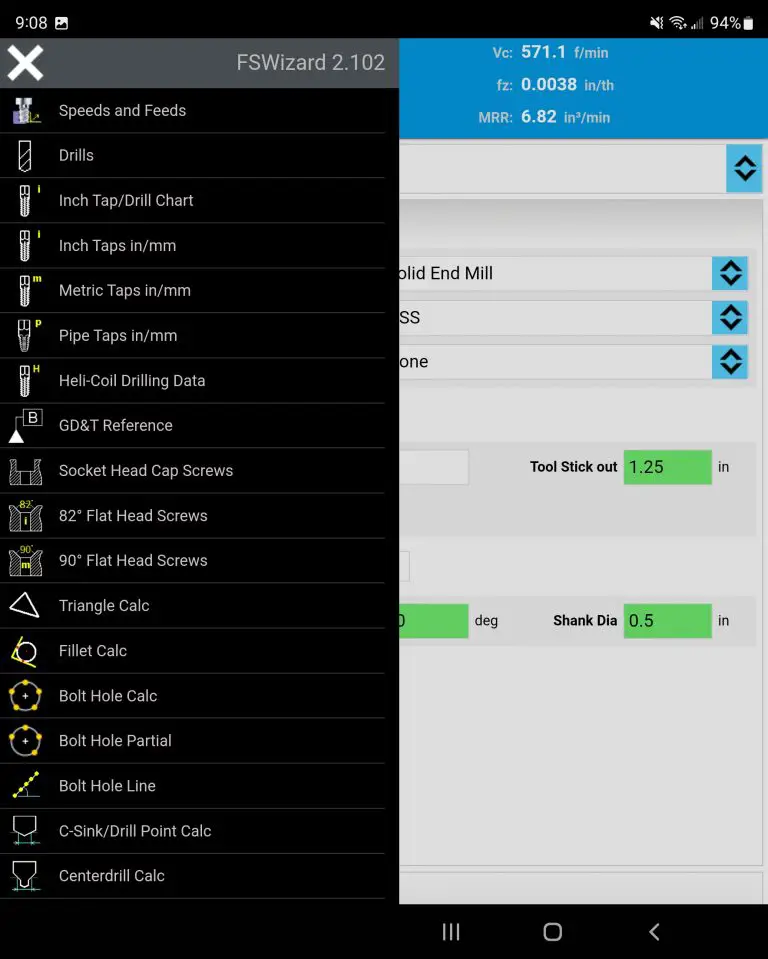
The biggest downfall of the free version of FSWizard is the limited selection of materials available in its speeds and feeds calculator. There are enough to get by, but the numbers won’t be exactly tailored to your workpiece. The additional materials are available in the Pro version of the tool.
Overall, FSWizard provides a ton of value for free. The app is available for all android and iOS devices.
There are a large number of machining calculators available online. It can be a pain to have a bunch of bookmarked sites for all the different calculators you might need.
MachiningDoctor.com has a great selection of machining calculators for everything from speeds and feeds to sine bar calculations all in one place. Most of their online calculators are fairly advanced and allow customization for many different variables.
I also like that they often have a simple mode available for users who might not be as experienced.

Who doesn’t like to earn a little extra dough?
Whether you have a CNC router, laser engraver or plasma cutter, selling your projects locally or online can bring in a pretty penny.
But where is the best place to sell those cool creations?
We picked the best spots to set up shop and turn a tidy profit with tips to help you make the most of each marketplace.
Fire up the CNC, it’s time to make some money!
You can sell your products both locally and on the internet. Billions of people buy and sell goods online thanks to the widespread internet access. Here are some of the places you should explore:

Facebook Marketplace is one of the best and easiest ways to market your CNC projects to a local audience for free.
Through the marketplace, people can browse through your product portfolio and message or call you with offers. Getting started is super easy, especially if you’re already a Facebook user. You can use your personal account or create one for your business.
All you need are a couple nice pictures of your CNC projects, a thorough description of the products, their conditions (new), price, and where willing buyers can pick them from.
The pictures are very important because they are what will help get people to share and tag others on your listing. Spend a little time getting good pictures.
Locally, it is best to meet buyers face to face and cash is always best. You can sell and ship products through Facebook Marketplace, but Facebook charges a 5% fee.
Tip: Be careful accepting some forms of payment such as PayPal or Venmo. People have been known to dispute transactions leaving sellers without their payment or their product.
Craigslist has been around since 1995 and is still one of the most popular online marketplaces to sell all sorts of items. This makes it a great place to sell your CNC projects and best of all there is not cost for selling.
It has taken a hit in popularity since the introduction of Facebook Marketplace, but plenty of buyers and sellers still use the site.
Creating a Craigslist ad is so simple that you don’t even need a Craigslist account.
How to list your CNC projects on Craigslist
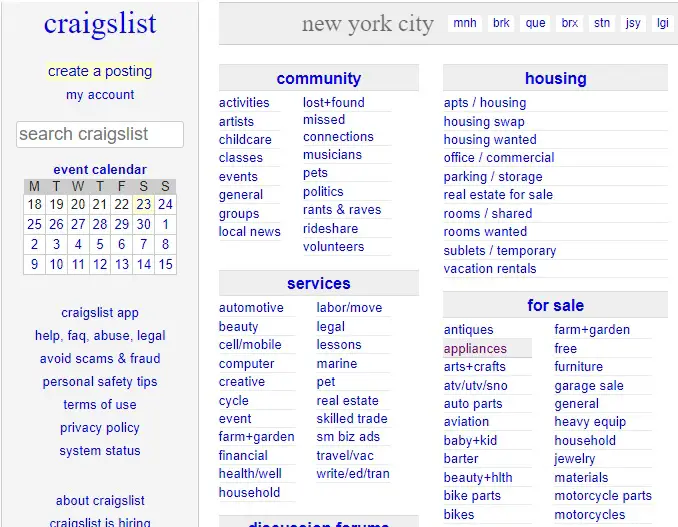
Once posted you will simply need to monitor your email for interested buyers.
Craigslist is a great zero fee option for selling CNC products online locally.
Craft fairs or craft shows are local craft events organized for artists to showcase and sell their products. Craft fairs are a superb way to show off your brand to the locals and hopefully make some sales while you’re at it.
CNC products can get a lot of attention at craft fairs because often there isn’t much competition. Many of the other vendors at the show will be focused on things such as jewelry, knitting and painting.
Get your products to stand out and put yourself out there and you can make sales even after the fair is over. Craft shows allow you to bring your CNC projects to the masses, network with peers, and acquire a new set of skills and techniques.
Most craft fairs and shows will charge a fee to display your wares. They can range from $10 to hundreds of dollars, it varies a lot by event. Bigger venues with more traffic are going to be more costly to attend but they also have the potential for much larger sales.
Some tips for selling at craft fairs:
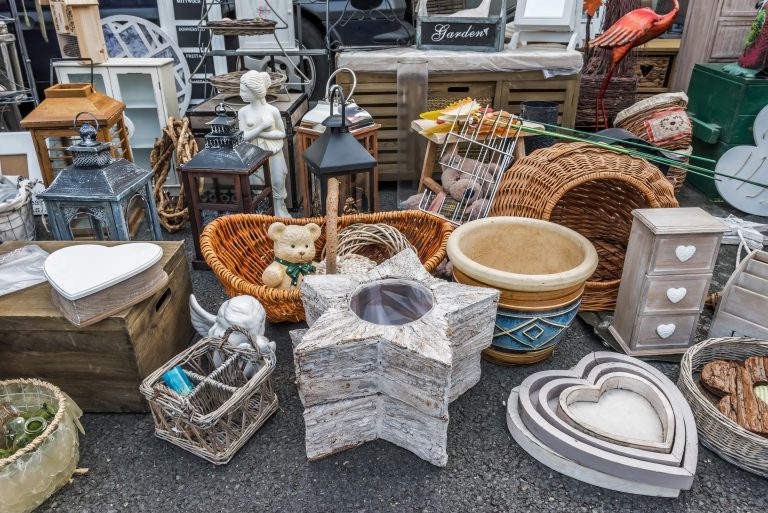
Flea market are an outdoor street market where organizers rent spaces to vendors to sell their products. Some events will be indoors, but most flea markets are done outside in the warmer months.
Vendors commonly sell secondhand or used products at flea markets, but this doesn’t mean your unique brand-new CNC creations can’t be sold. You can make a pretty penny selling your CNC projects at flea markets the same way you would at craft shows.
Flea markets tend to have lower space rental fees which can increase your overall profits.
Many flea markets are temporary and open mainly in the summer late spring to early fall depending on your local climate. Some of the larger markets will be open year-round.
Renting a space in a flea markets will vary in cost much like craft fairs but can be anywhere between $10 to a couple hundred.
Tip: Check local newspapers and Facebook groups to find nearby markets to sell your wares and don’t be afraid to ask your friends and family if they have visited any that were particularly busy.
Craft stores can be an interesting and extremely profitable proposition if done right.
The first step is finding a good craft store. A quick Google of “craft stores near me” may do the trick. Another good way to find the best craft stores to sell your projects is by talking to other sellers at events. This is only one of the reasons why networking with other makers is helpful.
Not all craft stores are created equal. They vary in the type and amount of fees they charge as well as their rules. Some may be strict on keeping your product stocked and others might not allow you to setup shop if someone else is already selling similar products there.
All this means you need to put some boots on the ground and get out there and check some local shops out. The best ones are close to you for easy stocking or not far from your normal commute.
Don’t be afraid to ask shop owners for suggestions to increase your sales. They see firsthand what people want and it will be best to stay on their good side after all.
Our best tip is to try out multiple craft stores over time and find out which ones work best for you and your product. Different locales will have varying tastes that may or may not cater to your specific product. Find your target market.

Think of it like a pop-up craft store and a good excuse to get rid of some stuff you don’t need at the same time. A good old fashion garage sale can be an excellent opportunity to kick start your side hustle.
Even better if you are near an area that gets a decent amount of traffic. If possible put up signs to advertise that are easy to read at a distance. Some towns or cities even hold town wide yard sales which brings even more traffic and potential customers in.
Make sure you price everything ahead of time and expect people to negotiate. Seriously, people can be brutal. I once saw an old lady offer a dime for a $10 item. And it sold! Don’t be afraid to stand firm on your prices as they won’t be normal yard sale fare but giving in a little is likely to improve your overall sales numbers.

Local festivals, fairs, and events offer valuable opportunities to sell your CNC projects. Often people are in a happy mood and ready to buy more than they usually would.
What might seem like a small town event can be huge for the local community and bring out a large portion of the population. More eyes on your products means more potential customers.
Fees to set up shop at these types of events tends to be low so take advantage and make a killing even if the event is only once per year.
Some sample events to look for that usually have vendor spots available:

Etsy is a popular global marketplace for artisans with nearly 82 million monthly active users. The platform is dedicated to sellers and buyers of “handmade, vintage, custom, and unique” products.
This platform is crawling with buyers who are willing to splurge on unique items on sale. Don’t expect cookie cutter type products to do well here.
Your best bet to gain customers on Etsy is to highly customize your art to make sure nothing like it exists on the platform or any other place. When done correctly, sellers can often get top dollar for their products.
The best products on Etsy are unique. Etsy is a great market to sell products that cater to a specific audience. Custom board game tiles, 3d topographic maps of specific locales and personalized products of all kinds are just some examples of the types of things sold on Etsy.
Having the right product to list might not be simple but creating an Etsy account is super easy:
Etsy charges a transaction fee of 6.5% for every product sold on its platform.

EBay is huge player in the ecommerce industry. Recent statistics show that EBay is used by nearly 35% of all active US mobile users. That’s a huge group of potential buyers.
EBay also has the potential to open your side hustle up to a global market giving you limitless possibilities.
You can list your item for sale as either a standard bidding auction or for a buy it now price. Buy it now prices tend to work best if you will be consistently offering the same products.
One of the best things about using EBay is how easy it is to set up a listing. Typical EBay listings requires a photo, product description, price, payment method, and shipping information.
EBay does a great job of integrating shipping and keeping the overall shipping cost low which helps drive more sales.
EBay takes a percentage of nearly every sale, ranging from 1.5% and 15%.

Everyone knows Amazon. Over 197 million people around the world visit Amazon.com every month, making it by far, the most popular ecommerce site worldwide.
You can monetize most of your CNC project ideas on Amazon under their different categories and go about creating unique products for the worldwide market.
Furniture, arts & craft, ornaments, customized signs, and personalized nameplates, among others, can sell pretty quickly on Amazon.
Setting up an Amazon listing is simple but you should take care to accurately list your products to make sure that customers get what is expected.
To create a listing you will need to:
You may sell your products on your Amazon customer account or create a seller’s account.
Amazon takes a cut of between 6% and 15% of every sale made on the platform. The percentage can go to as high as 45% for Amazon devices accessories.
While the platform is huge. You need to be ready for the potential demand. Because of this, it is best to make sure you have your business running smoothly before selling on Amazon.
Identifying where you can sell your CNC projects solves only a part of the puzzle. The other equally important part is getting the item ready for sale and shipping. Even after finding the ideal outlet for your products, there are a couple of things you need to consider when selling. They include:
CNC projects can be created on wood, plastic, light metals (aluminum, brass, and copper), and acrylics among others. You will want to create your projects on high quality materials, but make sure you don’t overpay because buyers like a good bargain as well.
First impressions are important. Besides its main job of protecting your product from damage during shipment, the packaging is the first introduction the customer has to your brand.
Make it memorable. This can mean custom printed labels or laser engraved packaging but no matter which way you go try to stand out.
And toss a few business cards in the box. Happy customers are often willing to spread the word of your quality work. Make it easy for them.
Including a card or code that offers 5 or 10% off another purchase can also be a great way to keep the customers you already have coming back for more.
Shipping can be costly and makes selling your products a little more complicated. This is why it is a great idea to start locally and work your way up to online only marketplaces.
Pay close attention to the sizes and weights of your products because they can make big changes in your shipping cost which can end up hurting your bottom line.
What happens when a product is faulty when it reaches the buyer? Can you refund their money or send them a replacement quickly?
It is bound to happen eventually when you start your own business. Make sure you are prepared for it to happen and act quickly. Quality customer service can make or break the customers opinion of your brand.
Make sure you clearly list your warranty and return policies because you will be expected to follow them and customers take them into account when making purchasing decisions.
That’s plenty of ideas and tips about where to sell your projects, but what if you don’t know what to build?
Then check out our guide to the Best CNC Projects That Really Sell to kickstart your imagination.
Whether you want to learn a new skill, work on a pet project, or start a small business there is a CNC machine or router for you. CNCs, which are generally thought of as being ridiculously expensive don’t have to be.
These beginner machines prove the assumption wrong. While you won’t be able to cut a giant chuck of hardened steel with them, they will cut through wood, plastic and other soft materials like butter. With the right machine and some tweaking you might even cut aluminum.
All of the CNC machines listed below are excellent machines. However, it is important to take note of some of features such as the work area of the machine. Feel free to skip to the end of this article to see our comprehensive list of things to consider when looking for your first CNC machine or router.
Budgets vary, but all of these machines should be considered affordable, entry level CNC machines that are extremely capable.
Now, let’s get to the meat and potatoes and find out which machines top our list.
Name | Awards | Work Area | Where to Buy |
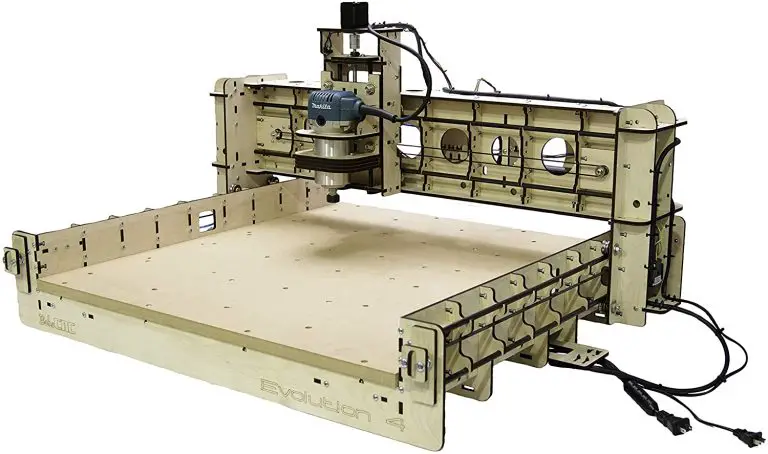
BobsCNC Evolution 4 CNC Router Kit | Best Overall CNC, | 24"x24"x3.3" | |
SainSmart Genmitsu CNC 3018-PRO | Best Budget CNC, | 11.8"x7.0"x1.7" | |
SainSmart Genmitsu 3018-PROVer | Best Mini CNC, | 11.8"x7.0"x1.7" | |
MYSWEETY DIY CNC 3018-PRO | Best Beginner CNC Router and Laser Engraver Combo | 11.8"x7.0"x1.7" |

Customer support is second to none
Large work area - great for making bigger signs

More detailed assembly
Not setup for laser engraving
Materials it will cut: Wood, plastic, soft aluminum, acrylic, PCB, leather, others possible with experimentation
Work area: 24” x 24” x 3.3” = 610 mm x 610 mm x 85 mm
Warranty: 60 Days
BobsCNC makes machines that are a pretty big step above other entry level CNC machines. Bobs makes machines that are aimed at users that want to machine wood, plastic and other soft materials. CNC wood routing is their specialty.
Size matters and the work area of the Evolution 4 (E4) is two to three times larger than other machines. This makes a huge difference in what you can make.
Many people use the E4 for making CNC routed signs or art. BobsCNC even has some “unofficial” plans that allow you to expand the machine even more. The work area can be expanded to 24”x48”x3”.
One downfall is that the E4 is not designed to be used with a laser. The company claims this is for safety reasons and honestly it makes a lot of sense. Lasers can be very dangerous.
Many of the beginner level laser engravers have a small work area. This makes it easier to build an enclosure for protection. The E4 is a much larger machine.
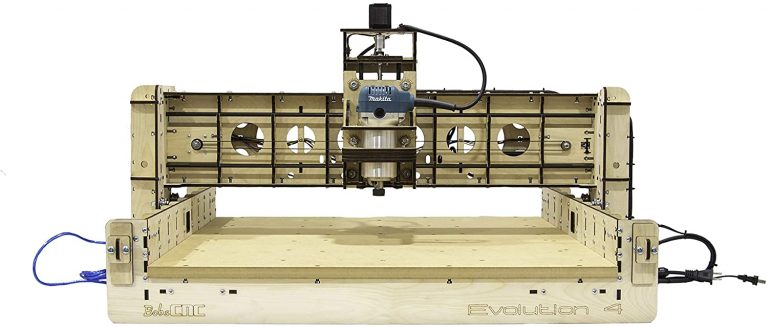
A key difference of the E4 when compared to other starter CNCs is that the setup is more involved.
While other machines often arrive mostly assembled, this is not the case with machines from BobsCNC. You will need to assemble everything yourself. It will likely take a day or two but you will develop a good understanding of the machine itself doing it.
Luckily, the included instructions are detailed and thorough. If there are any questions, there are plenty of good resources on YouTube and in Facebook groups.
Speaking of questions, if you have any issues BobsCNC has top notch support. Like ridiculously good support. By all accounts they are extremely fast to respond. It is not unheard of for Bob himself to respond and help to troubleshoot any issues by phone or email outside of normal working hours.
A couple things to know about the E4:
It’s louder than most entry level machines. The router/spindle is a real power tool, so it makes quite a bit of noise.
It’s messy. The E4 is capable of cutting a lot more than other entry level machines. This means it generates substantially more dust as a result. Think about getting a dust shoe and dust collection system to keep things tidy.
Overall, the Evolution 4 from BobsCNC is an extremely well designed and built product. It does exactly what it is meant to do, which is CNC routing of wood and other soft materials. Some light metal work might be possible but realize this is still a starter tool.
In the end, I think a picture is worth a thousand words so check out the gallery on BobsCNC to get an idea of the types of projects you can make.
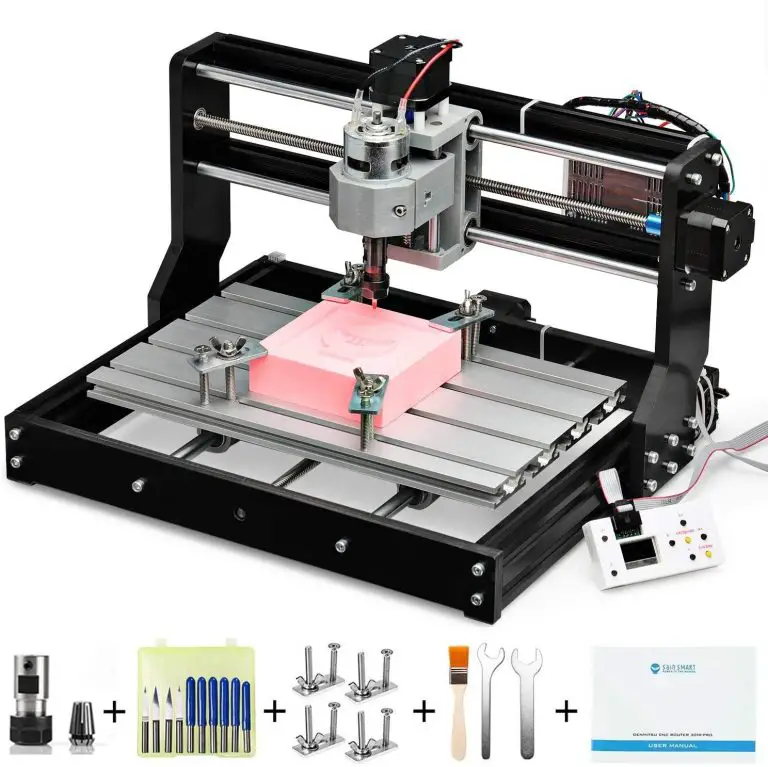
Easy assembly
Great for beginners
Easily switch to laser engraving
Limited work area
Materials it will cut: Wood, plastic, soft aluminum, acrylic, PCB, leather, others possible with experimentation
Work area: 30 cm x 18 cm x 4.5 cm = 300 mm x 180 mm x 45 mm = 11.8” x 7.0” x 1.7”
Warranty: 1 Year
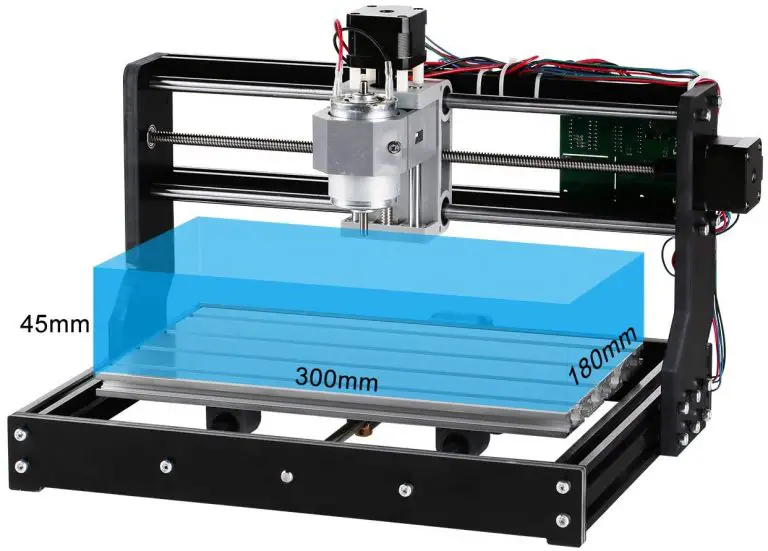
The 3018 Pro is a great starter CNC machine. Primarily meant to be used for engraving, it is extremely well built for such a budget friendly machine.
The 3018 Pro will easily cut softer materials such as plastic and wood. Metals are a little more of a challenge.
Aluminum can be cut but it will require playing with the speeds and feeds to find something that works for your machine and cutting tools. Other soft metals may be possible but expect to experiment quite a bit.
This is a nicely built machine. The frame is rigid and assembly is easy.
The 3018 Pro can easily be switched to a laser engraver by purchasing a laser unit and swapping it in place of the router/spindle. The swap only takes 2-3 minutes on the machine.
The Genmitsu 3018 Pro is an excellent choice for anyone who is just starting out with CNC.
The one big downfall of the 3018 Pro is the work area. You simply won’t be able to work on large projects.
The manufacturer’s support and communities such as the dedicated Facebook group are a huge help to those trying to learn CNC. Because these 3018 CNCs are so common, chances are that any question you have has already been answered.
The Genmitsu 3018 Pro is a quality, versatile machine for beginner level CNC machining, routing and laser engraving.
Pre-assembled
Comes with most common upgrades
Not a full enclosure
Materials it will cut: Wood, plastic, soft aluminum, acrylic, PCB, leather, others possible with experimentation
Work area: 30 cm x 18 cm x 4.5 cm = 300 mm x 180 mm x 45 mm = 11.8” x 7.0” x 1.7”
Warranty: 1 Year
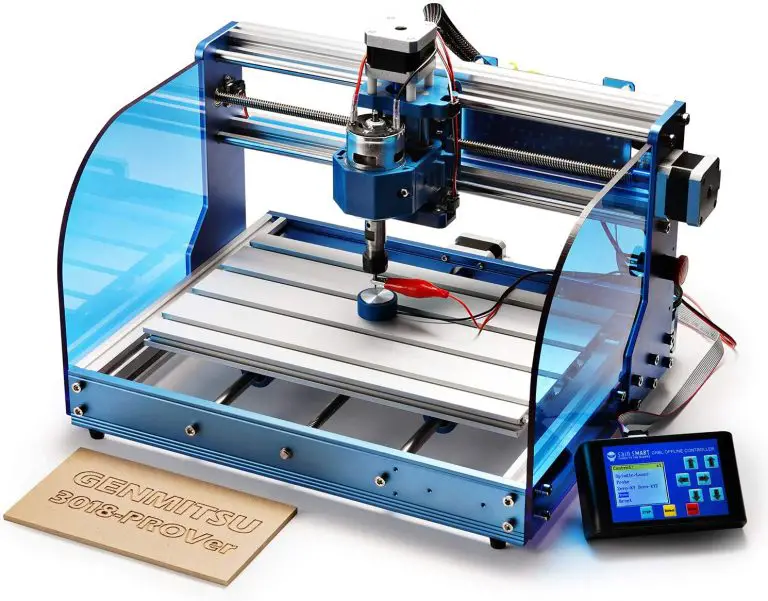
Essentially the Genmitsu 3018-PROVer is the same as the Genmitsu 3018 with the exception that it comes with almost all of the upgrades that people normally add on to their machine.
Let’s get to the upgrades.
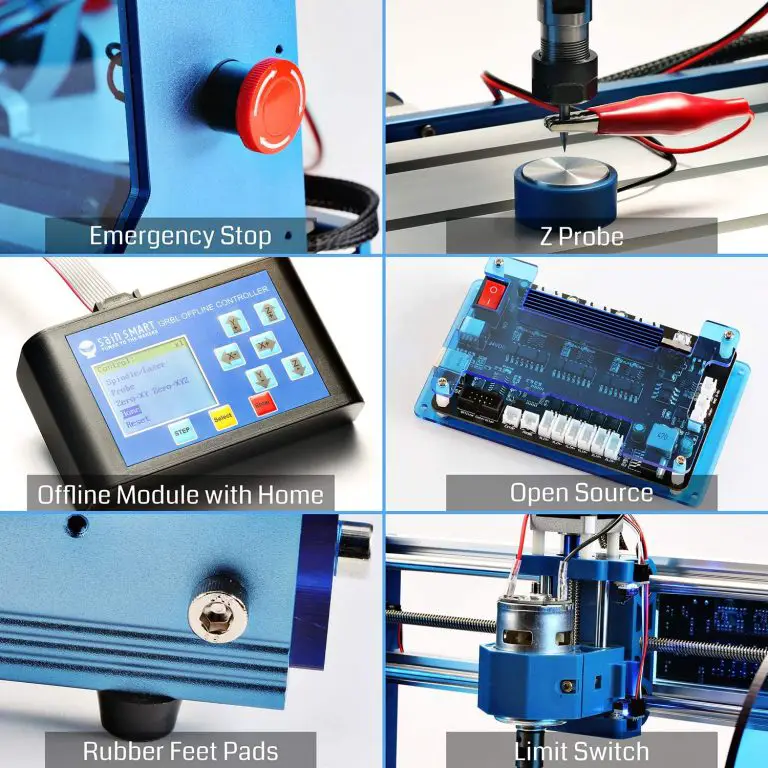
One area which is nicely improved is the body of the 3018-PROVer. It is now all aluminum. This improves the rigidity of the machine which increases cutting performance.
The drivers have been upgraded too. They are more powerful while also being much quieter. This is a nice change for anyone who might be operating the machine in close proximity to their neighbors.
Limit switches have been added which help to keep your machine from crashing. While these are a great addition, it should be noted that they actually decrease the work area by a small amount. Not a huge concern but plan on losing a little travel.
The biggest change is the addition of an offline controller display and emergency stop button. The emergency stop or e-stop button is a welcome addition.
The machine will crash. It’s inevitable. Being able to hit a big red stop button is fairly important. Emergency stop buttons are standard on anything bigger than an absolute beginner model and for good reason.
The offline controller allows you to run the machine without having a computer attached. For a good rundown of the offline controller check out this guide from the manufacturer.
The added side enclosures on the machine are just OK. They won’t contain all the noise or dust but they help a little. Not a big change over the other Genmitsu 3018 models. They feel kinda pointless because when it comes to dust, you need to go all out and get a full enclosure or just deal with the mess.
The last upgrade is the addition of a z-axis tool setting touch probe. This allows you to set the location of your part without messing with sheets of paper or something similar.
Place the probe on the workpiece and connect the clip to your cutting tool. Lower the tool until it touches the probe. The machine will automatically set the height of your workpiece and you are ready to cut.
The Genmitsu 3018-PROVer is an excellent all-around CNC for the beginner. It combines the already stellar 3018-PRO CNC machine with the most common and beneficial upgrades to make setup and use easy.
Easy to use laser engraving software
Laser focus lens
Materials it will cut: Wood, plastic, soft aluminum, acrylic, PCB, leather, others possible with experimentation
Work area: 30 cm x 18 cm x 4.5 cm = 300 mm x 180 mm x 45 mm = 11.8” x 7.0” x 1.7”
Warranty: 90 Days
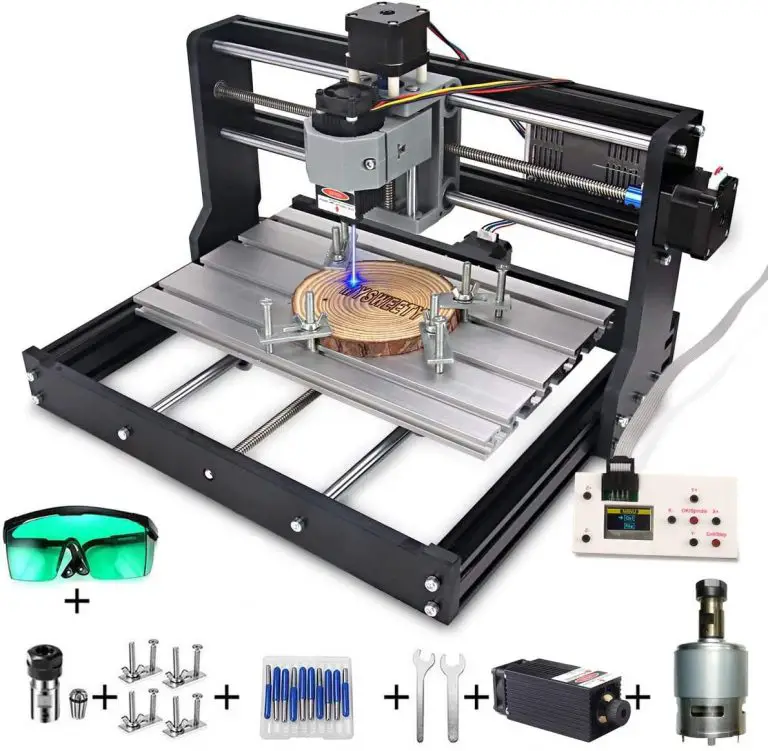
The MYSWEETY CNC 3018-PRO is a great starter CNC machine especially for those looking to get into laser engraving. Overall the build is very similar to other 3018 model CNC machines. What sets it apart is the included laser.
The MYSWEETY comes in 3 different versions:
It’s an odd naming structure but I guess with a name like MYSWEETY maybe that should be expected.
The machine comes in need of full assembly. The included instructions leave something to be desired, so seek out some YouTube videos to help you along. Assembly should take about an hour, possibly a little longer to watch instructional videos.
The build is sturdy and most of the components are aluminum. Let’s talk about the included laser.
The lasers available are passable. Don’t expect to do much cutting with them. They are primarily for engraving. Remember these are beginner machines and whether you are CNC routing or laser engraving, they often end up lacking somewhat in the power department.
That being said, the included blue laser is capable of cutting smaller pieces of wood such as 1/8” balsa wood. It might just take some experimenting to get right.
A frequent complaint about the laser module is that the focus lens fits rather loosely. This makes it too easy to turn accidently. A little bit of Teflon tape on the threads will go a long way towards remedying the problem. This will keep your laser focused where it needs to be on the workpiece. A correctly focused laser will increase its performance.
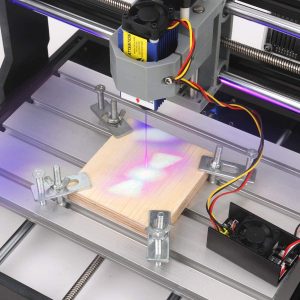
Also included in the package is a set of laser safety glasses. Read the instructions and make sure to use these when operating the laser. Lasers can be quite dangerous. Safety first! You don’t want to put an eye out with this thing.
An offline controller comes as part of the package. This is a welcome addition for those who don’t want to dedicate a computer to the use of their CNC machine.
The software that comes with the MYSWEETY CNC-3018 PRO is a mixed bag. Laser engraving works very well and in most cases the machine can be setup and engraving in no time.
It is enough to get you started but if you want to get serious with laser engraving then you will want to pick up a copy of Lightburn sooner rather than later. It is reasonably priced and works extremely well.
Unfortunately, the software for the milling aspect isn’t quite as user friendly as the included laser software. Expect to take a little time to learn some of the intricacies of the program before you get you used to it. Or jump straight to one of the other software packages out there. Easel by Inventables can be a good starter software to make your first projects more simple to get going.
All in all, the MYSWEETY CNC-3018 PRO is a good beginner laser/mill combo for someone who is looking to get their feet wet in CNC routing and laser engraving. The build is in line with other entry level machines such as the Gemnitsu. It comes with a nice set of extras and makes an excellent learning tool. Small scale laser engraving is this machines specialty.
BobsCNC Evolution 4 Router Kit is the clear winner with a much larger work area and improved cutting performance when compared to other beginner CNC machines.
The other CNC routers listed, such as the Genmitsus and MYSWEETY, can do most of the same tasks just on a much smaller scale. However, they do it at a budget friendly price.
The MYSWEETY machine makes a nice compromise between CNC routing and laser engraving if you aren’t sure which way you want to go yet and would like to try both out before stepping up to a more capable machine once you know which you like more.
Keep this in mind and check out the list of things to consider that follows to help you get started and if you have any questions, please leave them in the comments below.
While some of these entry level machines can be “cute”, don’t let them fool you. These are powerful tools that are capable of causing serious damage. Treat them like the dangerous power tools that they are.
Read your instructions.
Wear property safety equipment including eye and ear protection.
Be careful and if you aren’t sure about something, don’t be afraid to reach out to the manufacturers or other learning resources to make sure you are being safe.
The size of the work area is very important part of a CNC machine. Many hobbyist machines do not have a large envelope that they are capable of cutting, routing or engraving in.
The Z axis (up and down) is always the axis with the least amount of travel. This will determine how thick of a work piece you are able to cut. Keep in mind that this will be further reduced by your tooling. If you have a long end mill or router bit that you are using, then it will shorten the thickness of the part which you are able to cut.
Please note that the physical dimensions of the CNC are not the same as the work area.
For example, the Genmitsu CNC 3018-PRO has a physical size of 15.7” x 13.0” x 9.4”. The work area is only 11.8” x 7.1” x 1.8”. Clearly there is a significant difference between the two. So make sure that you know the two specs are different and how they relate to what you can cut and where you can physically place your machine.
Speeds and feeds can be a fairly complicated subject but here are some resources to get you started:
As you work with more difficult materials such as metals, you will find that the window of speeds and feeds that will work will shrinks up drastically.
If you are sticking with soft stuff like wood or plastic, then your window for success will be more open and forgiving. For this reason, wood is a great material to practice with when you are first getting acquainted with your CNC.
When it comes to beginner level CNC machines, the terms router and spindle are used almost interchangeably. Some machines, such as the ones from BobsCNC, use an actual router like you would buy at a hardware store. Others use spindles.
Practically, they are both simply motors that have a collet or chuck to hold a cutting tool such as a router bit or end mill. For the beginner level machines, an actual router such as one from Dewalt or Makita will be more powerful than the spindle included in similar machines.
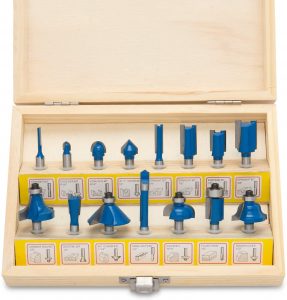
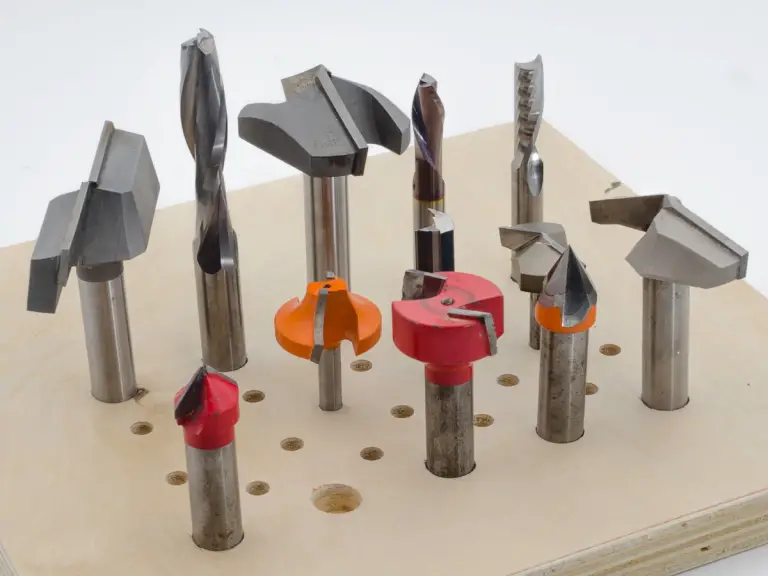
Tooling is your cutters. This includes router bits and end mills of all shapes and sizes. The right cutter will make all the difference when machining. Cutters can be purchased for many different types of materials.
Many CNC machines will come with some type of cutter right out of the box. They aren’t usually great. They will get you started however and as you gain experience you can look into adding additional tooling for your application.
The most important bits for getting started with you CNC are end mills (both flat bottom and ball nose), v bits and a surfacing bit. These are the first ones you will want to get and the first ones you will want to upgrade down the road. For a full guide check out our Ultimate Beginner’s Guide to CNC Router Bits.
Pay attention to the level of customer service that the manufacturer provides. While the machines are not overly complex, they can pose some challenges for someone just starting.
Look for companies that are quick to reply and don’t be afraid to check their website for tutorials or additional information. While some of the foreign made machines might not have the best phone support, they often have support groups and communities that do an excellent job of helping you with any issues.
There is a large variety of software that gets used on these machines. Covering them all would be a giant topic by itself. To get you started here is a quick rundown:
A good starting point is to look into Fusion 360. It has an enormous number of tutorials on YouTube. You are likely to find help for any issue you run into and there are many guided courses on use of the software.
For more information check out these related articles:
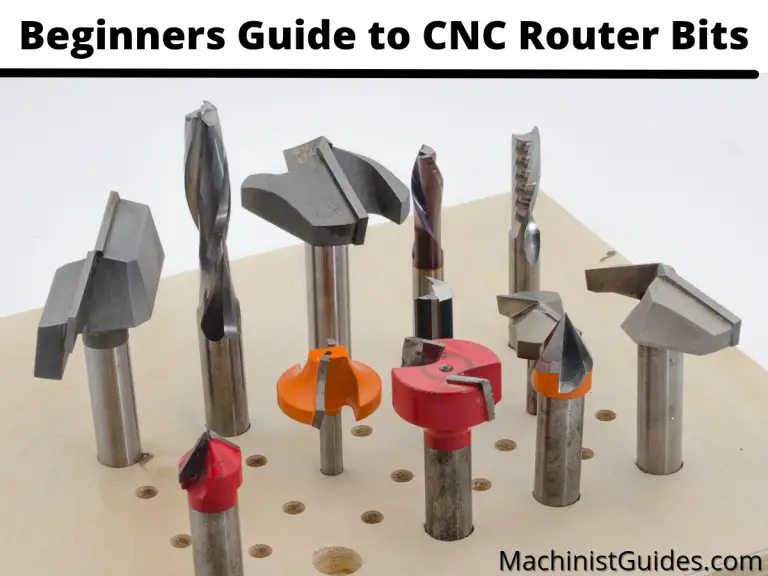
Besides your CNC machine itself, the next most important part of machining is the router bit.
Different bits make different cuts and have different jobs, and if you’re new to machining, navigating bits can be confusing. From the bare-bones essential bits for machining to the more specialized bits that you’ll use rarely, there’s a lot of information around bits that can confuse even the most seasoned machinists.
To clear things up, we’ve made what we hope is a handy guide to walk you through everything you need to know about bits while you’re getting started as a machinist.
While we don’t claim this article is comprehensive, we do think that when you’re done reading, you’ll be a lot more knowledgeable about bits than when you started.
These are the bits to get started with. They will get the most use. As a result, they should be the first ones that you upgrade to better bits.
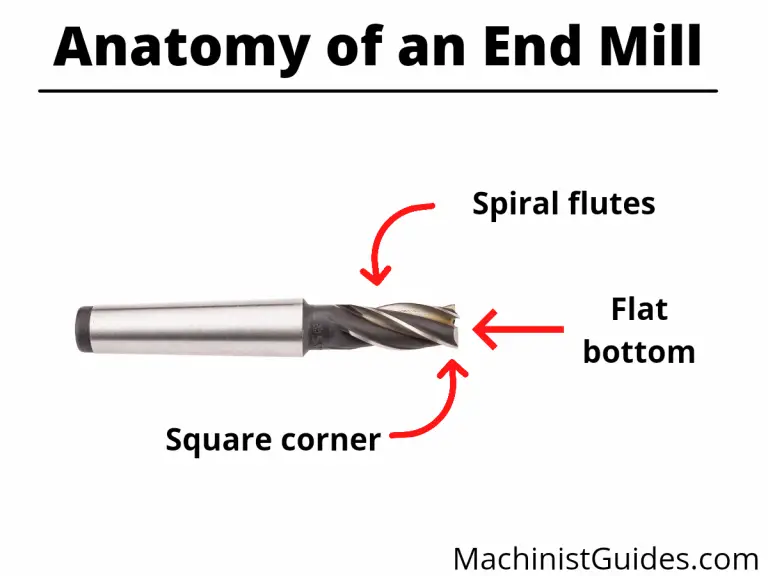
End mills are side-cutting tools, meaning they’re meant to cut flat bottoms.
They can cut a square slot or profile with a square corner, and you can also use them for contouring and reaming.
You’ll be able to distinguish an end mill by the flat bottom on the end of the bit.
V-bits are – you guessed it – shaped like a “V.” Producing a V-shaped cut, these bits are great for engraving, lettering, detailed designs, and signs.
You’ll typically use V-bits to add your special style or artistic design to projects.
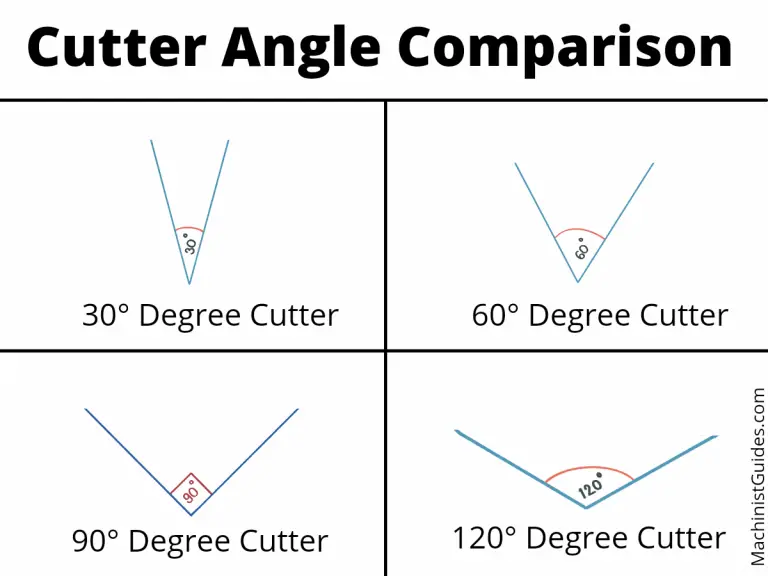
V-bits come in all different sizes and angles. The smaller the angle, the more narrow the cut.
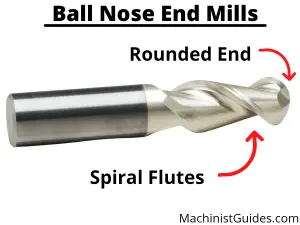
A ball nose bit is basically the same thing as an end mill, except the end is a ball. This will give you a rounded contour around the edges of your cut.
You may also occasionally use a ball nose bit in lettering, but they are not as common as v-bits.
V-bits will allow you to create sharp-cornered letters, while ball nose bits will give you softer, rounded letters.
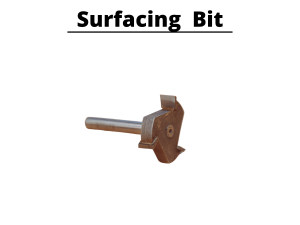
Surfacing bits are basically just big end mills.
You’ll use a surfacing bit to remove large amounts of material at once, like if you’re smoothing out your spoil board.
You can also use a surfacing bit to condition a bad piece of wood or otherwise smooth out the surface of the wood if it isn’t perfectly straight. This is very similar to planing a piece of wood.
These specialty bits may not be necessary for CNC machining, but they’re nice to have handy.
Definitely don’t purchase any of these bits until you have the four essential ones above. But, once you have some experience under your belt, you can try a couple of these out to get more creative with your projects.
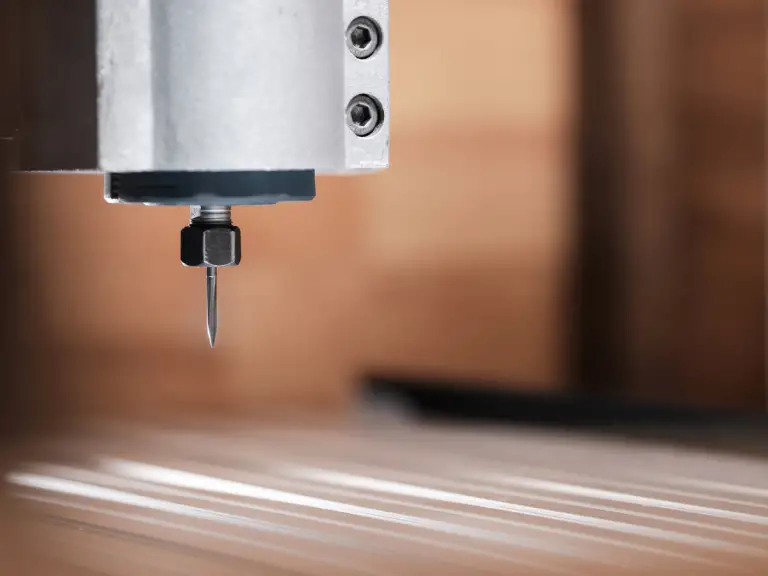
Carving bits are for any of you that want to make 2.5D or 3D projects. They allow you to make a lot of fine detail.
Some of the most amazing projects will use these bits. It will definitely be best to get some practice with not only your machine but also the software you are using as well before jumping into working with these bits.
You don’t want to be busting bits while you are still learning. Because of this, it is a good idea to start out with some cheaper practice bits while learning how to carve with your CNC.
T Slot cutters are pretty simple: they’re made for cutting out slots on the back of a sign so you can hang it on a wall.
Signs of all sorts are common projects for anyone operating a CNC router. If you find yourself making plenty of signs, wall art or similar wall hangings then this bit will be an essential add to your tool box.
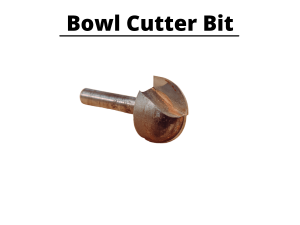
Imagine if a ball nose bit and a surfacing bit had a baby – that’s what bowl cutters are for. They will cut the same rounded shape as a ball nose. However, the bottom is wider and flatter than a ball nose because this bit is meant to remove a lot of material, like a surfacing bit.
These cutters are excellent for removing larger amounts of material or “hogging” out the material.
Engraving bits are most often used to etch designs into glass, wood, acrylic, or metal.
The interesting thing about an engraving bit is that it’s a “drag” bit. This means the spindle isn’t actually turned on while the bit is in use. Instead, the bit just drags across the surface to engrave.
The spiral-shaped cutting edges on the sides of an end mill are called flutes. Generally, there are 2 flutes on CNC router bits, though there can be more. The more flutes there are, the better the finish you’ll get.
One misconception is that the more flutes you have, the faster you can feed material. Yes, extra flutes mean that you remove more material per spin, but it’s common for people to increase the speed too much and overload the tool.
In reality, you should slow things down when you have more flutes to avoid any overloading. So, while you’ll cut more material per spin with 5 flutes, the lower spin rate may mean that using fewer flutes is more efficient since you can cut faster with 2 flutes than you can with 5.
If you’re relatively new to machining, 2 flutes should be enough.
Some of the stuff in this section is going to get pretty technical. While we’ll try our best to explain how the different flutes cut material, we also recommend watching a tutorial video for any bit where you have confusion.
Sometimes, it’s just easier to see a bit in action than it is to explain how the bit works.
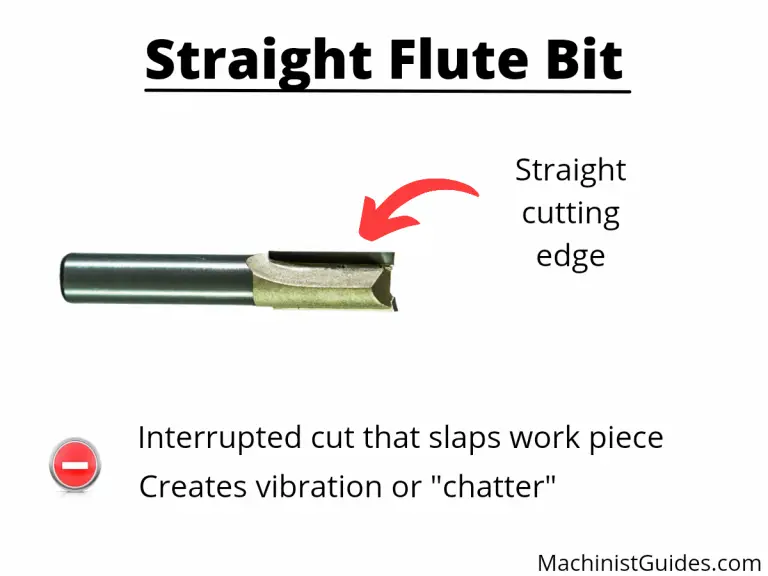
Straight flutes give you an interrupted cut that sheers away material for the entire length of the bit. Straight bits really slap the wood and cause a great deal of vibration and chatter. These bits require a lot of force and should generally be avoided unless you need them for a specific purpose.
Bowl cutters and surfacing bits are examples of straight flutes.
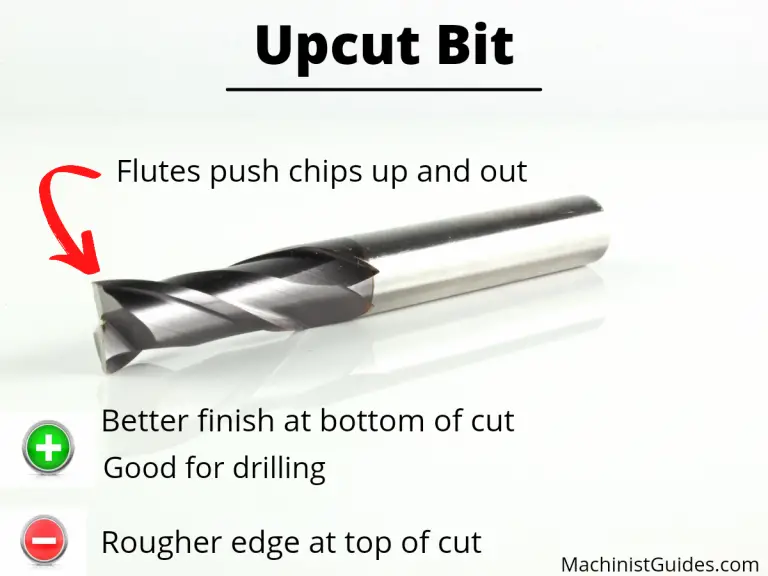
Upcut bits pull the chips up to remove them – the chips are “riding” up the flute. They pull the chips up towards the router or spindle.
Because the upcut is removing material out the top of the surface, the rough edge of the material you’re cutting is on top. Upcut bits have flat bottoms, which means they cut a smoother surface on the bottom.
These bits are great for drilling and plunging. They are not great for working with plywood because they will create a poor edge on the top of the wood.
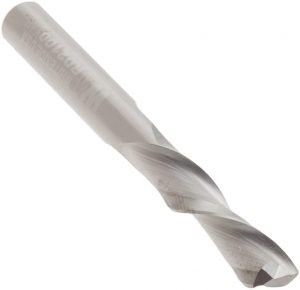
Downcut bits are the reverse of the upcut bit. The material you’re removing is “pushed” downward away from the router or spindle. The rough edge, then, will be at the bottom of your material. The top edge of your material will be very clean when using a downcut bit.
Downcut bits are good for finish passes. However, you shouldn’t use downcuts for deep slots, drills or plunges. That’s because the downcut has no way of ejecting chips and debris, so it will stay stuck in the slot, or at least be very difficult to clean out.
While the downcut has a V-shaped bottom to leave room for the chips, the chips are not removed as well as a upcut bit and this can lead to heat buildup which can dull or ruin your bit.
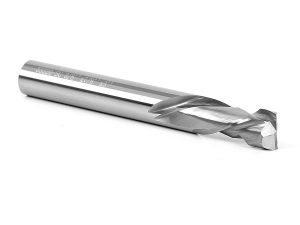
Compression bits are a combination of Upcut and Downcut bits. A compression bit will have an upcut for the bottom quarter or third of the bit, while the rest of the bit will be downcut. When run at full depth, the compression bit will leave clean edges on both sides of your workpiece.
They can’t run as fast as upcut bits, but they are a nice compromise between finish edge quality and speed. They are a solid choice for working with veneered wood or plywood.
When we’re talking about router bit materials, we’re really only talking about the cutting edge, as that is the most important aspect of a bit.
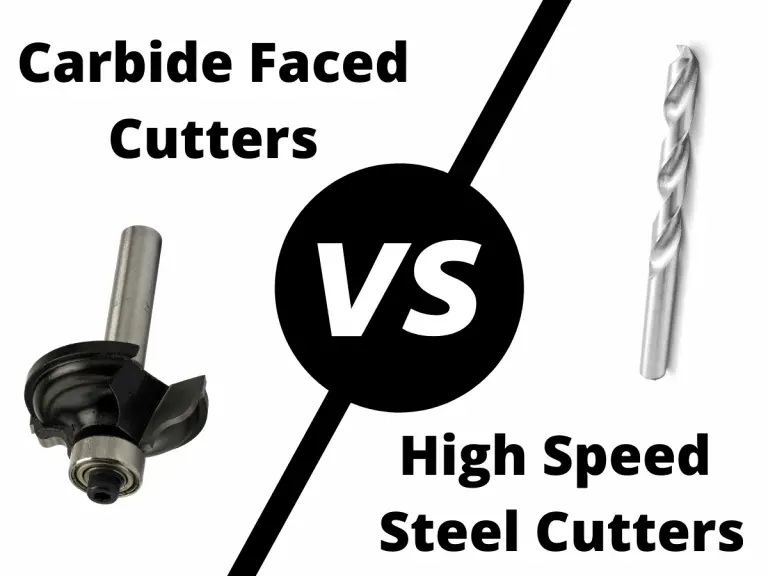
Carbide steel is a metal that is made with tungsten and a whole lot of carbon. The unique combination of materials, combined with how the metal is made gives this material a high tensile strength and high heat tolerance. Carbide steel also has high abrasion resistance.
In other words, carbide steel is good stuff. Naturally, it’s more expensive, but it’ll last 20-50x longer than a normal steel bit.
Compared to carbide steel, High Speed Steel bits are lower on the scale of tensile strength, heat tolerance, abrasion resistance, and price.
High speed steel is a little springy and generally has a worse finish than carbide steel. It also breaks down faster. Of course, then, high speed steel bits are cheaper.
There is nothing wrong with high speed steel bits but keep in mind that they will likely need to be changed or sharpened more often.
Coatings are chemical or metal finishes that have been bonded to the bit. Not all bits come with coatings, though it’s not at all uncommon to see coated bits.
One thing we should note is that coatings do not add strength to your bit. This is a common misconception. Coatings are intended to be heat barriers and are only a few atoms thick. To be honest, coatings are not always necessary, especially for hobbyists.
Because coatings often add expense to the bits and they aren’t needed for most users, we do not recommend them. However, if you think they are right for your application then by all means experiment and see what happens. For beginners though, we say skip them.
Black oxide bits are common and will protect against corrosion and friction. They are very similar to normal high speed steel (HSS) bits and work well for most materials.
Cobalt bits are made for greater heat resistance which works well when dealing with harder materials such as steel. These are overkill for working with soft materials such as wood and aluminum.
Tungsten carbide bits, which are generally just referred to as carbide bits, are extremely hard and heat resistant. Their hardness also makes them brittle, so you will want to use extra care when working with these bits, so they don’t chip. They can also be quite expensive.
Titanium bits are actually just high-speed steel bits that are coated with titanium nitride. This coating helps them to wear slower. This works well for heavy-duty, high-volume work. Once big downfall of titanium bits is that because they are coated and not solid titanium, they can’t be sharpened once they go dull.
All in all, we don’t really think it’s worth the additional cost for coatings. The benefits are rather minimal, especially if you’re just doing CNC as a hobby.
To be honest, if you’re new to CNC, we recommend getting cheaper bits. Yes, they’ll dull faster, make lower-quality cuts, and don’t last long, but they make for good practice.
While you’re still getting a feel for machining, it’s not a bad idea to start off with cheaper bits. When you run them into your steel clamp and bust them into a million pieces, you won’t be nearly as disappointed.
Unless you forgot to wear your safety glasses. Always wear your safety glasses!
As you get better at machining, there will come a time where you should treat yourself to more expensive bits. They cut so much cleaner, and their high price is offset by the fact that they last a long time.
When you move on to the pricier bits, build up your arsenal by first starting with the essential bits we talked about earlier.
The first premium bits to get are:
Flat Bottom End Mills:
The ¼” inch bit gets used the most, followed by the 1/8” and then the 1/16”
V Groove Cutters:
You’ll find other V groove bits besides these 3, but they aren’t necessary. Perhaps you’ll eventually want a 120 degree bit for larger lettering, but that’ll come down the road.
Remember the larger your V-bit angle is, the wider your lettering will be.
Ball Nose Bits
These bits are used for contouring and finer details such as when you are carving with your CNC.
Surfacing Bit
This bit is for flattening or “surfacing” your material. They work similar to a planer but they make the part flat in multiple passes.
They are also used for surfacing your spoilboard.
These next few bits are nice to have but are nonessential. Hold off on purchasing these bits until you have a full set of the bits above.
Carving Bit
You have to be pretty advanced to get into carving. Carving projects have long run times, and you’ll likely need to learn a specialty program. Definitely hold off on carving until you’re ready.
Drag Bit
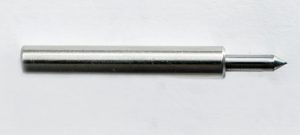
Unless you’re engraving metal or glass, you can hold off on buying a drag bit. They can be used to make some cool CNC projects but they only have a single use.
T Slot Cutter
These are handy if you’re making signs that you want to hang but are not a necessity.
Bowl Cutter
You won’t need this bit unless you’re contouring and removing a lot of material at once.
Surely you picked up on the concept, but we want to hammer home the importance of having practice bits, and sound, solid, expensive bits.
If you’re new or if you’re experimenting around, you should stick to cheap steel bits. This gives you margin for error and won’t leave you with much out of pocket when they break.
Once you’ve upgraded your skills and have a good handle on your machine, go ahead and upgrade your bits. But even if you’re confident in yourself, it never hurts to have some spare practice bits laying around.
If you skipped down to the bottom of this article and wound up here, go back up to the top and take a look at the first section. There, we went over the most essential bits in machining and explained what each essential bit is for. The most important bits to own are:
Honestly, we don’t think coated bits are necessary. The coating layer is usually super thin, so you don’t get much out of the coating in the first place. And, coatings can make the bit’s cut less smooth.
To top things off, you can pay a heck of a lot of money for a coated bit, yet you likely won’t notice a difference in the cut.
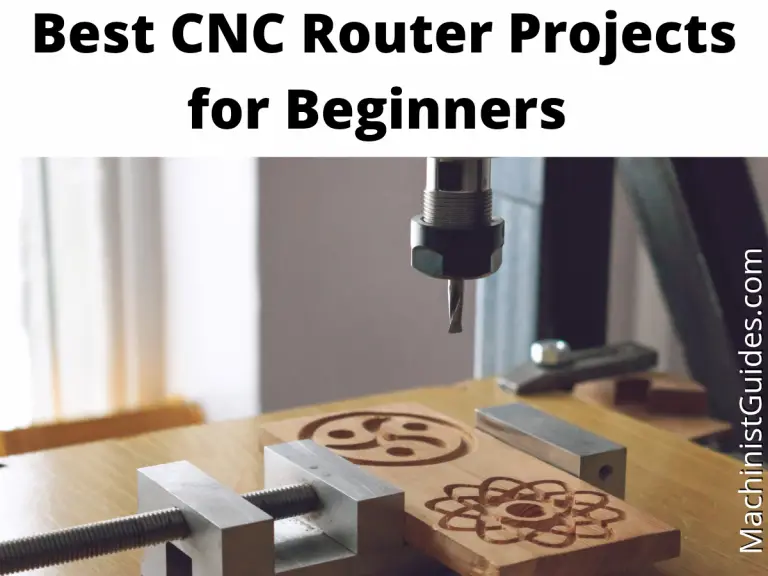
If you’re relatively new to CNC, coming up with project ideas may be difficult.
You’ve probably spent a decent chunk of change on a new 3018 CNC or maybe something bigger and more fun, not to mention all the tooling and other materials. Now it’s finally time to make something.
While searching for good starter projects, you will find some plans that are out of your league, too big for an at-home machine. On the flip side, some are just too boring.
We know the struggle of finding worthwhile projects for relative CNC beginners. Because we’ve been in your shoes, we want to make life easier to encourage everyone with a CNC – regardless of skill level – to keep at it.
So, here we’ve gathered a list of CNC projects that make great starter projects for anyone new to machining. We’ve sorted them from what we think are the easiest projects to the hardest ones. There’s sure to be something you like on this list.

You don’t even have to make the spoon or utensil for this project. Head to the dollar store to pick up some cheap kitchen utensils and carve away.
These make for an excellent gift if you have any chefs in your life. Even if your mom doesn’t cook, you know she would love it and she is worth it!
Or, you can make several of them and hang them around your kitchen as a unique art piece.
This is a super cheap project option and it lets you practice your carving skills.
We really like this project because it’s both useful, and a good way to practice drilling holes.
Even as a beginning machinist, you probably have several router bits. It’s easy to get excited and buy a bunch when you first get your machine.
And while some come with a small plastic case, why not drill yourself an authentic bit organizer?
It’s practical, looks cool in your garage or tool shed, and, again, it’s good practice. Leftover wood scraps make for good material for this project and as you experiment with different woods to machine with your CNC, you can compare them by repeating a simple project such as this.

We also like key holder projects because they’re practical and good practice, just like the router bit organizer.
You can make the holder into the shape of a house, or you can customize the board by putting a last name right across it. The possibilities are endless here, actually.
Wooden jewelry can make for an awesome gift for a lady in your life, and you can even sell them if you get good at it.
One popular item we’ve seen are necklaces. You first carve something like a heart, and then at the top, you drill a hole where you string the chain or lace through. You can also try making rings.
Actually, this is not necessarily limited to women. You can make some cool wooden bracelets for men if you’d like.
Pro tip: use small leftover scrap bits of some of the more exotic woods to use in larger projects.

Keepsake boxes are super simple projects that you can knock out in no time. It’s as simple as hollowing out some wood, attaching a hinge mechanism, and creating a lid.
You can carve some custom designs on the outside of the box or carve a special message on the inside of the lid.
Really, once you have the box, the rest is up to your imagination. A plain box is boring but putting a small, special detail can turn it into a prized possession for someone.

Signs really allow you to get creative with your CNC machine.
Typical signs will be done on a wooden board and then hung from a wall or drilled in. Signs can be seasonal, include a sports team logo, a name, or just about anything you’d like to put on there.
Perhaps our favorite thing about signs is that you can buy blanks online.
If you’re comfortable enough to make the baseboard, then go for it. But if you’re new to CNC and you want to take a shot on an even, clean, solid wood board, then go online and find a blank.
Practicing one technique at a time can help you perfect it when you have less variables to worry about.
The possibilities for signs are seemingly endless. The only thing that will limit you is your imagination and possibly the size of your machine, depending on how big you want the sign.
The types of signs you can make include, but are not limited to:
Bookmarks are an excellent first project. You can get a thin piece of wood and then carve it up with unique messages, a name, or even individual book titles. Rather than carving, you can also choose to cut right through the wood and make 3D designs.
Similar to a bookmark, you can make business cards.
This will also require carving or cutting through a relatively thin piece of wood. We love this idea because whoever you give this business card to is 100% going to remember it. Most business cards wind up lost or in the trash, but a wooden one will stand out.
Use them to get your name out there if you want to start selling things you make with your CNC.
Sticking with the business theme here, you can make a cool desk nameplate with your machine. It’s always nice when you can bring a little character and personality to your desk or office. You spend enough time there, so you may as well trick it out and make it your own.

You’re probably not going to make these year-round, but they make for a really great gift. Plus, it’s super easy to find Christmas ornament blanks on the internet, so you don’t have to worry about cutting the right shape and thickness on your own if you don’t want to.
You can put someone’s name in it, carve a snowman, Santa, a reindeer, or really whatever you’d like.
As a bonus, if you are looking to make a project to sell with your CNC, these are gold around the holidays.
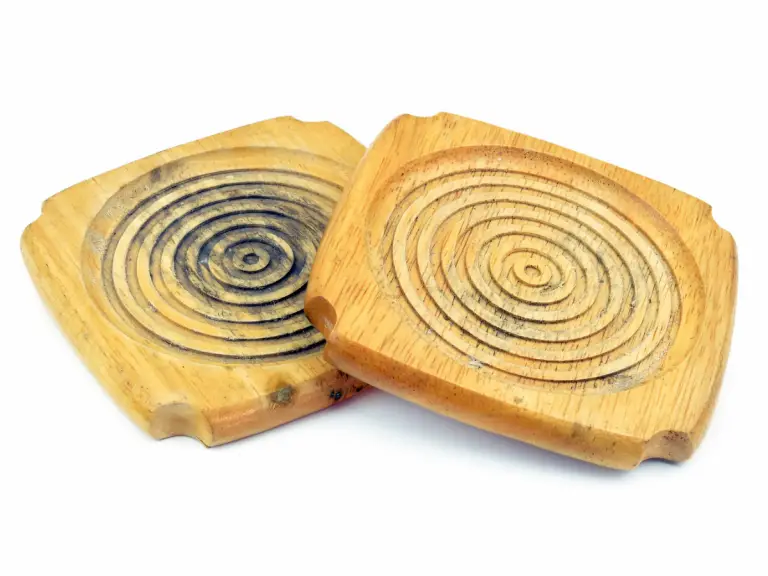
Drink coasters will be relatively similar to Christmas ornaments in both size and shape. And, similarly, you can find blanks of these as well.
We really like making coasters because they serve a purpose and work as an art piece. Have a little fun with it and make something a little strange and see how long until your significant other notices!
Please note that you may want to glue little rubber washers, or some felt on the bottom of your coasters so they don’t scratch up any surfaces if you think this will be a problem.
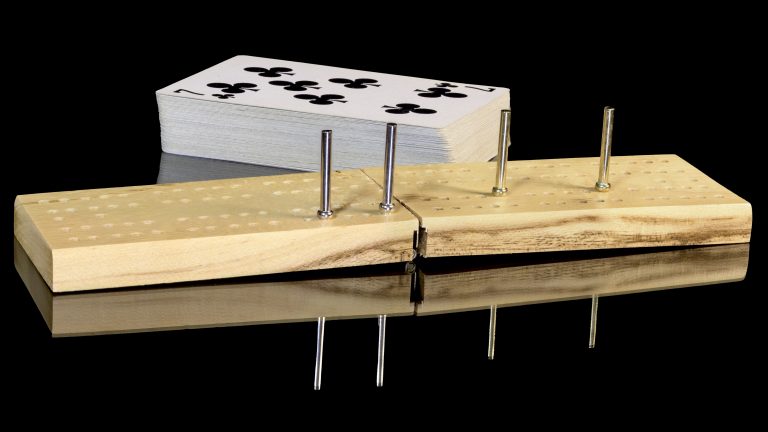
Anything game related is going to make for a great project. Most of these are going to be relatively easy, plus you’ll get some use out of them. Whether you make these for yourself or as a gift, they’ll be super useful and serve as a great conversation starter.
As far as game boards go, there a few super easy and popular options that include:
As for games themselves, you can try making:
Or, you can make individual game pieces for games such as:
If you aren’t sure which one is best, then start with a cribbage board. It makes for great hole drilling practice for anyone just starting out.

There are a couple of different routes you can go for clocks based on your skill level. If you’re super crafty and up for a challenge, try making your own wooden gears. This will take time and patience (and a lot of skill), but plenty of YouTube videos are out there to help you.
However, if you’re reading this, then chances are you’re new to CNC. An easier option would be to just make the clock face and buy a separate arm and battery mechanism.
If you do decide to buy a clock mechanism then a clock is as simple as cutting a round shape and drilling a hole for the clock to pop through. If you want it even easier, there are more blanks available to you can concentrate on the design.
This option still allows for a lot of creativity and work if you want it to. Acrylic can make for a cool clock too as either an all acrylic clock or an acrylic overlay.
While the list above isn’t comprehensive, it’s a really good starting list for easy projects. But, if none of those flips your switch you can try making:
Maybe you’ve looked at the items above and thought they were too easy, or you’ve already made several of them in the past. If you’re still fairly new to CNC but looking for a challenge, there are still plenty of projects that you can try out.
This may sound really fancy but it really isn’t.
The only reason it isn’t ranked with our super easy projects is that it requires an extra bit. They cost a few bucks, but a diamond drag bit can make some super unique projects.
What is great about this project is that pictures frames can be purchased at just about any dollar store to work with. And once you have your technique down, you can look for cool pictures at your local thrift store to make something a little more extravagant.
Take a look on Pinterest or YouTube, and you can find some pretty unique planters.
You can carve up the outside of the planter with a neat design. We recently saw a cool one with Egyptian-like hieroglyphics and some desert plants in planter.
Custom planters are great when paired with some succulents. They are always very popular.

In general, maps are always cool art pieces for your home’s walls, but a topographical map takes that to the next level.
Carving these with a CNC router is tricky, but the payoff is well worth it. Topo maps are sweet. You’ll likely need multiple cutters and a solid software design for a good topographical map. Many people will find that this is their ultimate goal when working with their CNC.
Per usual, check YouTube for tutorials.
Child growth charts are an excellent childhood memento that every kid will cherish when they get older. Unfortunately, so many people chart their kid’s growth on a wall in their house, meaning the chart goes away once you move.
What makes this a little more advanced is that not everyone will have a large enough machine to make one that will allow you to measure a kid through the years.
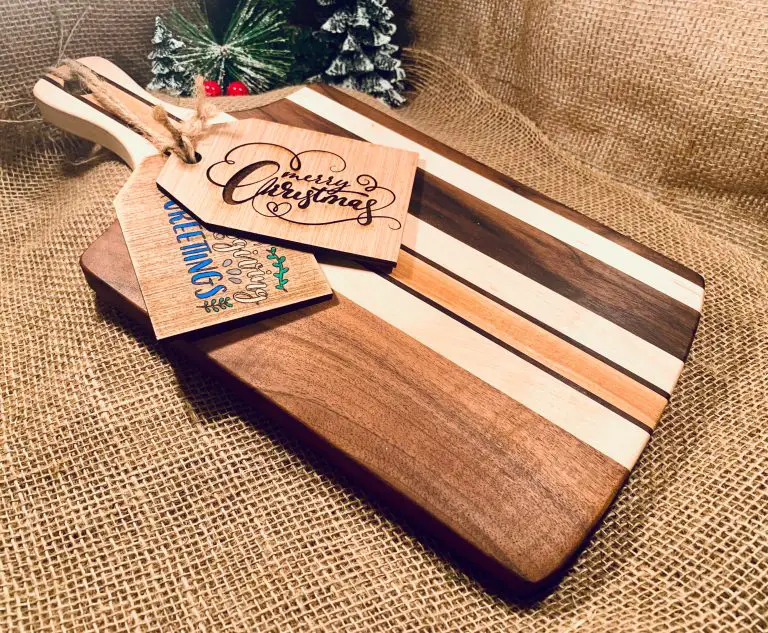
Making a cutting board from scratch is a standard woodworking project.
For anyone working with a CNC, you can buy a cutting board and engrave it to your liking. If you can come up with the right design, cutting boards can be big money makers and when it comes to gifts, personalization can bring a big smile to someone’s face.
It should go without saying that the more puzzle pieces you try to make, the harder the project will be. We’ve seen puzzles as simple as 3-4 pieces in the shape of an elephant, giraffe, or other animals that then gets given to a young child. You can certainly try to do bigger puzzles with more pieces if you’re up to the task.
For most it is best to stick with a smaller puzzle meant as a toy or decoration for a toddler or younger child.
Of course, this is all going to be up to you, and it can change on a project-by-project basis. However, you may have noticed that we tried to give you a really wide range of things to make.
In one category, you have things like a key holder, or router bit organizer. These projects are very useful and can be starter projects that you make for yourself.

Another category of things would be gifts. You could make a jewelry box for your wife, girlfriend, or mother. You can make Christmas ornaments for people close to you. Drink coasters can make for an awesome house-warming gift, and your friends will never forget who made them.

Or, you can turn your hobby into a side hustle. Anything on this list can be sold if you find the right audience. Places such as Craigslist and Facebook’s marketplace are free to list on and have numerous potential buyers in your local area.
Then there are the online marketplaces such as Amazon, eBay, and Etsy. These sites usually charge some kind of listing fee, and the shipping logistics are different from site to site. If you really want to make a small business out of your work, spend some time on Google, YouTube, and online forums, figuring out how to make these sites work for you. There are tips and tricks you can utilize to get your items listed at the top of searches, which then make it more likely your items will sell.
Then you have local craft fairs, flea markets, and art stores. At the markets and fairs, you may have to pay a small fee to become a vendor, but these fees are usually small. This will expose your work locally, and the people who come to these markets are usually in the market to buy if the price is right. They make a great stepping stone for figuring out what sells well in your local market.
And don’t be afraid to approach a local store owner and ask if you can sell your items there. People love to support local entrepreneurs and artists, and you can work out a fee-sharing structure with the shop owner.
From personal items, to gifts, to sales, CNC projects are becoming more and more popular since CNC machines have become more easily available to everyday hobbyists. We can tell you from experience, it just makes you feel good to give a gift that you made by hand or to turn your creations into cash.
Start small. It’s a simple cliché that is 100% correct.
If you go too big too early, things might not work out, and you can wind up burning yourself out and literally burning through cutters and material.
Start with simpler projects and feel the reward of crafting your very own items. Doing several smaller projects not only improves your skills, but it helps you build the confidence to tackle more complicated jobs.
We also recommend using blanks or pre-made products to engrave. For signs, ornaments, or coasters, blanks can be easily and cheaply purchased.
This saves the stress of building your base before carving and creating designs. There’s no shame in using blanks – it can save time, money, and stress. Hey, we all learned how to bike by first using training wheels.
Lastly, we recommend keeping your designs simple. Go for the 2D design first and see if it works out. Try several, simpler projects and if things are going well, then try for the 3D model you really want. Again, starting small builds the necessary skills and confidence you’ll need for bigger and better projects.

As CNC machines, including routers and laser engravers, become more affordable and practical to work with from home, the marketplace for CNC products is growing too.
Whether it’s Facebook, Etsy, eBay, or even a local flea/crafters market, people love CNC-made products for their personalization and unique designs.
So, if you fancy yourself a good enough machinist to turn some wood (or other machinable materials) into home décor, knick-knacks, kitchenware, or more, we’ve assembled some ideas for you to turn your craft into cash. Heck, even if you’re not looking to sell anything, this list may give you some good ideas for gifts or items to make for yourself.
Who knows, if your products get hot enough or if you find the right niche, you may be able to pay for that next vacation or offset your monthly car payments. Or maybe you will make someone you care about very happy with a personalized, hand-crafted gift.
To make things easier, we have laid out some of the best projects to make that will bring in the bank and even included tips to make them easier to produce and or quicker to sell below.
Everyone knows you can make signs with your CNC.
And for a good reason, people like them and more importantly, people like to buy them.
Unleash your creativity with custom-made CNC wall signs. These signs will generally be done on wood and can hang from a wall or door or be drilled into something stable.
You can make them seasonal, use sports teams or logos, or carve just about anything you can think of. Just please don’t use your machine for one of those “Live. Laugh. Love.” signs.
In terms of difficulty, signs are relatively easy to make. Wood blanks of all types can be used when you are just starting out, though we do recommend cutting the body of the sign yourself once you have had a little practice.
The biggest limiting factor will likely be the size of your machine. Nothing wrong with making a small sign though. They are cute.
Signs are perhaps the easiest way to monetize your CNC router, especially for someone just getting started.
Some specific types of signs to think about making are:
A lot of signs for home décor are going to be placed around the kitchen or living room areas. People that want home décor signs want their guests to see them.
Funny or creative slogans work well and if you find yourself in need of inspiration, take a stroll through Hobby Lobby to get the ideas flowing.
Don’t be afraid to get weird with it either. Something as silly as a meme can make a good saying for your sign. Just make sure it is relatable so you have a larger list of potential customers.
Everyone likes a nice welcome sign on their door. Use creative lettering or a bold paint job. Personalized signs that have a specific address are popular. Just remember that personalization is popular but it will take longer to design and make.
Another option is to find local businesses that want an “open” and/or “welcome” sign for their front entrance.

Similar to the welcome sign above, find a local business that wants a custom-made sign.
This won’t work at Walmart, but plenty of mom and pop shops would love a custom plaque with their business name on it. Businesses often have bigger budgets than your average Facebook marketplace shopper, so don’t be afraid to mark up your work a little bit.
These signs can include people’s names, or just the words “Man Cave,” or “Welcome to ___’s Man Cave” etc. Carve it on a quality wood and give it a nice finish.
Bonus points for darker finishes such as Dark Walnut.

These two are similar enough in nature to signs. If you or someone you know has a big lawn and it’s hard to see their house number from the street, this could be the perfect gift.
Everyone has a special place.
Maybe it’s where a couple first met or where they got married or where they call home. Maybe it’s a three pack of signs to cover each of the above.
Get creative with it and make sure to give your customer some good ideas about what they might want to use for coordinates.
If your customer doesn’t give know what coordinates they need, take the address and plug it in this site to find the coordinates for your sign.

When people are passionate about something they often like to show it off.
You probably know that people love their pets (dog moms, we are looking at you). But did you know that many people love their plants just as much?
You can create signs to label individual plants or create ones that are basically home decor for the outdoors.
“The garden is my happy place” would be a good place to start when thinking about what to make and sell to anyone who loves their garden.
Garden signs tend to be fun and whimsical so keep that in mind when dreaming up your creations.
This one is a personal favorite because they are so simple and their “rustic” nature means people tend to not notice small imperfections. A great project for anyone just getting started with their CNC.

If you live on a good-sized property – or know someone who does – you can make trail markers to help make navigation easier.
This works very well in well off areas where people buy vacation homes, especially if they have a lot of land.
Every state has these towns, so hop into the local Facebook group for that area and start offering this custom service.
As a bonus, this project is meant to have a weathered feel to it, so you likely won’t be spending big dollars on materials. Check out our guide to the best woods for CNC routing to figure out which ones work best for the great outdoors.
This type of sign can also be great to try and market to local campsites and other outdoor businesses.
Toys and games make excellent gifts, and you may even be able to sell a few of these. Their difficulty will vary, from the easier projects such as a chess or checkers board, to something more difficult such as a guitar.
Game boards are some of the most popular items for CNC makers. There are countless tutorials for these on the web, and you’ll likely be able to download ready-made software for game boards.
Cribbage boards make a great project for a beginner to practice drilling holes.
Checker pieces can be easy to make but if you are just starting out, it might be better to work on the game board and buy your checkers, chess pieces and cribbage pegs to start.
Once you have your project dialed in, it would be best to make the pieces yourself or to buy them in bulk to keep costs down.
For an additional twist, you can carve names or personal messages onto the board as well. If you get a classy looking wood – like cherry or even mahogany – these game boards can make excellent display pieces as well.
Perhaps the best piece of advice we can offer here is patience. It’s fairly easy and straightforward to carve train tracks, but it can take a while since you’ll need several different track sets in.
We think you’ll love the result, though. So many of us remember playing with these tracks as kids, so you shouldn’t find it too difficult to sell these tracks to a parent or grandparent in need.
Think about selling individual pieces as well as packs of tracks and once you know you have a market for them, making them in batches will be the best way to go.
Warning! This isn’t some beginner level project, but it is one that can definitely be profitable once you get it down.
If you really want to pull cash out of your CNC skills, you should look into instruments. Instruments can have high-profit margins if they’re of high quality. In fact, the popular guitar brand Taylor uses CNC machines for their guitars because CNC’s offer precise cuts and are much more efficient than hand-carving.
A good way to get started for beginners is to purchase a guitar body and make the rest of the guitar or buy all the pieces and come up with a killer design before putting it all together.
The design and the paint or finish is what will make or break this type of project.
The puzzles we’re talking about will be relatively simple unless you’re awfully ambitious. However, simpler puzzles are excellent for children. You can make animals and break the puzzle up into only three or four puzzle pieces if you’d like.
Or, you can make name puzzles, which are great decorations for kids’ rooms and serve as educational pieces when the kid is old enough.

Similarly, it’s easy to carve up some letter blocks. Kids will love these, and they are again good learning tools.
You can find ready to carve blanks to practice on which make getting started easy.
A nice tip here is to combine the blocks to spell names and sell them as décor for a child’s room.
Switch to thin metal and you can use those same letters to make stencils for all kinds of craft projects.
Trays are similar to signs because they are simple, but so many people like them. There are a lot of trays available from other crafters out there so you will really want to work hard to set yours apart from others.
Things such as personalization or tailoring them to your local market are the types of things that will give you an advantage over other sellers.
Really just a catch-all tray. The great things is that there is a lot of room for creativity here.
Trays in the shape of your home state or a local landmark such as lake make for good sellers. This one really lets you use your imagination.

Perfect for breakfast in bed or maybe just bringing out some crackers and cheese for your guests.
These can be hard to make and stand out from other sellers, so personalization helps to get your customers attention.
Serving trays for special events such as weddings are functional and serve as mementos of the event. Anything you can do to target weddings with your projects will help sales and can often be sold at a higher markup

Organizing products are hot right now. Cut pockets in a tray to hold all the miscellaneous makeup and hair accessories.
The finish of the wood will make a big difference here. Brighter colors work well here, so go with something like a light oak stain.
Who doesn’t like a nice soak in the tub?
Kids I guess. I never got why they don’t like a bath.
Either way, these trays aren’t for the kids. These are for mom. Cut a pocket or two for a glass of wine or a candle to sit and craft a stand to hold a phone, book or tablet.
Keep in mind this thing will be around water so it is best to make sure it is painted or sealed to protect it from water damage.
These sell best around Valentine’s day.
The possibilities here really are endless. You can carve the shape of a snowflake, Christmas tree, Santa’s hat, or a gingerbread man. Or, if you wanted a traditional, circular ornament, you can carve the middle out into whatever Christmas-related theme you’d like.
Ornaments are relatively simple, and people are going to buy them up over Christmas time.
These are a great project for beginners and another one that has ready made blanks. Grab the blanks for 50 cents or less each, fire up your CNC and sell them for $5 or more.
That is some serious profit. The only downside is they only sell well leading up to Christmas, though it might be worth trying a Christmas in July promotion to drum up some summer sales.

Speaking of Christmas, decorations of all kinds tend to sell very well.
Cut out a tree and pop an LED star on top or make a cookie tray for Santa. There is a lot of freedom for creativity here.
The biggest thing to remember is to have the items made ahead of the holiday season. When you have an item that is a hit, you will need them ready to go to keep up with demand.

Christmas items in the winter and wedding stuff in the summer. When done right, these can be the bread and butter of your sales.
Signs, trays and custom centerpieces can be great moneymakers. People spend a ton of money on weddings, why not get a piece of the action.
Look around for inspiration, wedding shows and magazines can give you some of the best ideas. One minute you’re watching Bridezillas and the next you are cutting custom cake toppers to sell to your local bakery.
The bride and groom get gifts for their wedding party and the wedding guests get gifts for the bride and groom.
Custom and/or personalized projects are the key here. There can be a lot of competition here because there is so much money to be made so pay attention to how you market and advertise your product. It will likely make or break your chances of turning a proft.
These work well for weddings but also for events such as prom or quinceaneras. The name of the event, the date and sometimes a name are the best things to engrave.
Most won’t be making the hanger itself from scratch, but there are many that are ready to be engraved available online.

Just like with weddings, there are a ton of different ideas that you can cook up for a baby shower.
Signs tend to be one of the best selling gifts for baby showers.
Another potential market is families of newborn babies. A custom sign with the name, date of birth and weight makes for a lovely gift and parents and grandparents love to purchase them.
These projects are going to be wide ranging, and will again require you to use your creative side. Most decorative items aren’t going to be particularly difficult to make, yet will look excellent in anyone’s home, store, or office. Some of these things may also have a bit of functionality, which is a bonus selling point.
Keepsake boxes are as simple as hollowing out a piece of wood, attaching some hinges, and creating the lid. From there, you can custom-carve things onto the outside of the box. Or, you can write special messages on the inside of the lid that can be read when the box is opened.
Nothing too fancy and they aren’t the hottest sellers, but if you come of with the right design they can do well.
It’s best to target something you would find on a kids bookshelf so keep it fun.
If you only have a 3-axis CNC, statues and trophies are going to be tough to make. You can still produce them, but they’ll be bulkier and not so fine in detail.
If you have a 4-axis router, you can make better, more detailed products. However, as a word of caution, don’t try and make things too slender. The wood will likely snap under pressure from the drill, and all your work will be for naught.
Maps are a super popular decorative item these days. People love them.
Maps of cities, states, countries, the world, or anything, really. Just a regular map – as in the cutout of a state or country – should be a generally easy project. You just need the right toolpath, and you’re good to go. It’s like carving any other project.
But, if you want to take things a step further, you can try a topographical map. These are becoming more popular by the day, and should sell fast.
They aren’t a beginner level project because it will take some messing with your software to get the map into your software and running. If you’re up to the challenge, though, these maps are super cool.
Clocks aren’t much different than a sign for the most part.
Clock mechanisms are pretty cheap and they come in a variety of styles so you are bound to find one that fits yours project.
For the face, you can get as creative as you want. Inlay it with a super cool design, or cut straight through the wood for a semi-transparent clock.
Glass etchings or engravings can make unique decorative items. Grab a diamond drag bit and some dollar store picture frames to practice with and work your way up to larger engravings.
Pet related engravings make for great practice pieces and pet related products tend to sell well too.
Thrift stores make great places to find larger frames and glass on the cheap.
Check out the video below to get a feel for what kind of stuff you can create.
Kids grow up so quick don’t they?
Make custom signs the chart their progress. Just make sure to keep your distance markings accurate. These make another great baby shower gift.
A springtime product that makes for a good Mother’s Day gift. Planters can be make extra fancy but there isn’t usually a great return on the extra work.
Keep it simple and treat it like a sign with some cute or loving saying on the side. The color or finish you pick will play a big role in the popularity of this product.
Who wouldn’t like beautiful feature piece for their wall. I won’t tell you how to make art, cause well…that sounds really hard.
What I can tell you is that people want big pieces when it comes to wall art so you will either need a larger CNC or will need to get creative with how you make it in sections.
Patterns and textures are your friends here. The type of grain of the wood you use will be equally important. Just don’t jump into this one expecting to hit it rich.
When done right, wall art can sell for hundreds of dollars or more but it isn’t easy for everyone to get right.
With a little practice and some common tools, you can easily make your own photo frames.
They work equally well as gifts for holidays and special occasions so they tend to sell very well. Pet related sayings or designs are probably the most popular.
Everyone loves to show off their pets. Speaking of which want to see 535 pictures of my cat?
Yeah, I thought so.
Simple stands that leave room for adding some style. They aren’t the best sellers locally, but if you can add your own flair to one then they can really take off in the online marketplaces.

There is a huge market for anything phone related but things are highly competitive.
Practice making them for your family as gifts before going full bore trying to turn a profit. They sell great but it can be tough to stand out in the crowded space.
Nameplates for a desk or door are fairly straightforward projects and are a great way to add some personality to anyone’s office space. In particular, anyone working in manufacturing, landscaping and outdoors, or construction would be good targets if you’re trying to sell these.
Custom-made business cards are a super unique niche that folks working in the industries mentioned above would love. A thin, wooden or metal business card carved from a CNC machine is a clear and obvious way to stand out from the crowd.
Plus, nobody’s going to crumble up and throw out one of these business cards. Memorable and difficult to throw away are perhaps the two most important features of a business card, making machined cards a fantastic item to have.
Mark your business name on some to give away and get the name of your business into the hands of some people.
Additionally, they can make simple gifts with a touch of personalization.
The wide carpenter pencils work best because they have more flat area to put your engraving on. Who wouldn’t love a pencil that says #1 Grandpa?

Drink Coasters are another super popular item to CNC. Virtually all homeowners have coasters because nobody wants to ruin a perfectly good table with a wet drink. Yet, at the same time, those cheap paper coasters are easy to lose and can get ruined over time.
But a solid, well-crafted, beautiful wood coaster is both practical and decorative. Coasters have a super wide target audience, so you shouldn’t have too much trouble trying to sell these.
Like so many other CNC projects, if you don’t know what to do to make it stand out then start with pets or cute sayings or better yet, cutes sayings about pets. It really works!
Like coasters, cutting boards have universal appeal because just about every person out there needs one. You can personalize cutting boards by carving a person’s initials or monogram into the corner of the board.
Cutting boards in the shape of your local state tend to sell well, although some states work better than others for this type of project. Not something to try in Hawaii.
As a word of advice, you’ll want to use dense hardwoods with a closed-grain for cutting boards. This means something like maple, walnut or cherry. These woods are smooth and flat, which makes them ideal for cutting. Also, the closed grain means raw food won’t get lodged into the board, which can be a health issue (and also an odor issue).
These are great sellers around Christmas time especially.
Look to sell them to home bakers as well as local bakeries. Don’t be afraid to head into some local businesses to see if you can drum up some business.
Focus on how something simple like cookie shapes can help their business stand out.

Otherwise known as adult Lunchables. These meat and cheese boards have become quite popular recently.
Functionally they are very similar to cutting boards and may even use the same. Engraving sections that are labeled for meat, cheese, olives, fruit, etc. will make for a visually interesting product that can catch someone’s eye.

Like trim and molding, cabinet doors can be an easy sell to many homeowners because they look great and add value to the home. Basic cabinet doors are fairly easy projects and involve primarily straight lines. However, you can add value to your doors with more elaborate designs.
Similarly, more expensive wood means you can charge more for your work. Of course, that also means higher up-front costs. If you’re just getting started, though, MDF and primed plywood are cheap, readily available materials that you can make some nice cabinet doors from.
You won’t be making cabinet doors as your first project but with a little practice and a large enough machine, pretty much anyone could work their way up to cabinet doors without too much trouble.
Another dollar store favorite. Buy them for a dollar, put your engraving on and sell at a 500% markup.
And while you are at the dollar store, look around for inspiration for other projects. Keeping your material costs low will make a world of difference in your profits.
Trim and molding are a great way to monetize your CNC work because people are willing to pay top-dollar for a job well done. Good trim and molding add value to people’s home while also preventing damage, so it’s a win-win.
Plus, with most CNC machines, you can pass through the machine length-wise, meaning you don’t need to worry about machining several small parts and then putting them together.
These aren’t huge moneymakers but a couple dollars here and there adds up quick. The nice thing is that you can buy dozens or hundreds of blanks online to work with.
Pick up a display stand and put them on the corner of your table at the craft fair to pick up some extra sales. Alternatively you can engrave your logo on one side and a design on the other side and give them out free with each purchase. The advertising alone will pay for the keychains.
People love free things even if the cost is baked into your other items.

Most people will think about a “No Girls Allowed” sign on a kids room door but try to think outside the box and find a way to sell to more profitable shoppers.
Local hotels or bed and breakfast establishments especially can be good prospects to try and peddle some do not disturb signs. The benefit of trying to get business from other businesses is that you will often get bulk orders.
The next big question is where to sell these items. Products don’t do you any good if they’re just sitting on the shelf.
So we’ve compiled a quick list of the best places to sell your projects. If you want a more complete guide then check out our full post with tips and tricks for selling in each market.
It isn’t as popular as it once was but there is still plenty of money to be made on Craigslist.
Craigslist is also free to post which makes it a great option.
Like it or not, Facebook Marketplace is one of the biggest and easiest places to sell your CNC projects.
Make sure to use it as part of your selling strategy.
Selling on Amazon will give you access to a huge pool of customers but most people won’t be ready to handle the type of demand that can result if their product takes off.
My recommendation is to take it slow and not tackle selling on Amazon until you have more experience with selling your CNC projects.
Ebay makes a good way to work your way up to selling on Amazon. They make shipping easy and they actively work to keep shipping costs down for you and the customer.
The biggest downside is the amount of competition present on Ebay.
Etsy is very similar to Ebay but with a more “crafty” feel to the products. Keep this in mind when picking what products you plan to sell on Etsy.
Making a website is not nearly as difficult as it used to be. Website builders make things super simple.
The hard part is getting traffic to your site. Getting traffic from search engines such as Google can take a lot of work, but if you find a way to get people to go directly to your site then it can be worth it because you won’t be paying fees to the marketplace.
If you do make your own website then make sure to put it on as much stuff as you can.
Do not underestimate the power of selling locally. Thousands of people make full-time incomes making crafts and selling them in craft stores.
Keep in mind there is likely a fee to sell at these events or stores.
These are the most popular choices for selling your products but check out our full guide for tips, tricks and some often overlooked places to sell your wares.
For your project to be truly complete, you have to smooth down any rough cuts and remove the burrs from any raw edges or holes. This is not only going to make your projects look better, but it’s going to make them safer as well; there won’t be any jagged edges that can cut your skin or tear your clothes.
This is where a deburring tool is comes in handy. While there are countless deburring tools on the market, we’ve made picking a tool easy for you.
That’s because we’ve scoured the internet, read all the reviews, and have some experience ourselves, and we’ve found the five best deburring tools on the available.
Name | Awards | Where to Buy |
AFA Tooling Deburring Tool Kit | Best Overall Deburring Tool | |
YXGOOD Hand Deburring Tool Kit | Best Value Deburring Tool | |
Vastools Deburring Tool | Best Ultra Cheap Deburring Tool | |
Mavast Aluminum Deburring Tool | Best Deburring Tool for Metal | |
ORX Plus Tools External Deburring Tool | Best External Deburring Tool |
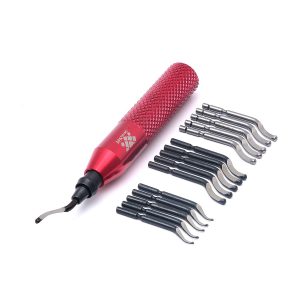
AFA Tooling Deburring Tool Kit
Cuts a wide variety of materials
Aluminum handle
One-year warranty
None
One thing we really love about this deburring tool is just how versatile it is.
This thing will help you deburr all kinds of materials from brass and steel to aluminum, copper, PVC pipe, wood and more. It also works well on plastics without melting them and does a good resin art too.
With so many different applications and coming in at such a reasonable price, it’s easy to make this our best overall deburring tool.
The kit, which is really just the tool and extra blades, comes with 15 blades. This includes 5 each of 3 different types. Each type works well with different materials.
One set of blades is for softer materials such as copper, wood, and plastic. The next set is for medium harness materials including aluminum, brass, and steel. The last set, which is designed for more difficult materials works well with stainless steel, tungsten, and other similar metals.
When you pick the right blade for your material, it will improve the finish of your break edge or chamfer that you are applying to the part.
Beyond its versatility, this deburring tool is also going to last you a long time.
The knurled aluminum handle provides superior grip and lends an overall solid build quality to the tool. This deburring tool can take a beating and still get the job done. Plus, with the extra replacement blades, you won’t need to worry about purchasing anything else, even if you do roll it off your workbench onto the concrete.
This tool from AFA Tooling comes with a swivel head which comes in handy for a number of different reasons. For any of you lefties out there, you can purchase this tool without having to worry about how you’ll hold it or risking using it with your right hand. The swivel head also means you can deburr your project, even if it has some weird angles or hard to reach places.
Lastly, when you buy this AFA deburring tool, you get a one-year warranty. Given the number of materials this tool can work with, the replacement parts, the swivel head, the warranty, and the price, we think this is the best overall tool on the list.
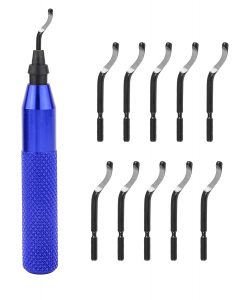
YXGOOD Hand Deburring Tool Kit
10 HSS replacement blades
Swivel head
Cannot cut through harder metals
If you’re looking for a mix of utility and price, you can’t go wrong getting this YXGOOD deburring tool kit set.
For one, it can be used on a fair amount of materials, including plastic, copper, aluminum, silver, and wood. While this list may leave out some of the harder metals, given what you’re going to pay for the tool, that’s more than fair. Additionally, you can pick up some replacement blades that are meant for harder materials if you find you need them down the road.
Speaking of replacement blades, the tool comes with 10 of them, all of which are HSS (high speed steel). This means that the blades will work on a good number of metals without dulling too quickly.
Also, like many of the nicer deburring tools, this one has an aluminum handle, so you know it’s going to be a nice and sturdy tool.
No one wants to bust a plastic handle while zipping along, deburring the edges of their parts.
Also similar to nicer models, this tool has a 360-degree swivel head, so you can use it whether you’re a righty or a lefty and it can be used in all kinds of strange angles and in the nooks and crannies that might be hard to reach with a tool that doesn’t have a swivel head.
All in all, this YXGOOD hand deburring tool is a really nice addition to your toolkit.
The only negative here is that the deburring tool can’t cut through quite as many materials as the tool above, but, again, given the price of this tool, that makes sense. Remember, you can always get some more robust replacement blades if you find you end up needing them.
If you want to get the most value out of your dollar, we recommend this deburring tool.
VASTOOLS Deburring Tool
Low price
Swivel head
No replacement blades
If can swing a few extra bucks, I definitely recommend going with one of our other recommendations. Let’s face it, these aren’t the most expensive tools under the sun.
While 50% more expensive may sound like a lot, when some of the tools can be had for under 10 bucks, it really isn’t that bad.
With that said, maybe you do need to pinch every penny. Maybe your significant other is a little cranky because you just laid out a decent chunk of cash for that new 3d printer. Every situation is different. I get it.
If this sounds like you then this deburring tool from VASTOOLS will likely get the job done well for you. In fact, working with 3d printed plastic and similar soft materials.
Where this tool will start to struggle is if you start trying to work with anything much harder than aluminum.
The fact that it can work with metals at all is excellent for a deburring tool on the cheaper end of the spectrum.
It also features a swivel head like our other recommendations as well as an aluminum body. When you start looking at tools in the ultra-budget category, you’re going to quickly see that most aren’t built as well and can be pretty limited in the materials that they can work.
Above all, we recommend making sure to get a deburring tool with a swivel head. It makes deburring in tight spots much easier and this tool is about as cheap as you can go and still get this feature.
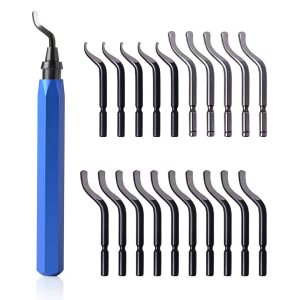
MAVAST Aluminum Deburring Tool
Comes with multiple blade types
Excellent customer service
None
If you already know that you’re going to be doing a lot of projects with metals, you should really consider purchasing this deburring tool from MAVAST.
While it is more than capable of cutting wood, it can also easily deburr stainless steel, steel, copper, aluminum, plastic, PVC, and tin. And this is not just the manufacturer hyping up their own product, numerous other reviewers have testified that this tool can cut through hard metals without leaving behind any chatter and or gouging of their project.
Harder materials will dull up your blades quicker which is why this kit is great for metals. It comes with a whopping 21 different blades. This includes 11 standard HSS blades,5 BK3010 black HSS blades, and 5 BS1018 silver HSS blades, suitable for cutting stainless steel and other hard metals.
With this much versatility and toughness, you absolutely need to buy this deburring tool if you plan on mainly using metals. You’ll be glad you have ample replacement blades and the right blade for your material as well.
This tool also comes with many standard features you would expect, such as the swiveling head so that both right-handed and left-handed users can operate with the tool without a problem.
Another nice thing about purchasing a MAVAST tool is their customer service. The company has a great reputation for helping customers with any questions that come up. If things aren’t working like you planned with your project, it is always nice to get some quick support.
ORX PLUS TOOLS Deburring External Tool
Works with wide variety of materials
Limited application
While these external chamfer/deburring tools have a little bit more of a limited use, that does not mean it’s not worth keeping one in your toolbox.
If you’re unfamiliar with these tools, they’re ideal for repairing damaged bolts and tightening nuts in their place. This means you don’t have to replace expensive or hard to find bolts, which can save you some cash – and some frustration – in the future.
To use this tool, you simply place it on the end of your drill. But be sure that you use an extremely low speed while you’re using it, or you could make the damage worse.
This particular ORX tool only works if you use it in a clockwise direction. Further, it works on a really wide range of materials, including stainless steel, hardened steel, mild steel, copper, brass, aluminum, fiberglass, wood, and plastic.
There is one downside to the tool, and that is the edges cannot be sharpened. With that said, because it isn’t an everyday use tool for most people, you’ll likely find that the tool never needs to be sharpened anyways.
All things considered, we like this deburring tool because even though it has a limited range of uses, it does exactly what it is supposed to and does it well.
If you’re right-handed, you’re a bit luckier as far as this goes. Most machines and tools are made with right-handers in mind, so it’s the lefties that have to do the extra research.
Luckily, all of the tools in this article come with a swivel head, so you can adjust the deburring blade to fit whichever hand is dominant.
However, this may not be the case for all tools, so be sure to check the specs. If you’re a lefty and you don’t see a swivel head, you should probably reconsider buying the tool.
Even if you’re just a hobbyist, you’re eventually going to wear out the blade on your deburring tool. So while you may save money upfront by not buying a tool with replacement blades, eventually, you’ll be out of luck.
Many deburring tools online will come with extra blades, and it may be worth the extra investment.
As always, don’t discount customer service. You may need to return an order, or you may have questions about how to use a tool, and when a manufacturer answers your questions promptly and respectfully, that’s always nice.
You can also usually tell the level of customer care by how well a package is wrapped when it arrives at your door. The shipping process can take a beating on your tools, and if they aren’t well wrapped, this can significantly lower the lifespan of your tool.
A well-packaged tool tells you that the manufacturer really cares about quality service.
Deburring tools are fairly straightforward, but that doesn’t mean you should go with any old tool. As we noted above, all tools are certainly not created equal.
Our best overall choice from AFA Tooling does a wonderful job working with a good range of materials and packaging that capability up in a solid body that is built to last.
One last note, keep in mind the types of materials you plan on working with and how much use you plan to give it. The blades you get will make a big difference in the success of any of your projects or builds.
Pick a high quality deburring tool and you won’t be disappointed. Not only does it add a nice, professional finish to your project, but it can help with safety too. No one wants to get cut or tear a piece of clothing on a jagged edge. Deburr it!
Learn More Media LLC
5319 Hillside Way
Williamsburg, VA 23185
© 2026 Machinist Guides