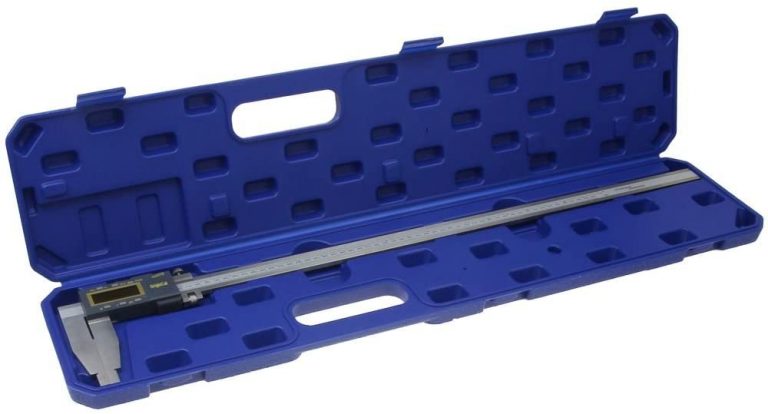
Whether you want to learn a new skill, work on a pet project, or start a small business there is a CNC machine or router for you. CNCs, which are generally thought of as being ridiculously expensive don’t have to be.
These beginner machines prove the assumption wrong. While you won’t be able to cut a giant chuck of hardened steel with them, they will cut through wood, plastic and other soft materials like butter. With the right machine and some tweaking you might even cut aluminum.
All of the CNC machines listed below are excellent machines. However, it is important to take note of some of features such as the work area of the machine. Feel free to skip to the end of this article to see our comprehensive list of things to consider when looking for your first CNC machine or router.
Budgets vary, but all of these machines should be considered affordable, entry level CNC machines that are extremely capable.
Now, let’s get to the meat and potatoes and find out which machines top our list.
Name | Awards | Work Area | Where to Buy |
BobsCNC Evolution 4 CNC Router Kit | Best Overall CNC, | 24"x24"x3.3" | |
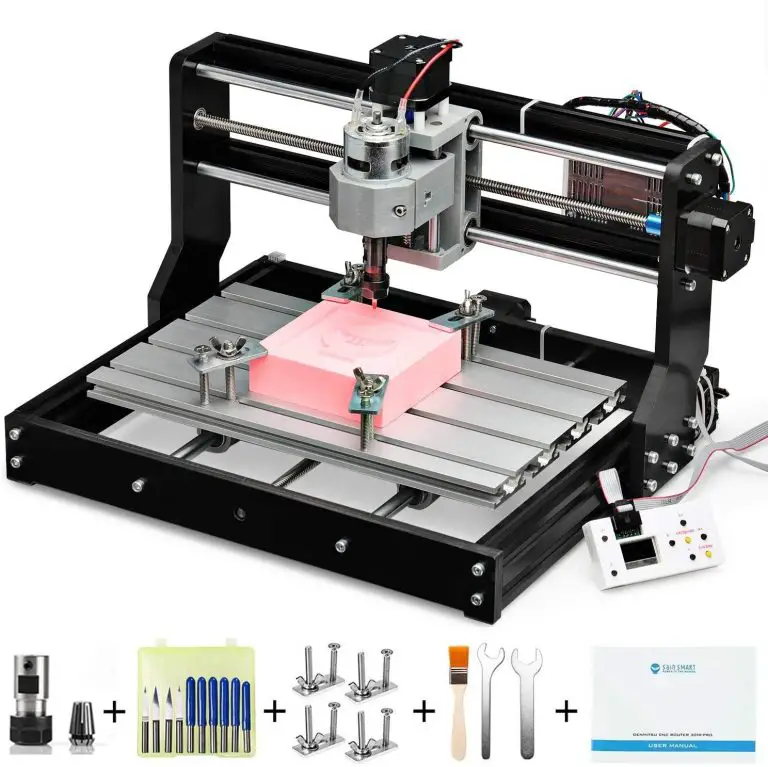
SainSmart Genmitsu CNC 3018-PRO | Best Budget CNC, | 11.8"x7.0"x1.7" | |
SainSmart Genmitsu 3018-PROVer | Best Mini CNC, | 11.8"x7.0"x1.7" | |
MYSWEETY DIY CNC 3018-PRO | Best Beginner CNC Router and Laser Engraver Combo | 11.8"x7.0"x1.7" |
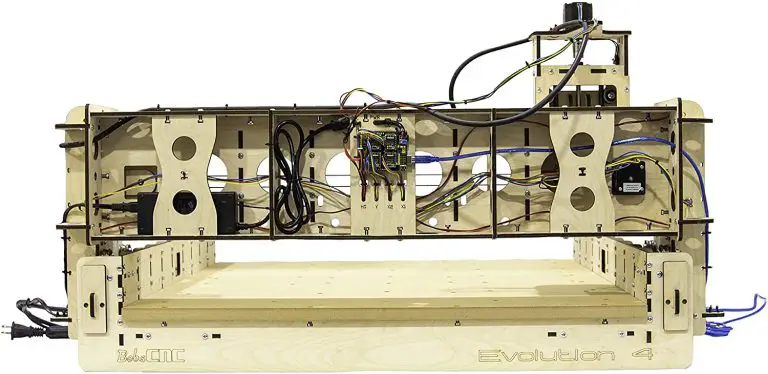
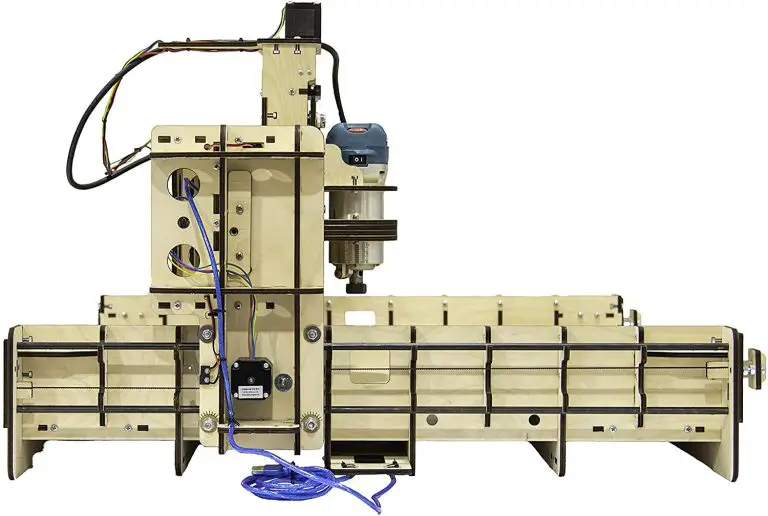
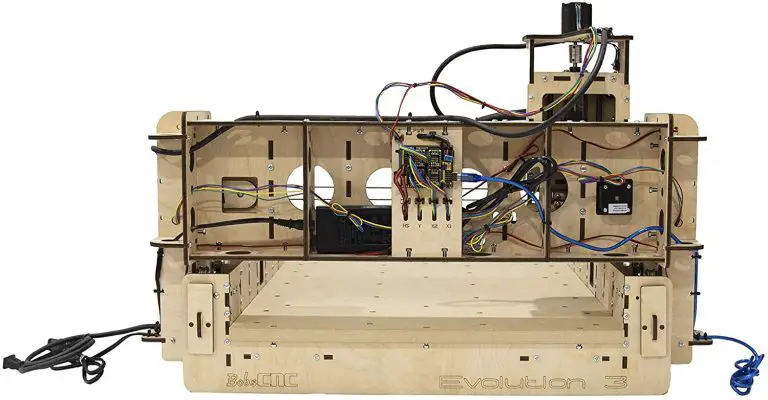
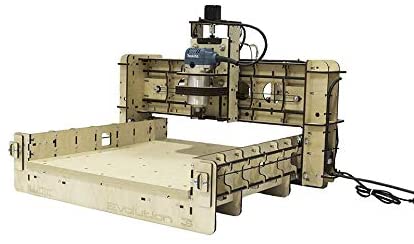
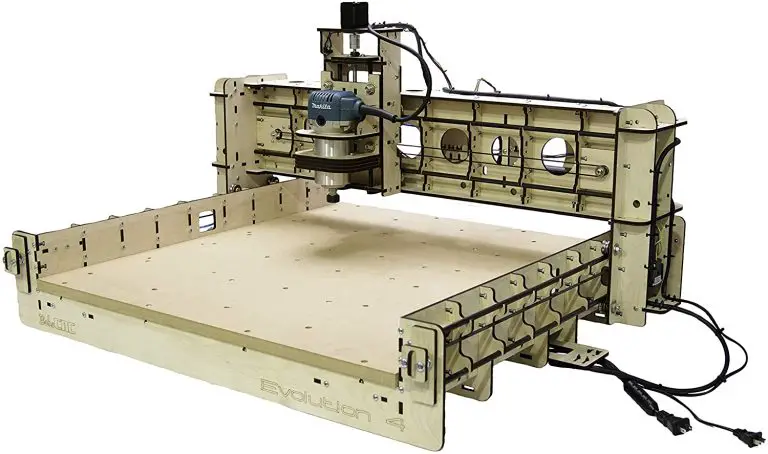
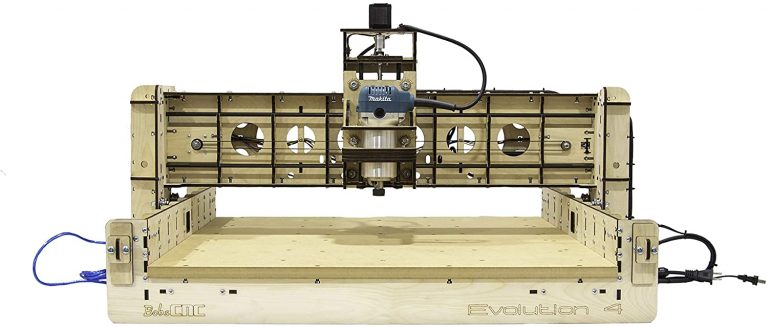
BobsCNC Evolution 4 CNC Router Kit
Pros
Customer support is second to none
Large work area - great for making bigger signs
Cons
More detailed assembly
Not setup for laser engraving
Materials it will cut: Wood, plastic, soft aluminum, acrylic, PCB, leather, others possible with experimentation
Work area: 24” x 24” x 3.3” = 610 mm x 610 mm x 85 mm
Warranty: 60 Days
BobsCNC makes machines that are a pretty big step above other entry level CNC machines. Bobs makes machines that are aimed at users that want to machine wood, plastic and other soft materials. CNC wood routing is their specialty.
Size matters and the work area of the Evolution 4 (E4) is two to three times larger than other machines. This makes a huge difference in what you can make.
Many people use the E4 for making CNC routed signs or art. BobsCNC even has some “unofficial” plans that allow you to expand the machine even more. The work area can be expanded to 24”x48”x3”.
One downfall is that the E4 is not designed to be used with a laser. The company claims this is for safety reasons and honestly it makes a lot of sense. Lasers can be very dangerous.
Many of the beginner level laser engravers have a small work area. This makes it easier to build an enclosure for protection. The E4 is a much larger machine.
A key difference of the E4 when compared to other starter CNCs is that the setup is more involved.
While other machines often arrive mostly assembled, this is not the case with machines from BobsCNC. You will need to assemble everything yourself. It will likely take a day or two but you will develop a good understanding of the machine itself doing it.
Luckily, the included instructions are detailed and thorough. If there are any questions, there are plenty of good resources on YouTube and in Facebook groups.
Speaking of questions, if you have any issues BobsCNC has top notch support. Like ridiculously good support. By all accounts they are extremely fast to respond. It is not unheard of for Bob himself to respond and help to troubleshoot any issues by phone or email outside of normal working hours.
A couple things to know about the E4:
It’s louder than most entry level machines. The router/spindle is a real power tool, so it makes quite a bit of noise.
It’s messy. The E4 is capable of cutting a lot more than other entry level machines. This means it generates substantially more dust as a result. Think about getting a dust shoe and dust collection system to keep things tidy.
Overall, the Evolution 4 from BobsCNC is an extremely well designed and built product. It does exactly what it is meant to do, which is CNC routing of wood and other soft materials. Some light metal work might be possible but realize this is still a starter tool.
In the end, I think a picture is worth a thousand words so check out the gallery on BobsCNC to get an idea of the types of projects you can make.
SainSmart Genmitsu CNC 3018-PRO
Pros
Easy assembly
Great for beginners
Easily switch to laser engraving
Cons
Limited work area
Materials it will cut: Wood, plastic, soft aluminum, acrylic, PCB, leather, others possible with experimentation
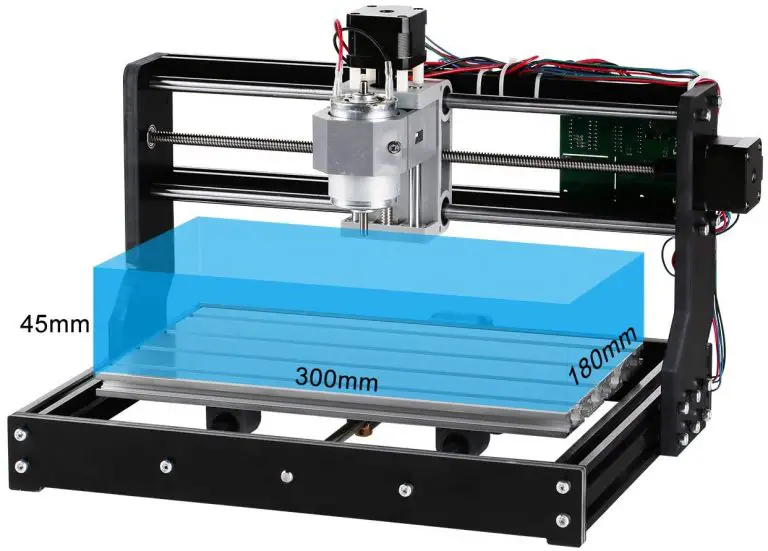
Work area: 30 cm x 18 cm x 4.5 cm = 300 mm x 180 mm x 45 mm = 11.8” x 7.0” x 1.7”
Warranty: 1 Year
The 3018 Pro is a great starter CNC machine. Primarily meant to be used for engraving, it is extremely well built for such a budget friendly machine.
The 3018 Pro will easily cut softer materials such as plastic and wood. Metals are a little more of a challenge.
Aluminum can be cut but it will require playing with the speeds and feeds to find something that works for your machine and cutting tools. Other soft metals may be possible but expect to experiment quite a bit.
This is a nicely built machine. The frame is rigid and assembly is easy.
The 3018 Pro can easily be switched to a laser engraver by purchasing a laser unit and swapping it in place of the router/spindle. The swap only takes 2-3 minutes on the machine.
The Genmitsu 3018 Pro is an excellent choice for anyone who is just starting out with CNC.
The one big downfall of the 3018 Pro is the work area. You simply won’t be able to work on large projects.
The manufacturer’s support and communities such as the dedicated Facebook group are a huge help to those trying to learn CNC. Because these 3018 CNCs are so common, chances are that any question you have has already been answered.
The Genmitsu 3018 Pro is a quality, versatile machine for beginner level CNC machining, routing and laser engraving.
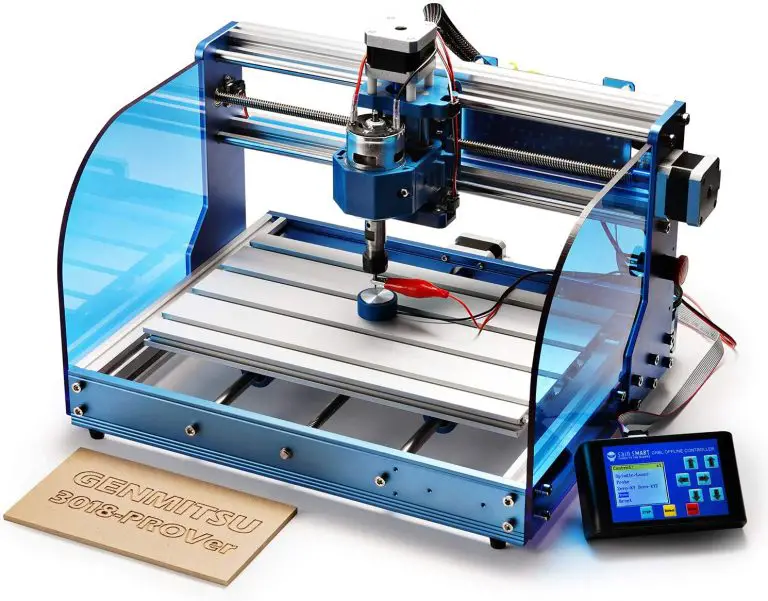
SainSmart Genmitsu 3018-PROVer
Pros
Pre-assembled
Comes with most common upgrades
Cons
Not a full enclosure
Materials it will cut: Wood, plastic, soft aluminum, acrylic, PCB, leather, others possible with experimentation
Work area: 30 cm x 18 cm x 4.5 cm = 300 mm x 180 mm x 45 mm = 11.8” x 7.0” x 1.7”
Warranty: 1 Year
Essentially the Genmitsu 3018-PROVer is the same as the Genmitsu 3018 with the exception that it comes with almost all of the upgrades that people normally add on to their machine.
Let’s get to the upgrades.
One area which is nicely improved is the body of the 3018-PROVer. It is now all aluminum. This improves the rigidity of the machine which increases cutting performance.
The drivers have been upgraded too. They are more powerful while also being much quieter. This is a nice change for anyone who might be operating the machine in close proximity to their neighbors.
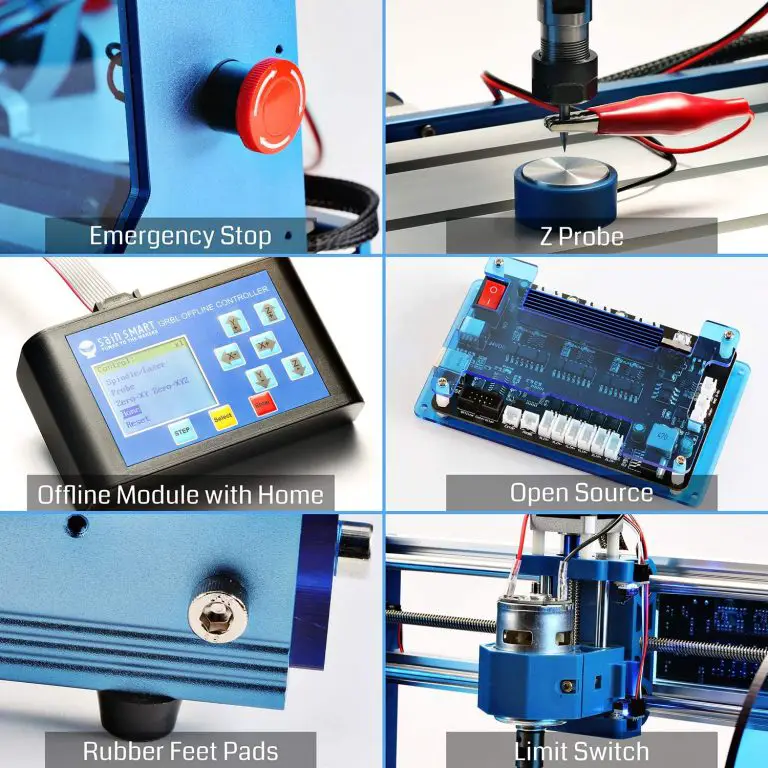
Limit switches have been added which help to keep your machine from crashing. While these are a great addition, it should be noted that they actually decrease the work area by a small amount. Not a huge concern but plan on losing a little travel.
The biggest change is the addition of an offline controller display and emergency stop button. The emergency stop or e-stop button is a welcome addition.
The machine will crash. It’s inevitable. Being able to hit a big red stop button is fairly important. Emergency stop buttons are standard on anything bigger than an absolute beginner model and for good reason.
The offline controller allows you to run the machine without having a computer attached. For a good rundown of the offline controller check out this guide from the manufacturer.
The added side enclosures on the machine are just OK. They won’t contain all the noise or dust but they help a little. Not a big change over the other Genmitsu 3018 models. They feel kinda pointless because when it comes to dust, you need to go all out and get a full enclosure or just deal with the mess.
The last upgrade is the addition of a z-axis tool setting touch probe. This allows you to set the location of your part without messing with sheets of paper or something similar.
Place the probe on the workpiece and connect the clip to your cutting tool. Lower the tool until it touches the probe. The machine will automatically set the height of your workpiece and you are ready to cut.
The Genmitsu 3018-PROVer is an excellent all-around CNC for the beginner. It combines the already stellar 3018-PRO CNC machine with the most common and beneficial upgrades to make setup and use easy.
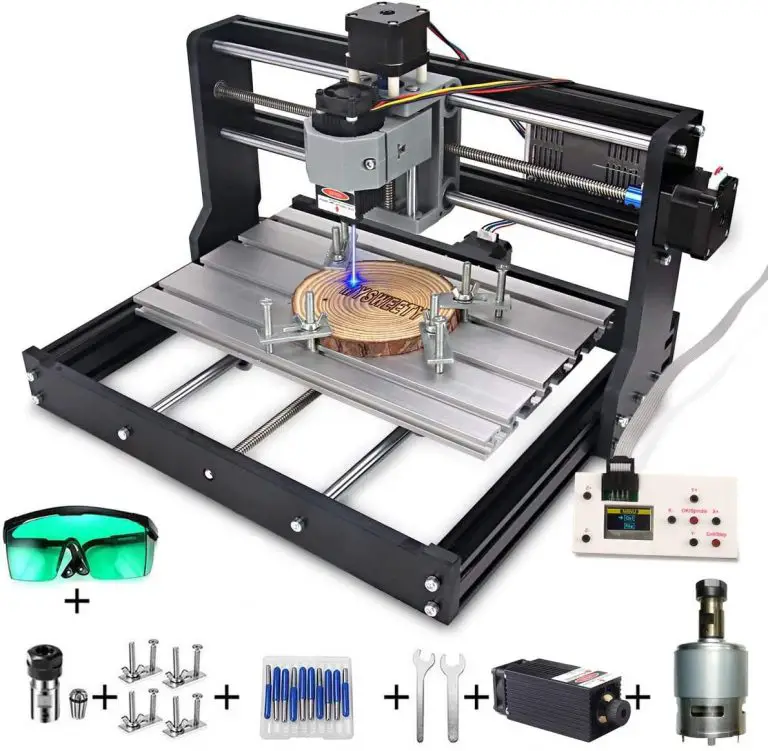
MYSWEETY DIY CNC 3018-PRO
Pros
Easy to use laser engraving software
Cons
Laser focus lens
Materials it will cut: Wood, plastic, soft aluminum, acrylic, PCB, leather, others possible with experimentation
Work area: 30 cm x 18 cm x 4.5 cm = 300 mm x 180 mm x 45 mm = 11.8” x 7.0” x 1.7”
Warranty: 90 Days
The MYSWEETY CNC 3018-PRO is a great starter CNC machine especially for those looking to get into laser engraving. Overall the build is very similar to other 3018 model CNC machines. What sets it apart is the included laser.
The MYSWEETY comes in 3 different versions:
- Large = 3 watt laser
- Extra Large = 5 watt laser
- Full Size = 7 watt laser
It’s an odd naming structure but I guess with a name like MYSWEETY maybe that should be expected.
The machine comes in need of full assembly. The included instructions leave something to be desired, so seek out some YouTube videos to help you along. Assembly should take about an hour, possibly a little longer to watch instructional videos.
The build is sturdy and most of the components are aluminum. Let’s talk about the included laser.
The lasers available are passable. Don’t expect to do much cutting with them. They are primarily for engraving. Remember these are beginner machines and whether you are CNC routing or laser engraving, they often end up lacking somewhat in the power department.
That being said, the included blue laser is capable of cutting smaller pieces of wood such as 1/8” balsa wood. It might just take some experimenting to get right.
A frequent complaint about the laser module is that the focus lens fits rather loosely. This makes it too easy to turn accidently. A little bit of Teflon tape on the threads will go a long way towards remedying the problem. This will keep your laser focused where it needs to be on the workpiece. A correctly focused laser will increase its performance.
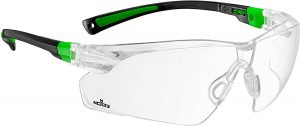
Also included in the package is a set of laser safety glasses. Read the instructions and make sure to use these when operating the laser. Lasers can be quite dangerous. Safety first! You don’t want to put an eye out with this thing.
An offline controller comes as part of the package. This is a welcome addition for those who don’t want to dedicate a computer to the use of their CNC machine.
The software that comes with the MYSWEETY CNC-3018 PRO is a mixed bag. Laser engraving works very well and in most cases the machine can be setup and engraving in no time.
It is enough to get you started but if you want to get serious with laser engraving then you will want to pick up a copy of Lightburn sooner rather than later. It is reasonably priced and works extremely well.
Unfortunately, the software for the milling aspect isn’t quite as user friendly as the included laser software. Expect to take a little time to learn some of the intricacies of the program before you get you used to it. Or jump straight to one of the other software packages out there. Easel by Inventables can be a good starter software to make your first projects more simple to get going.
All in all, the MYSWEETY CNC-3018 PRO is a good beginner laser/mill combo for someone who is looking to get their feet wet in CNC routing and laser engraving. The build is in line with other entry level machines such as the Gemnitsu. It comes with a nice set of extras and makes an excellent learning tool. Small scale laser engraving is this machines specialty.
Conclusion
BobsCNC Evolution 4 Router Kit is the clear winner with a much larger work area and improved cutting performance when compared to other beginner CNC machines.
The other CNC routers listed, such as the Genmitsus and MYSWEETY, can do most of the same tasks just on a much smaller scale. However, they do it at a budget friendly price.
The MYSWEETY machine makes a nice compromise between CNC routing and laser engraving if you aren’t sure which way you want to go yet and would like to try both out before stepping up to a more capable machine once you know which you like more.
Keep this in mind and check out the list of things to consider that follows to help you get started and if you have any questions, please leave them in the comments below.
Things to consider
Safety
While some of these entry level machines can be “cute”, don’t let them fool you. These are powerful tools that are capable of causing serious damage. Treat them like the dangerous power tools that they are.
Read your instructions.
Wear property safety equipment including eye and ear protection.
Be careful and if you aren’t sure about something, don’t be afraid to reach out to the manufacturers or other learning resources to make sure you are being safe.
Size of work area
The size of the work area is very important part of a CNC machine. Many hobbyist machines do not have a large envelope that they are capable of cutting, routing or engraving in.
The Z axis (up and down) is always the axis with the least amount of travel. This will determine how thick of a work piece you are able to cut. Keep in mind that this will be further reduced by your tooling. If you have a long end mill or router bit that you are using, then it will shorten the thickness of the part which you are able to cut.
Please note that the physical dimensions of the CNC are not the same as the work area.
For example, the Genmitsu CNC 3018-PRO has a physical size of 15.7” x 13.0” x 9.4”. The work area is only 11.8” x 7.1” x 1.8”. Clearly there is a significant difference between the two. So make sure that you know the two specs are different and how they relate to what you can cut and where you can physically place your machine.
Speeds and feeds
Speeds and feeds can be a fairly complicated subject but here are some resources to get you started:
As you work with more difficult materials such as metals, you will find that the window of speeds and feeds that will work will shrinks up drastically.
If you are sticking with soft stuff like wood or plastic, then your window for success will be more open and forgiving. For this reason, wood is a great material to practice with when you are first getting acquainted with your CNC.
CNC routers vs spindles
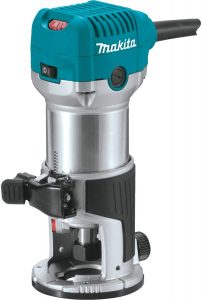
When it comes to beginner level CNC machines, the terms router and spindle are used almost interchangeably. Some machines, such as the ones from BobsCNC, use an actual router like you would buy at a hardware store. Others use spindles.
Practically, they are both simply motors that have a collet or chuck to hold a cutting tool such as a router bit or end mill. For the beginner level machines, an actual router such as one from Dewalt or Makita will be more powerful than the spindle included in similar machines.
Tooling
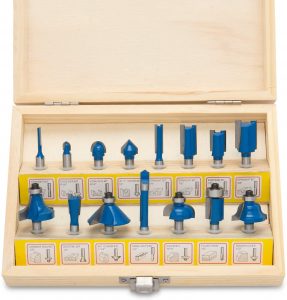
Tooling is your cutters. This includes router bits and end mills of all shapes and sizes. The right cutter will make all the difference when machining. Cutters can be purchased for many different types of materials.
Many CNC machines will come with some type of cutter right out of the box. They aren’t usually great. They will get you started however and as you gain experience you can look into adding additional tooling for your application.
The most important bits for getting started with you CNC are end mills (both flat bottom and ball nose), v bits and a surfacing bit. These are the first ones you will want to get and the first ones you will want to upgrade down the road. For a full guide check out our Ultimate Beginner’s Guide to CNC Router Bits.
Customer service
Pay attention to the level of customer service that the manufacturer provides. While the machines are not overly complex, they can pose some challenges for someone just starting.
Look for companies that are quick to reply and don’t be afraid to check their website for tutorials or additional information. While some of the foreign made machines might not have the best phone support, they often have support groups and communities that do an excellent job of helping you with any issues.
Software
There is a large variety of software that gets used on these machines. Covering them all would be a giant topic by itself. To get you started here is a quick rundown:
- CAD or computer aided drafting is software that will allow you to create models to machine or engrave. This is only a drawing and needs further processing before your machine will know what to do with it. The most commonly used CAD software are Fusion 360 and Tinkercad
- CAM or computer aided manufacturing is the software that takes your model and turns it into code that your CNC will understand. If you are familiar with 3D printers, CAM software is similar to slicing software. The most common CAM software are Fusion 360, CamBam, SheetCam and MeshCam.
A good starting point is to look into Fusion 360. It has an enormous number of tutorials on YouTube. You are likely to find help for any issue you run into and there are many guided courses on use of the software.
Related articles
For more information check out these related articles: