Best Digital Calipers – The Definitive Buyer’s Guide in 2023

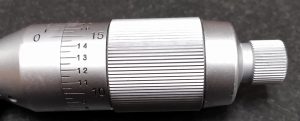
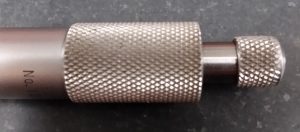
A good set of digital calipers is an invaluable tool for any machinist or hobbyist. Calipers can take a wide range of measurements. And do it with a ton of accuracy.

For many people, finding the best digital caliper is important because they get used so much. When you can measure inside, outside and depth measurements the tool gets a good amount of use.

I used digital calipers almost every day for 15 years and there isn’t much competition. 

Mitutoyo digital calipers are the best. 

There is solid competition in the value department, but Mitutoyo has the most well-made caliper on the market.

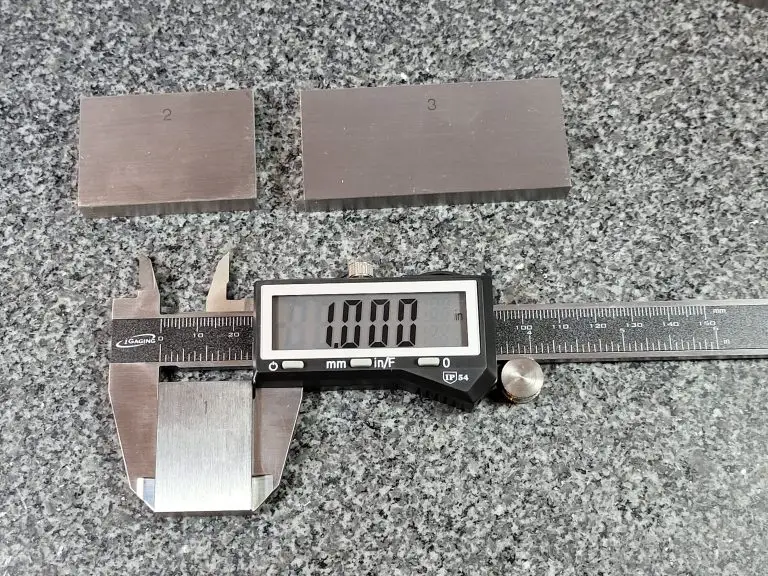
If you don’t plan on using it day in and day out then consider this caliper from iGaging. 

It has good build quality and is closer in price to a budget pick than the Mitutoyos. If you have a special use case or an extremely limited budget then keep reading to find the right digital caliper for you.

What we consider in our review

Accuracy vs resolution

Accuracy is the single most important feature of your digital caliper. 

They are measuring tools and they need to measure correctly.

a mitutoyo digital caliper with the display on
Mitutoyo digital caliper

The accuracy is the ability of the caliper to give the true value of a given measurement.

The accuracy of the best calipers is usually +/- .001.

Cheaper alternatives will have an accuracy between +/- .002″ to +/- .010″. For some this may be fine, but it will depend on what level of accuracy you need for your project.

I also recommend that you do not blindly trust the claimed accuracies touted by the budget manufacturers. If Starrett or Mitutoyo specify an accuracy level, you can trust it but this is not the case 

Keep in mind the type of tolerances you will be working with to help you decide how accurate your caliper needs to be.

Measuring range

The measuring range of the caliper is another one of the most important aspects of any digital caliper. 

You need to make sure that it will cover all the measurements you will want to take. 

0-6″, 0-8″, 0-12″ and 0-24″ are some of the typical measuring ranges. 

0-6″ is the most common size of caliper. 

Measuring sizes over 6″ are less frequent. 

A 0-6″ caliper maintains a nice balance of measuring range and ease of measurement. 

As the measuring range of a caliper gets larger, it becomes more difficult to use

Using a 0-24″ caliper to measure a 1″ hole diameter would be quite difficult. 

Even if you require the ability to measure larger sizes, you will want a 0-6″ caliper for many measurements because of its ease of use.

Display size

mitutoyo digital caliper zeroed
Look For A Large Display

The display on your caliper plays an important role in how easy it is to use. Being able to quickly read your measurements will save you time in the long run. 

Let’s be real, some of us don’t have the best eyes. Larger displays make getting your reading simpler. This is one area that digital calipers have a nice advantage over dial calipers. The dial and indicator needle can be hard for some to read on your average dial caliper.

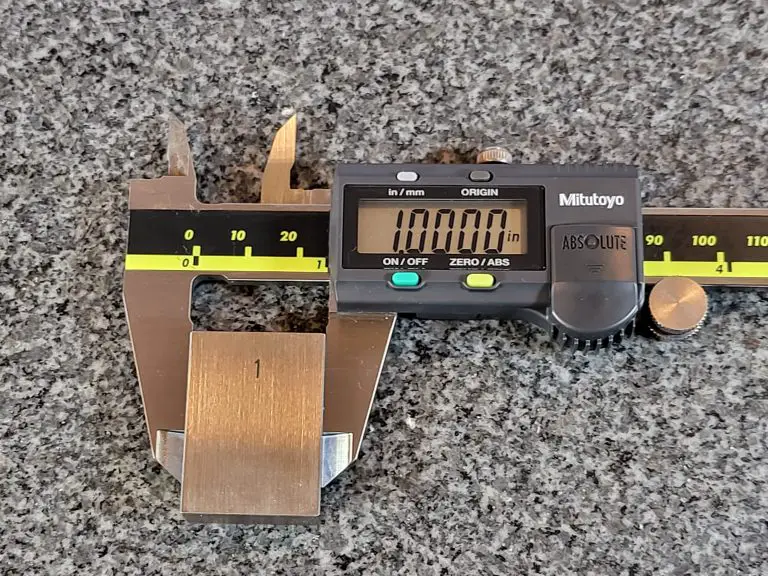
The best displays have large uniform digits as shown on the Mitutoyo caliper above.

Measuring units

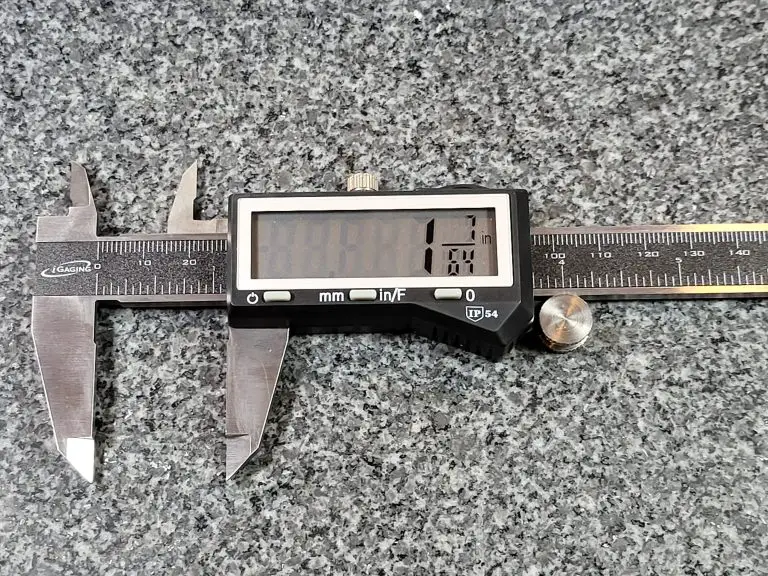
Most digital displays are capable of showing measurements in inches as well as millimeters. Some calipers will also read measurements in fractional units. 

Fractional units are generally not the best way to take measurements because the displays don’t round and instead will display a measurement of something similar to 53/128″. That isn’t a very helpful way to display the data. If the display rounds to something useful such as 1/16 or 1/32 it would be more useful but most don’t.

Battery life

mitutoyo digital caliper sr44 battery
Typical digital caliper battery

Battery life should be a prime consideration when examining the quality of a digital caliper. 

An auto on and auto shut off feature can greatly extend the longevity of a calipers battery life. 

The best digital calipers will have battery life that is measured in months or years. Most of the budget options available have much shorter battery lives. If you go the budget route with your caliper, make sure to keep some extra batteries on hand and maybe think about taking the battery out when the tool is not in use.

Good battery life means the caliper will be ready to use when you need it.

Dial vs digital calipers

dial caliper reading 0.661
Dial caliper face

Dial calipers make a good option for a measuring device as well. The main benefit they possess is that they don’t require batteries so they are always ready to use. 

Dial calipers can’t switch measuring units at the press of a button though. There are some dial calipers that measure in mm as well as inches at the same time but they haven’t been proven to be particularly reliable.

For a more comprehensive look at the two caliper types, be sure to check out our  guide to the differences between dial and digital calipers.
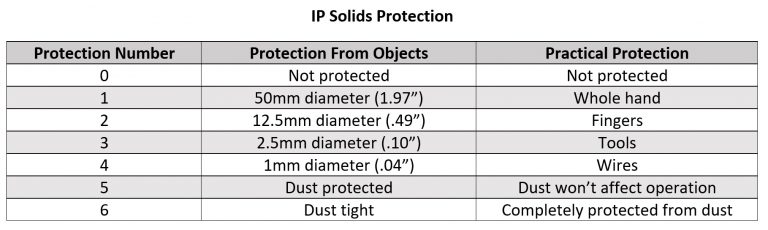
IP ratings

Ingress protection rating or IP rating for short is the amount of resistance a device has to things such as dirt and water. 

Many digital calipers have no protection rating at all.

For the ones that do, IP54 is the most common rating. This equates to limited protection from dust and protection from splashing water which will be more than most users require.

The less frequent IP67 rating is excellent and means they are almost impervious to everyday dirt and water.

Keep in mind though that IP ratings don’t protect the tool from physical damage such as being dropped.

The chart below outlines how protected a tool is. The first digit in any IP rating is for the solids protection and the second digit covers the protection from liquids.

ingress protection (IP) ratings solids description
ingress protection (IP) ratings liquid protection

Materials

Adoric digital caliper display
Carbon fiber digital caliper from Adoric

For most applications you will want to get a caliper made of stainless steel. Other materials available include carbon fiber composites and plastic. 

While tools made of carbon fiber and plastic are generally not as nice in quality as those made of stainless steel, they do have some benefits. Carbon fiber and plastic calipers are less likely to scratch or damage softer materials such as wood or plastic. 

Stainless steel calipers tend to have sharp jaws that can scratch some materials but if you are careful in their use, there shouldn’t be any issues. Carbon fiber composites and plastic also have the benefit of being non-magnetic.

Calibration certificates

Some calipers are sold with a calibration certificate for a decent upcharge. Skip it. The tool should be accurate when purchased, regardless of whether it comes with a certificate or not.

The best practice is to verify the accuracy of the caliper when you receive it. Check the tool against a known standard such as a set of gauge blocks. At a bare minimum, verify the zero position before using your gauge.

Cases

VINCA digital caliper in case unwrapped
A Case Provides Much Needed Protection

A case is an important accessory for a digital caliper. These are precision measuring instruments after all and all too often they get knocked off a workbench or dropped by a careless coworker. 

Keeping them in a case will add a layer of protection to help keep them safe. Cases come standard with calipers from the the best toolmakers such as Starrett, Mitutoyo, Fowler and Brown and Sharpe. 

They do not come standard for cheaper tools so keep that in mind when looking at those budget friendly options.

Data transfer

An RS232 port can be a handy addition to your caliper, but is certainly not a necessity. A RS232 port allows the transfer of data/measurements from your caliper to your computer.

For most users this is an unneeded feature, but for some applications it can be handy to record the data directly to your computer.

Our top picks

Now that you know what we consider when reviewing the best calipers, let’s find out who is making the best in class calipers. 

Spoiler: there’s someone new on the list

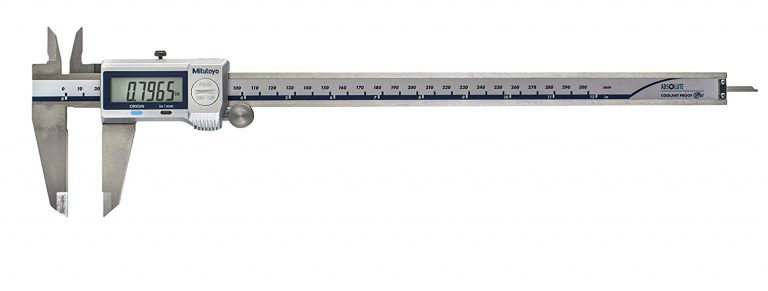
Mitutoyo 500-196-30 Digital Caliper

plus symbol

Pros

Accuracy
Dependability
Battery life

minus symbol

Cons

Cost

Accuracy: +/- 0.001”/.0254 mm

Measuring units: Inches, mm

Warranty length: One year

Battery used: 1 SR44 (included)

Amazing accuracy, excellent battery life and protection from dirt, water and oil. Mitutoyo makes a digital caliper that is everything you would want in a precision measuring tool.

These calipers from Mitutoyo are a reliable and consistently accurate measuring instrument. Perfect for reloading, engine work or every day use in a machine shop. 

Basically, Mitutoyo has set the standard for what a digital caliper should be and maintained that standard for a long time. In fact, if you can find a used set do be afraid to pick them up. 

These calipers are heirloom quality.

That isn’t something you would normally say about something electronic, but these digital calipers from Mitutoyo break the mold and are built to last.

Everything about these calipers is well-made.

  • Quality stainless steel frame
  • Solid plastic body
  • Buttons that just feel nice and are easy to use
  • Large, easy to read LCD display
  • Better battery life than any other caliper I have seen (Mitutoyo claims 3.5 years – it might be longer)

Combine these things with the dependable accuracy and you got a tool that is truly best in class.

VINCA DCLA-0605 Digital Caliper

plus symbol

Pros

Price
Customer service

minus symbol

Cons

No IP rating

Accuracy: +/- 0.001”/.0254 mm

Measuring units: Inches, mm, fractions

Warranty length: One year

Battery used: LR44 (included)

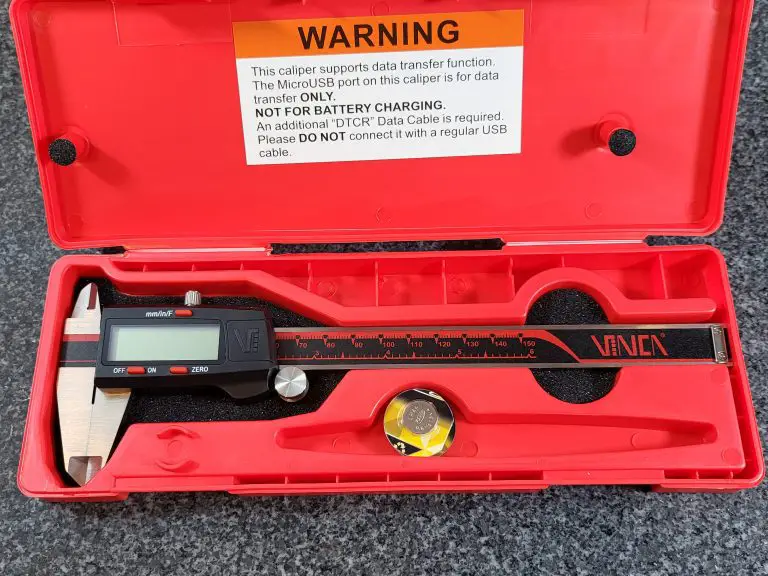
If you’re just getting into machining and you’re a bit nervous about dropping a lot of money on a high-end caliper like the one above, then this budget-friendly VINCA just might be the tool for you.

First and foremost, it’s a very accurate caliper for the price, with an accuracy of +/- 0.001″/.0254 mm. These are measuring devices after all. They need to be accurate.

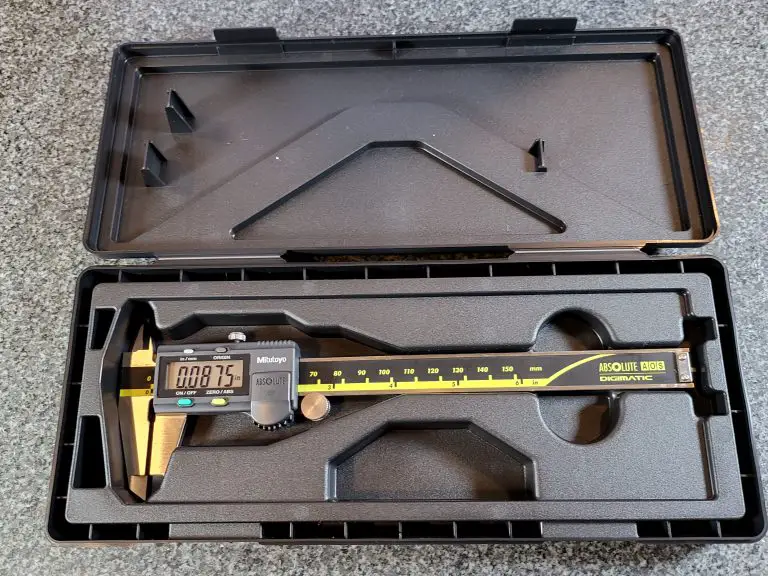
While it is made of stainless steel, you’ll also be happy that this caliper comes with a heavy-duty case to keep it protected at all times when it’s not in use.

The LCD display face is fairly large, however you should note that the way the values are displayed is a little awkward, especially when measuring in inches. It appears VINCA did this to allow fractional measurements.

This isn’t something that is a deal breaker but worth noting because some of the numbers you will be reading are only half the size of the screen.

Battery life is good on these VINCA calipers. Take note that they automatically turn on when the caliper moves which can cause them to drain the battery faster even when not in use. Using the lock to gently keep them in place will go a long way towards extending your battery life and keeping them ready to use when you need them.

An excellent bonus feature of this caliper is the RS232 port which allows you to plug the caliper right into your computer. This is something that is rarely seen with budget priced calipers.

Digitally transferring readings can be super helpful, because it’s so easy to fat-finger a measurement if when entering them manually. 

Overall, these VINCA digital calipers are a great value for the price. They aren’t quite on the same level as some of the higher end measuring tools but they make an excellent starter set that doesn’t break the bank.

Starrett 798A-6 0-6″ Digital Caliper

plus symbol

Pros

Protection from the elements
Accuracy

minus symbol

Cons

Expensive

Accuracy: +/- 0.001”/.0254 mm

Measuring units: Inches, mm

Warranty length: One year

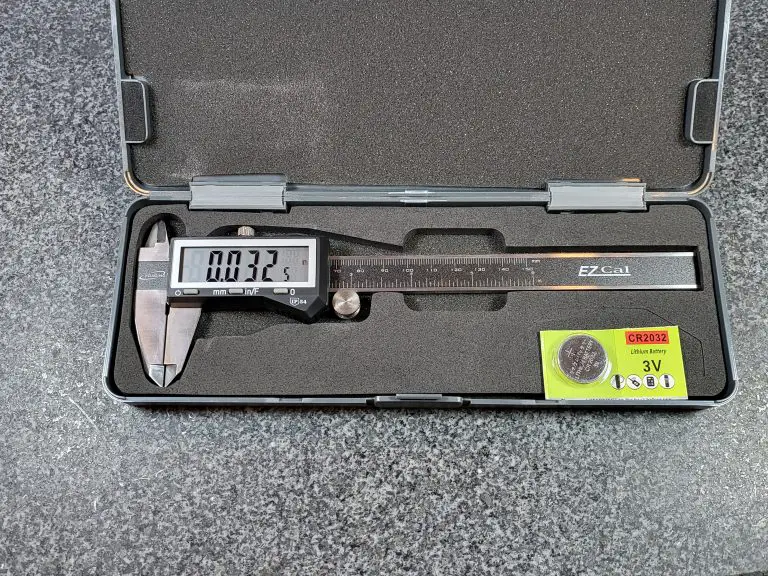
Battery used: CR 2032 3V (included)

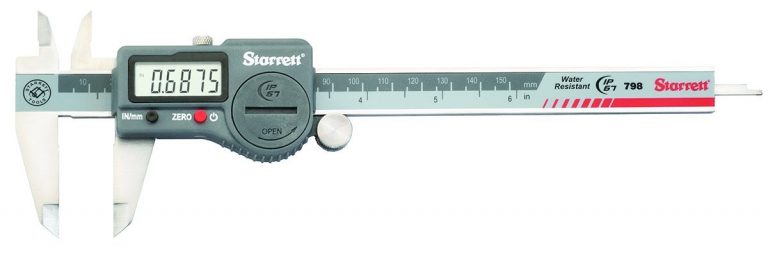
It’s tough to do a review about calipers and not include anything made by Starrett. Starrett is an industry leader, and for decades has carried a solid reputation for making incredible products.

This heavy-duty digital caliper from them has an accuracy of 0.001″, or 0.254 mm and a resolution 0.0005″ or 0.010 mm. Exactly the type of precision you would expect in a quality measuring tool.

When it comes to build quality, the stainless steel bar of this caliper is designed to last just like many other Starrett tools and the case it comes with only helps to extend the life of your caliper by keeping it safe when you’re not using it.

This display is easy to read and quite large. The buttons work as designed and overall the 798A-6 functions exactly as intended and just feels very well built.

However, the real reason you’ll want to buy this caliper is because of how rugged this thing is.

The 798A-6 is rated IP67. IP stands for ingress protection. This is a measure of the amount of resistance a device has to dirt, water, and other contaminants. For a full breakdown of IP ratings, see our rundown in the Things to Consider section.

Just know that most digital calipers, especially lower priced models, often offer no IP rating at all. The better models that do offer some form of IP rating are usually rated IP54. The IP67 rating of this Starrett is a significant jump up in protection.

One thing to keep in mind is that the IP rating doesn’t protect against damage from drops or other physical damage. You’re going to still need to treat it carefully. But let’s face it, we aren’t always working in the most pristine environments.

While the added protection that the Starrett caliper offers is welcome, it does come at a cost. Mechanics and machinists have known for a long time the value of a tool that can withstand a little abuse. Whether that is necessary for you situation is something you will need to decide.

I can’t say that I know of anyone who has regretted spending the extra to step up and get a tool from Starrett.

iGaging IP54 0-6″ Digital Caliper

plus symbol

Pros

Large display
IP54 rated

minus symbol

Cons

No auto power off feature

Accuracy: +/- .001”/0.02mm

Measuring units: Inches, mm, fractions

Warranty length: Two years

Battery used: CR 2032 3V (included with spare)

While they are a budget tool manufacturer, iGaging has been around awhile and made quite a name for themselves providing decent tools for a much lower price.

Made of stainless steel, this iGaging caliper has an accuracy of +/- .001” or .02mm, and a resolution of .0005” or .01mm which is directly in line with the capabilities of higher priced tools. Fractional measurements are taken in increments of 1/128″

We tested the accuracy and it performed wonderfully reading spot on in all inside, outside and depth measurements taken across the measuring range. It even comes with a calibration certificate. Most budget priced tools skip this.

This is a solid set of calipers, especially for the price. The LCD display is large and skips the weirdness that other calipers such as the VINCA DCLA-0605 has because of the fractional units. 

igaging ip54 digital caliper display fractions

But the real standout feature of this caliper is just how tough it is given its price. The iGaging caliper has an IP54 rating, which, as we mentioned earlier, is the average rating for calipers with an IP score.

However, given the price point, this is a very uncommon feature for calipers in this price range. Most will have no IP rating at all.

Being a budget caliper, but still offering protection from dust, oil, water, and other contaminants is what sets this caliper apart from others in its class.

Another nice thing about this caliper is the 2-year warranty. You’ll notice that a lot of the calipers on this list are given a 1-year warranty which is still higher than the average warranty. 2 years provides quite a bit of assurance that the caliper will function for a good long time.

igaging ip54 digital caliper in box with battery

One small drawback of this caliper is that the on/off power function is manual. What this means is that you need to remember to hit the power  button every time you are done using it or else you’ll drain the battery. Many digital calipers will feature an auto off feature to extend the battery life.

Overall, the IP rating this tool has offsets any issues with battery life. iGaging has done a great job of making a budget priced tool that stacks up well in most areas against some of the most well known measuring tool manufacturers.

Mitutoyo 500-754-20 0-12″ Digital Caliper

plus symbol

Pros

Large measuring range
IP67 rated

minus symbol

Cons

Very expensive

Accuracy: +/- .0015”/0.0385mm.

Measuring units: Inches, mm

Warranty length: One year

Battery used: 1 SR44 (included)

We’ve included another Mitutoyo caliper on this list because this caliper is a bit different than the other one. For one, it’s got a much larger measuring range, going from 0-12″.

While measuring above 6″ is less likely, especially for beginners, this caliper gives you the option for larger measurements when needed.

Keep in mind that you wouldn’t want this as a replacement for a 6″ caliper, instead larger calipers such as a 12 or 24″ model will get used in addition to a 6″ caliper.

There are situations where you might need to measure something larger and the 6″ caliper just won’t do. But anytime you are measuring a smaller size, a large format caliper such as this will be difficult and awkward to use. Not to mention it won’t fit into tight spaces well.

You should also take not that the accuracy is slightly reduced because it needs to maintain that accuracy over a larger measuring range. This caliper has an accuracy of +/- .0015″/0.0385mm which is pretty good. 

You will find that some of the budget tool makers will spec their 12″ digital calipers with an accuracy of +/- .001″, which on paper looks like they are better than this Mitutoyo. In reality, they are often far worse than that. This is especially true if you move up to a 24″ caliper.

The Mitutoyo 500-754-20 comes with a whopping IP67 rating, meaning it’s super water and dust resistant. Having that level of protection on a tool that costs this much is important because you wouldn’t a splash of coolant or oil to destroy your prized measuring tool.

While it’s an expensive tool, if you have bigger projects that you plan on working with, then it’s well worth the money. And, as we touched on earlier, Mitutoyo is a premium brand in the industry, so if you do pull the trigger and decide to buy this caliper you won’t be disappointed in the quality of the product.

If you must go the budget route with a large range digital caliper, then be extremely aware of the accuracy you need and what the tool can actually provide. They might not line up.

I know everyone doesn’t have unlimited budgets so if you need to keep costs down, think about looking for a used Mitutoyo or Starrett digital caliper (good luck) or maybe going with a good quality dial caliper instead. Remember, that your large calipers are going to see much less use than a standard 6″ version.

All in all there are a lot of choices available nowadays when it comes to digital calipers and they are not created equal. 

Mitutoyo and Starrett lead the pack but they do come at a cost. 

Tools that have IP protection will help them last but may not always be a necessity for each user.

For smaller 6″ calipers, you can get a serviceable option that will often get the job done at a fraction of the cost. 

When it comes to larger calipers, don’t believe the claimed accuracy on those budget tools. 

9 Best CNC and Machining Books

Whether you are a seasoned machinist or a machine operator starting a new career, a good book can go a long way towards developing your understanding of the parts, pieces and processes involved in the machining trade.

We have laid out our recommendations for all skill levels and even included some quality choices for topics such as CAD and GD&T.

Check out Machinist Guides picks for best machining and CNC related books!

Best Beginner Machining Book

Machining Fundamentals

It’s not quite machining for dummies, but this text is easily the most beginner friendly book while also going in depth on the subject.

If you take a beginner machining course, this is likely the textbook that will be used. It covers everything from manual machining to CNC and everything in between. This textbook does a good job of not assuming you have previous knowledge and instead teaches all the basics and then some in an easy-to-understand format.

One of the best things about this title is that there are a lot of pictures to show you what is being taught. There is no better beginner’s book for machining. If you are looking for something that is primarily focused on CNC machining then look for one of the books listed below instead.

Best Beginner CNC Book

Machining and CNC Technology

Machining and CNC Technology is a great overall machining book similar to our Best Beginner Machining Book. 

Where this book excels is in providing an excellent introduction to CNC related topics. Too often the actual operation and setup of the machine are not given enough coverage. 

This book gives a great introduction to CNC machining and covers everything from machine setup to program planning and g code tutorials.

Machining and CNC Technology is another textbook that is so thorough it is often used for training in machine tool classes.

Best CNC Programming Book

CNC Programming Handbook

Not a book for beginners. The CNC Programming Handbook by Peter Smid goes in depth on just about every CNC programming related topic.

Everything is covered and in great detail. Personally, this isn’t the type of text I would read straight through. Instead, I recommend using it like a CNC version of the Machinery’s Handbook.

This is absolute CNC reference grade material.

The CNC Programming Handbook makes a great comprehensive desk reference. When it comes to learning CNC programming, if this book doesn’t have it then most likely no book does.

You won’t need it on a daily basis but when you come across a topic that you don’t understand, it will be an invaluable resource.

Best Beginner GD&T Book

2018 Ultimate GD&T Pocket Guide 

GD&T can be a complex topic to learn. Our best GD&T book recommendation is 488 pages! That’s a lot of information to take in. 

Luckily, there are many different “pocket guides” out there that condense it down to a beginner level so you can comprehend the basics.

This pocket guide does a good job of covering the most common applications of GD&T and it’s likely that unless you are working in inspection, it will cover everything that you need.

Even experienced inspectors can benefit from having a quick reference handy.

Best Geometric Dimensioning and Tolerancing (GD&T) Book

GD&T: Application and Interpretation 

Geometric dimensioning and tolerancing can be a difficult subject to tackle. Fortunately, this book by Bruce Wilson does a great job of breaking it down into smaller pieces.

In my opinion, when it comes it GD&T related matters, a picture says a thousand words. Luckily this book contains countless examples to make understanding some of the more difficult concepts of GD&T much simpler.

One item worth noting is that this book is based on the ASME Y14.5 2018 revision. This is the most recent revision of the drawing standard and many other textbooks available are based on older revisions of the standard. For reference, 2009 was the previous revision of ASME Y14.5.

Note: If your shop doesn’t have a copy (which they should), more experienced GD&T users may want to consider a copy of the ASME Y14.5-2018 standard to have around for reference as well.

Best Overall Machinist Reference Book

Machinery’s Handbook

This is the book by which all other references are judged. Machinery’s Handbook, which is often referred to as the Machinist Handbook, is the quintessential reference for all machining.

This is not a book for beginners, but instead for someone who already has some knowledge of machining. Every machine shop should and likely already does have a copy or two laying around. Each new edition continues to add new and relevant content to an already extensive collection of important information.

Don’t be afraid to pick up a previous edition if you can find it used or cheaper. The difference between one edition isn’t that great. Just avoid a copy that is five or ten editions out of date.

Every machinist should have a copy of this book available to them.

Best Beginner CAD Book

Fusion 360 for Makers

If you are just getting started with CAD, then in all likelihood you will be working with Fusion 360. Fusion 360 is a free (for personal use) piece of CAD software from Autodesk, makers of Inventor.  Inventor is one of the most popular pieces of drafting software used in machine shops around the world.

Learning Fusion 360 will teach you skills which will transfer to other more advanced pieces of software. Although, I should point out that Fusion 360 is no slouch and will allow you to create some pretty advanced widgets and doodads if you take the time to learn it.

Fusion 360 for Makers is a great starting point for newbies to learn the basics and get acquainted with the software.

Best Budget Beginner Book for Lathes

Basic Lathework for Home Machinists 

If you are just getting started with lathes and are looking for a guide to start you off cheap then this is the book. It is not the most comprehensive, but it does a good job laying things out for beginners.

The abundance of pictures helps machining newbies wrap their head around the parts and processes involved with metal lathes. The only complaint would be that the pictures are in black and white which makes it a little bit harder to see some of the finer details in the photos.

If you aren’t ready to dive into a literal textbook yet, then this book can get you started at a budget friendly price.

Best Budget Beginner Book for Mills

The Milling Machine for Home Machinists

Just like Basic Lathework for Home Machinists, this book is a good starter book.

One area where The Milling Machine for Home Machinists excels is the color pictures. There are a lot of them and they make it easier to understand the topics being covered.

This is not the book you want if you have been running a mill for any length of time. It covers entry level material only. Once you fully understand the information covered, think about stepping up to one of the more comprehensive machining books for beginners such as Machining Fundamentals or Machining and CNC Technology.

Conclusion

Thanks for checking out our guide to the best machining and CNC books. Hopefully they help add to your physical and mental library.

P.S. If you have a good recommendation for a machining book please share it in the comments below.

Related articles

11 Best 3018 Series CNC Upgrades and Accessories

Why do they have to make so many cool toys for adults?

Actually, I suppose it’s not the toys that are the problem, but instead it’s the cost of the toys.

Luckily if you recently purchased a 3018 series CNC such as the SainSmart Genmitsu series, MYSWEETY or one of the numerous other manufacturers out there, there are some relatively cheap or homemade upgrades to trick out your new machine.

Check out our list below to find out how to improve your 3018 CNC without breaking the bank.

Safety glasses

First and foremost, you should make sure you have a quality set of safety glasses. While these are small machines that are not as high powered as industrial CNCs, they are still dangerous.

Read your instructions. Wear safety glasses and it’s a good idea to have ear protection too.

Enclosure

An enclosure is one of the best upgrades for any hobbyist CNC. These machines can create a lot of dust and noise. It is a good idea to reduce both, especially if running the machine in your normal living area.

The enclosures are pretty straight forward. Assemble the box and place it over your machine to start reducing the volume of dust and noise created by your CNC.

If you have a 3D printer and are so inclined, it is possible to construct your own with some PLA, pieces of plexiglass and a little elbow grease.

Vise clamp

Larger CNCs use a machinist vise to hold the workpiece. This vise is a smaller version for the 3018 series of CNC machines. They work great to secure a variety of materials.

This tool is especially useful for holding parts which are an unusual shape such as jewelry or some electronics.

Many different forms of work holding are available such as clamps and T nuts but a vise is a simple way to hold a large assortment of material. Compared to other types of workholding, a vise will decrease setup time and increase productivity.

T nuts

If a vise is too costly for securing your workpiece. Think about some T nuts. They aren’t as fast but they are versatile and a vast improvement over the typical clamps included with most of the 3018 series CNCs.

Check out our bonus tips for ways to protect your workpiece while using T nuts.

Router bits and cutters

Upgraded router bits and end mills are an important addition. 

But not every type of bit is worth buying. 

Check out our Beginner’s Guide to CNC Router Bits to figure out which ones you need to get started and which ones are fun toys for later on.

Rotary engraving module

The 3018 series of CNC are capable of laser engraving but for anyone looking to laser engrave cylindrical objects such as cups, tumblers, etc. this is the perfect solution.

The rotary engraving module will allow you to rotate the workpiece to allow the part to stay in the lasers ideal path. This will allow uniform engraving of the workpiece around the circumference of the engraved piece.

This isn’t an upgrade for everyone but if you have a specific application in mind which requires laser engraving a circular object then think about checking out this upgrade.

Collets

Different collets are a great addition for a 3018 series CNC. They allow you to use many different size bits or end mills to machine your workpiece with. At the bare minimum it would be wise to consider adding a ¼” ER11 collet. For a little more you can get a set that will allow just about any bit or end mill that you would want to use.

There is no need to break the bank on ER11 collets for a 3018 CNC. The added quality and reduction in runout won’t translate to a big difference in quality for your projects. A simple set is the best choice.

Z axis touch setting probe

No one likes setting Z axis heights with paper. It feels imprecise and clumsy. Luckily, there is a simple and cheap upgrade which will allow you to make the process simpler and more accurate.

The probe is very easy to use. First connect the probe to your control board. Now measure the height of the probe with a tool such as a digital caliper or micrometer.

The thickness of the probe now needs to be entered into the CNC software. Place the probe on the workpiece and then connect the clip to the cutting tool. Run the probing program and lower the cutting tool slowly until it contacts the probe. The Z axis will now be set.

For more detailed instructions check the manufacturer’s website, they have a nice tutorial.

You can make your own if you wish but for the price it is hard to justify messing with a homemade tool.

If a homemade tool is more your speed then check out this tutorial which will walk you through creating your own Z axis touch setting probe.

The cost of the homemade tool is close to the cost of an actual probe but you might have some of the supplies on hand already which will bring the cost down.

Limit switches

Limit switches are a great addition to a 3018 CNC machine. Without them it is all too easy to crash your machine. While crashing the machine won’t always cause damage, it is a definite possibility.

Honestly, the machines should all come with limit switches to protect the machine from damage but I am sure that the manufacturers are trying to keep the cost down as much as possible and therefore did not include them in some versions of the 3018 CNC.

The 3018 series of CNC machines are pretty budget friendly but that doesn’t mean you want to scrap the machine right away.

Take note that adding limit switches will reduce your work area by a small amount. While this is unfortunate, it is definitely a recommended upgrade to protect your machine especially at the relatively small cost of the upgrade.

Storage tray

As you gain more experience with your CNC machine, it is inevitable that you will develop quite the collection of bits and end mills. A good storage solution is a must to protect your bits from damage.

The storage tray has holes for many different sizes of bits and end mills along with storage for miscellaneous other tools. The tray from Genmitsu does a great job of organizing all the little odds and ends along with your cutting tools.

If you have a 3D printer then check out Thingiverse for storage trays. You should be able to find something similar that will meet your needs. If you don’t have a 3D printer then you might be able to find something that will work at the dollar store.

The important thing is to keep your tools organized and protected so that they will remain sharp and ready for your next project.

Wire and cable protectors

Those with experience working with a 3D printer will likely recognize the value of a good wire/cable protector. This is often one of the first things printed when someone buys a new 3D printer and for good reason.

The movement of the machine back and forth in the process of cutting or engraving means that there is some risk that the wires will snag on some portion of the machine. The cable protectors will keep this from happening.

If you have a 3D printer already, take a peek on Thingiverse to see if there are any plans or find a premade alternative somewhere else like Amazon.

Bonus tips for your 3018 CNC

One great way to hold down projects that are difficult to secure for all types of reasons is to place blue painters tape on the bed and the workpiece. Now use an adhesive to glue the two sections of painters tape together. The tape and glue combo will hold the part and once you are done, you can simply peel the painters tape off.

3D printed holding fixtures can be a great addition and allow more versatility in what you can machine. Check out Thingiverse for all kinds of 3D printed addons.

Use felt furniture sliders from the dollar store with clamps or t nuts to protect surface of delicate workpieces.

If you have any additional tips you learned experimenting with your 3018 CNC please let us know and we will happily share them here to save others some of the headaches that come with learning how to work with a new machine.

Best Beginner CNC Machines and Routers

Whether you want to learn a new skill, work on a pet project, or start a small business there is a CNC machine or router for you. CNCs, which are generally thought of as being ridiculously expensive don’t have to be.

These beginner machines prove the assumption wrong. While you won’t be able to cut a giant chuck of hardened steel with them, they will cut through wood, plastic and other soft materials like butter. With the right machine and some tweaking you might even cut aluminum.

All of the CNC machines listed below are excellent machines. However, it is important to take note of some of features such as the work area of the machine. Feel free to skip to the end of this article to see our comprehensive list of things to consider when looking for your first CNC machine or router.

Budgets vary, but all of these machines should be considered affordable, entry level CNC machines that are extremely capable.

Now, let’s get to the meat and potatoes and find out which machines top our list.

Name

Awards

Work Area

Where to Buy

BobsCNC Evolution 4 CNC Router Kit

Best Overall CNC,
Best for Woodworking & Carving

24"x24"x3.3"

SainSmart Genmitsu CNC 3018-PRO

Best Budget CNC,
Best CNC for Beginners

11.8"x7.0"x1.7"

SainSmart Genmitsu 3018-PROVer

Best Mini CNC,
Best CNC under $1,000

11.8"x7.0"x1.7"

MYSWEETY DIY CNC 3018-PRO

Best Beginner CNC Router and Laser Engraver Combo

11.8"x7.0"x1.7"

BobsCNC Evolution 4 CNC Router Kit

plus symbol

Pros

Customer support is second to none
Large work area - great for making bigger signs

minus symbol

Cons

More detailed assembly
Not setup for laser engraving

Materials it will cut: Wood, plastic, soft aluminum, acrylic, PCB, leather, others possible with experimentation

Work area: 24” x 24” x 3.3” = 610 mm x 610 mm x 85 mm

Warranty: 60 Days

BobsCNC makes machines that are a pretty big step above other entry level CNC machines. Bobs makes machines that are aimed at users that want to machine wood, plastic and other soft materials. CNC wood routing is their specialty.

Size matters and the work area of the Evolution 4 (E4) is two to three times larger than other machines. This makes a huge difference in what you can make. 

Many people use the E4 for making CNC routed signs or art. BobsCNC even has some “unofficial” plans that allow you to expand the machine even more. The work area can be expanded to 24”x48”x3”.

One downfall is that the E4 is not designed to be used with a laser. The company claims this is for safety reasons and honestly it makes a lot of sense. Lasers can be very dangerous. 

Many of the beginner level laser engravers have a small work area. This makes it easier to build an enclosure for protection. The E4 is a much larger machine.

A key difference of the E4 when compared to other starter CNCs is that the setup is more involved. 

While other machines often arrive mostly assembled, this is not the case with machines from BobsCNC. You will need to assemble everything yourself. It will likely take a day or two but you will develop a good understanding of the machine itself doing it. 

Luckily, the included instructions are detailed and thorough. If there are any questions, there are plenty of good resources on YouTube and in Facebook groups.

Speaking of questions, if you have any issues BobsCNC has top notch support. Like ridiculously good support. By all accounts they are extremely fast to respond. It is not unheard of for Bob himself to respond and help to troubleshoot any issues by phone or email outside of normal working hours.

A couple things to know about the E4:

It’s louder than most entry level machines. The router/spindle is a real power tool, so it makes quite a bit of noise.

It’s messy. The E4 is capable of cutting a lot more than other entry level machines. This means it generates substantially more dust as a result. Think about getting a dust shoe and dust collection system to keep things tidy.

Overall, the Evolution 4 from BobsCNC is an extremely well designed and built product. It does exactly what it is meant to do, which is CNC routing of wood and other soft materials. Some light metal work might be possible but realize this is still a starter tool.

In the end, I think a picture is worth a thousand words so check out the gallery on BobsCNC to get an idea of the types of projects you can make.

SainSmart Genmitsu CNC 3018-PRO

plus symbol

Pros

Easy assembly
Great for beginners
Easily switch to laser engraving

minus symbol

Cons

Limited work area

Materials it will cut: Wood, plastic, soft aluminum, acrylic, PCB, leather, others possible with experimentation

Work area: 30 cm x 18 cm x 4.5 cm = 300 mm x 180 mm x 45 mm = 11.8” x 7.0” x 1.7”

Warranty: 1 Year

The 3018 Pro is a great starter CNC machine. Primarily meant to be used for engraving, it is extremely well built for such a budget friendly machine.

The 3018 Pro will easily cut softer materials such as plastic and wood. Metals are a little more of a challenge. 

Aluminum can be cut but it will require playing with the speeds and feeds to find something that works for your machine and cutting tools. Other soft metals may be possible but expect to experiment quite a bit. 

This is a nicely built machine. The frame is rigid and assembly is easy.

The 3018 Pro can easily be switched to a laser engraver by purchasing a laser unit and swapping it in place of the router/spindle. The swap only takes 2-3 minutes on the machine.

The Genmitsu 3018 Pro is an excellent choice for anyone who is just starting out with CNC. 

The one big downfall of the 3018 Pro is the work area. You simply won’t be able to work on large projects. 

The manufacturer’s support and communities such as the dedicated Facebook group are a huge help to those trying to learn CNC. Because these 3018 CNCs are so common, chances are that any question you have has already been answered.

The Genmitsu 3018 Pro is a quality, versatile machine for beginner level CNC machining, routing and laser engraving.

SainSmart Genmitsu 3018-PROVer

plus symbol

Pros

Pre-assembled
Comes with most common upgrades

minus symbol

Cons

Not a full enclosure

Materials it will cut: Wood, plastic, soft aluminum, acrylic, PCB, leather, others possible with experimentation

Work area: 30 cm x 18 cm x 4.5 cm = 300 mm x 180 mm x 45 mm = 11.8” x 7.0” x 1.7”

Warranty: 1 Year

Essentially the Genmitsu 3018-PROVer is the same as the Genmitsu 3018 with the exception that it comes with almost all of the upgrades that people normally add on to their machine.

Let’s get to the upgrades.

One area which is nicely improved is the body of the 3018-PROVer. It is now all aluminum. This improves the rigidity of the machine which increases cutting performance. 

The drivers have been upgraded too. They are more powerful while also being much quieter. This is a nice change for anyone who might be operating the machine in close proximity to their neighbors.

Limit switches have been added which help to keep your machine from crashing. While these are a great addition, it should be noted that they actually decrease the work area by a small amount. Not a huge concern but plan on losing a little travel.

The biggest change is the addition of an offline controller display and emergency stop button. The emergency stop or e-stop button is a welcome addition. 

The machine will crash. It’s inevitable. Being able to hit a big red stop button is fairly important. Emergency stop buttons are standard on anything bigger than an absolute beginner model and for good reason.

The offline controller allows you to run the machine without having a computer attached. For a good rundown of the offline controller check out this guide from the manufacturer.

The added side enclosures on the machine are just OK. They won’t contain all the noise or dust but they help a little. Not a big change over the other Genmitsu 3018 models. They feel kinda pointless because when it comes to dust, you need to go all out and get a full enclosure or just deal with the mess.

The last upgrade is the addition of a z-axis tool setting touch probe. This allows you to set the location of your part without messing with sheets of paper or something similar. 

Place the probe on the workpiece and connect the clip to your cutting tool. Lower the tool until it touches the probe. The machine will automatically set the height of your workpiece and you are ready to cut.

The Genmitsu 3018-PROVer is an excellent all-around CNC for the beginner. It combines the already stellar 3018-PRO CNC machine with the most common and beneficial upgrades to make setup and use easy.

MYSWEETY DIY CNC 3018-PRO

plus symbol

Pros

Easy to use laser engraving software

minus symbol

Cons

Laser focus lens

Materials it will cut: Wood, plastic, soft aluminum, acrylic, PCB, leather, others possible with experimentation

Work area: 30 cm x 18 cm x 4.5 cm = 300 mm x 180 mm x 45 mm = 11.8” x 7.0” x 1.7”

Warranty: 90 Days

The MYSWEETY CNC 3018-PRO is a great starter CNC machine especially for those looking to get into laser engraving. Overall the build is very similar to other 3018 model CNC machines. What sets it apart is the included laser.

The MYSWEETY comes in 3 different versions:

  • Large = 3 watt laser
  • Extra Large = 5 watt laser
  • Full Size = 7 watt laser

It’s an odd naming structure but I guess with a name like MYSWEETY maybe that should be expected.

The machine comes in need of full assembly. The included instructions leave something to be desired, so seek out some YouTube videos to help you along. Assembly should take about an hour, possibly a little longer to watch instructional videos.

The build is sturdy and most of the components are aluminum. Let’s talk about the included laser.

The lasers available are passable. Don’t expect to do much cutting with them. They are primarily for engraving. Remember these are beginner machines and whether you are CNC routing or laser engraving, they often end up lacking somewhat in the power department.

That being said, the included blue laser is capable of cutting smaller pieces of wood such as 1/8” balsa wood. It might just take some experimenting to get right.

A frequent complaint about the laser module is that the focus lens fits rather loosely. This makes it too easy to turn accidently. A little bit of Teflon tape on the threads will go a long way towards remedying the problem. This will keep your laser focused where it needs to be on the workpiece. A correctly focused laser will increase its performance.

Also included in the package is a set of laser safety glasses. Read the instructions and make sure to use these when operating the laser. Lasers can be quite dangerous. Safety first! You don’t want to put an eye out with this thing.

An offline controller comes as part of the package. This is a welcome addition for those who don’t want to dedicate a computer to the use of their CNC machine.

The software that comes with the MYSWEETY CNC-3018 PRO is a mixed bag. Laser engraving works very well and in most cases the machine can be setup and engraving in no time.

It is enough to get you started but if you want to get serious with laser engraving then you will want to pick up a copy of Lightburn sooner rather than later. It is reasonably priced and works extremely well.

Unfortunately, the software for the milling aspect isn’t quite as user friendly as the included laser software. Expect to take a little time to learn some of the intricacies of the program before you get you used to it. Or jump straight to one of the other software packages out there. Easel by Inventables can be a good starter software to make your first projects more simple to get going.

All in all, the MYSWEETY CNC-3018 PRO is a good beginner laser/mill combo for someone who is looking to get their feet wet in CNC routing and laser engraving. The build is in line with other entry level machines such as the Gemnitsu. It comes with a nice set of extras and makes an excellent learning tool. Small scale laser engraving is this machines specialty.

Conclusion

BobsCNC Evolution 4 Router Kit is the clear winner with a much larger work area and improved cutting performance when compared to other beginner CNC machines. 

The other CNC routers listed, such as the Genmitsus and MYSWEETY, can do most of the same tasks just on a much smaller scale. However, they do it at a budget friendly price.

The MYSWEETY machine makes a nice compromise between CNC routing and laser engraving if you aren’t sure which way you want to go yet and would like to try both out before stepping up to a more capable machine once you know which you like more.

Keep this in mind and check out the list of things to consider that follows to help you get started and if you have any questions, please leave them in the comments below. 

Things to consider

Safety

While some of these entry level machines can be “cute”, don’t let them fool you. These are powerful tools that are capable of causing serious damage. Treat them like the dangerous power tools that they are.

Read your instructions.

Wear property safety equipment including eye and ear protection.

Be careful and if you aren’t sure about something, don’t be afraid to reach out to the manufacturers or other learning resources to make sure you are being safe.

Size of work area

The size of the work area is very important part of a CNC machine. Many hobbyist machines do not have a large envelope that they are capable of cutting, routing or engraving in.

The Z axis (up and down) is always the axis with the least amount of travel. This will determine how thick of a work piece you are able to cut. Keep in mind that this will be further reduced by your tooling. If you have a long end mill or router bit that you are using, then it will shorten the thickness of the part which you are able to cut.

Please note that the physical dimensions of the CNC are not the same as the work area.

For example, the Genmitsu CNC 3018-PRO has a physical size of 15.7” x 13.0” x 9.4”. The work area is only 11.8” x 7.1” x 1.8”. Clearly there is a significant difference between the two. So make sure that you know the two specs are different and how they relate to what you can cut and where you can physically place your machine.

Speeds and feeds

Speeds and feeds can be a fairly complicated subject but here are some resources to get you started:

As you work with more difficult materials such as metals, you will find that the window of speeds and feeds that will work will shrinks up drastically. 

If you are sticking with soft stuff like wood or plastic, then your window for success will be more open and forgiving. For this reason, wood is a great material to practice with when you are first getting acquainted with your CNC.

CNC routers vs spindles

When it comes to beginner level CNC machines, the terms router and spindle are used almost interchangeably. Some machines, such as the ones from BobsCNC, use an actual router like you would buy at a hardware store. Others use spindles.

Practically, they are both simply motors that have a collet or chuck to hold a cutting tool such as a router bit or end mill. For the beginner level machines, an actual router such as one from Dewalt or Makita will be more powerful than the spindle included in similar machines.

Tooling

Tooling is your cutters. This includes router bits and end mills of all shapes and sizes. The right cutter will make all the difference when machining. Cutters can be purchased for many different types of materials.

Many CNC machines will come with some type of cutter right out of the box. They aren’t usually great. They will get you started however and as you gain experience you can look into adding additional tooling for your application.

The most important bits for getting started with you CNC are end mills (both flat bottom and ball nose), v bits and a surfacing bit. These are the first ones you will want to get and the first ones you will want to upgrade down the road. For a full guide check out our Ultimate Beginner’s Guide to CNC Router Bits.

Customer service

Pay attention to the level of customer service that the manufacturer provides. While the machines are not overly complex, they can pose some challenges for someone just starting.

Look for companies that are quick to reply and don’t be afraid to check their website for tutorials or additional information. While some of the foreign made machines might not have the best phone support, they often have support groups and communities that do an excellent job of helping you with any issues.

Software

There is a large variety of software that gets used on these machines. Covering them all would be a giant topic by itself. To get you started here is a quick rundown:

  • CAD or computer aided drafting is software that will allow you to create models to machine or engrave. This is only a drawing and needs further processing before your machine will know what to do with it. The most commonly used CAD software are Fusion 360 and Tinkercad
  • CAM or computer aided manufacturing is the software that takes your model and turns it into code that your CNC will understand. If you are familiar with 3D printers, CAM software is similar to slicing software. The most common CAM software are Fusion 360, CamBam, SheetCam and MeshCam.

A good starting point is to look into Fusion 360. It has an enormous number of tutorials on YouTube. You are likely to find help for any issue you run into and there are many guided courses on use of the software.

Related articles

Knurling – All About

What is knurling?

Knurling is the process of creating a pattern on a workpiece to improve the visual appearance or to create a better grip on the part. Knurling uses the tool to displace material. This moving of the workpiece material creates the knurled pattern. A great example of knurling is seen on the thimble of most micrometers. Knurling is also often used on various knobs to provide grip.

Types of knurling

straight knurling example
Straight knurling
diamond knurling example
Diamond knurling

There are four main types of knurling. These are straight knurling, diamond knurling, left hand and right hand knurling. Of these different knurling types, straight and diamond are by far the most commonly used. There are many variations of these patterns including fine, medium, and coarse versions of each. Fine knurling has the lowest profile whereas coarse knurling would have prominent ridges to provide greater friction for gripping.

Cut knurling vs form knurling

Cut and form knurling are the two methods of creating knurling.

Form knurling is the standard form of knurling. Form knurling is pressing the knurling tool into the workpiece to create the raised grooves or teeth.

Cut knurling scrapes away material instead to create the knurling pattern. Cut knurling is better for some materials such as plastic or Delrin.

Does knurling increase diameter?

Form knurling does increase the diameter of the workpiece. This happens because the knurling tool is displacing material (moving it) which pushes material in in some locations and out in others. The amount of increase depends upon whether the knurling is fine or coarse. Coarse knurling has more material displaced and therefore creates bigger valleys and mountains in the workpiece.

Cut knurling decreases the diameter of the workpiece. This occurs because material is removed from the part instead of moved around like in form knurling.

Can you knurl wood?

Yes, wood can be knurled but it is not as simple as knurling metal. Knurling really only works for hard woods in the same way as metal. However, a simple pattern can be created through a process called checkering.  

Can you knurl plastic?

Plastics can be knurled though usually in a different way. Cut knurling is often used instead of standard form knurling.

Can you knurl Delrin?

Yes, you can knurl acetal plastic, also known as Delrin. It will be more difficult than knurling metal but if you manage you speeds, feeds, and depth of cut carefully then you can come out with something that looks nice and is functional. Cut knurling is a good choice for Delrin.

Knurling tips

Do your knurling before your final finishing. Knurling applies pressure to the workpiece and can bend it.

Because the force on the workpiece is so big, make sure that everything is secure including the part and the cutter.

Multiple passes frequently yield the best results

Thoughts?

Got any knurling tips? Share them and we will add them to the list.