Let’s say you have some extra time on your hands, and you decide to build your own computer. Countless people do this every year, so surely it can’t be too difficult to find the necessary materials, right?
Then you realize you’re going to need some basic electrical wiring. Would you go search through a pile of old electronics and rip out whatever you can find?
Of course not.
You’re going to go find something that is meant for your build.
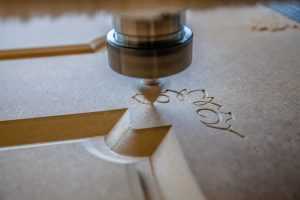
The same goes for CNC routing. You can’t (or at least shouldn’t) use just any old piece of wood you see lying around.
To build a nice project, you’ll need quality material, and we are going to help you figure out which ones are right for your use. Picking the right wood is especially important when you are making things to sell with your CNC.
We do our best to run through as many different types of wood for CNC routing that we could come up with, but if you just want the short and sweet version to help you pick a wood to work with check out our list of the best woods below.
Category | Wood Type |
Easiest wood for CNC routing (best for beginners) | Cherry |
Best wood for CNC carving | Walnut |
Best wood for CNC sign making | Cypress |
Best cheap wood for CNC routing | Poplar |
Best plywood for CNC routing | Birch |
Below is a lengthy list of various types of woods that you can use for CNC woodworking.
While the list may not include absolutely every type of wood you might want to use, it does hit the main ones
The cost of the different woods will vary by region and availability, but we have tried our best to assign a relative cost score to them.
Cost rating system
Keep it simple right? We used a scale of 1-5 dollar signs
$ = cheaper woods
$$$$$ = very expensive woods
Table of Contents
ToggleAlder
Cost: $
Alder wood is generally light and soft. Its structure is even with straight fibers. Highly pliant, alder wood is one of the preferred woods for furniture makers the world over.
Alder is pretty good for carving, though it can be a bit stringy at times.
Ash
Cost: $
Ash wood is strong, durable and generally light in color. It is coarse, but the grain is fairly straight. As a result of its strength and durability, ash wood has an array of uses but is commonly used in the making of tools, furniture and frames.
For routing, you might find moderate resistance with ash because it’s a stronger wood. Ash can tend to wear your cutters quicker than other, softer woods. If you’re going to use ash, make sure your cutters are sharp before you start.
Balsa
Cost: $
Balsa is the lightest and softest timber used commercially. Though it’s lightweight, balsa is also fairly coarse. It possesses an unusually high degree of buoyancy, and the wood is adaptable to a great number of special uses.
If you’re using softer balsa, it can be prone to tearing along the grain as the cutter goes past. It can also be hard to get a nicely finished edge with balsa.
Beech
Cost: $
Beech wood is known for its fine-textured straight and attractive grain, pliability, strength, and finishing ease. However, Beech wood has a fairly high shrinkage rate, which is why most beech wood ends up as paper.
When routing beech, you’ll likely want to have the router moving at a lower speed to avoid burning.
Birch
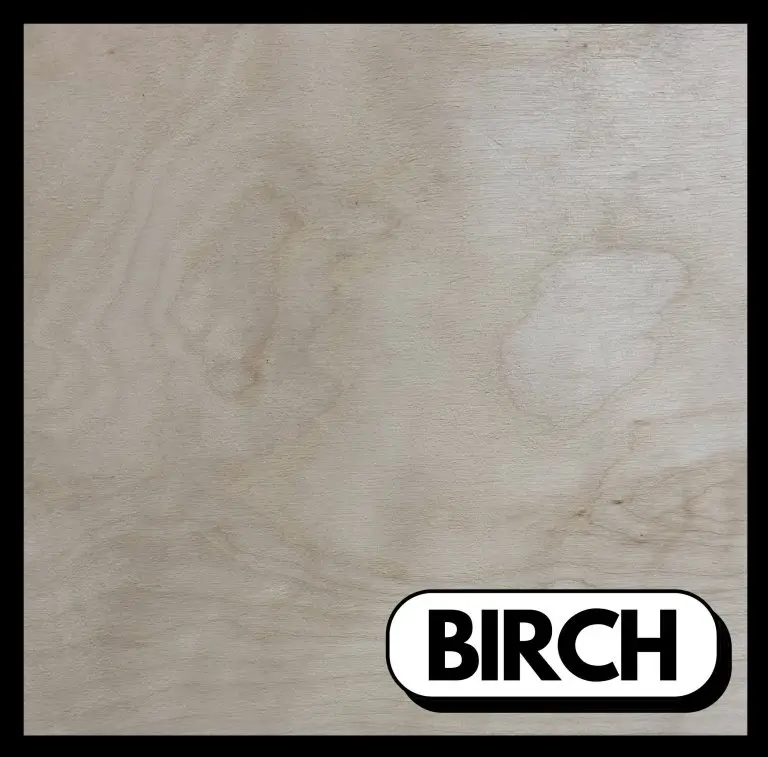
Cost: $
Birch is a stiff wood with light color and wavy grain.
When working with birch, you should go slow and take shallow passes. If routing in one direction causes a lot of splintering, turn the board around and go in the opposite direction. This hits the grain from a different direction. The splintering is caused by the bit digging into the grain. Going the other way stops that.
Birch plywood
Cost: $
For birch plywood, some good advice is to cut the chip load down to about half of what you would normally do.
You should also have your spindle speed as high as you can get it without overheating the cutting tool. For engraving, you will find that it is best to outline the toolpath first.
Cedar
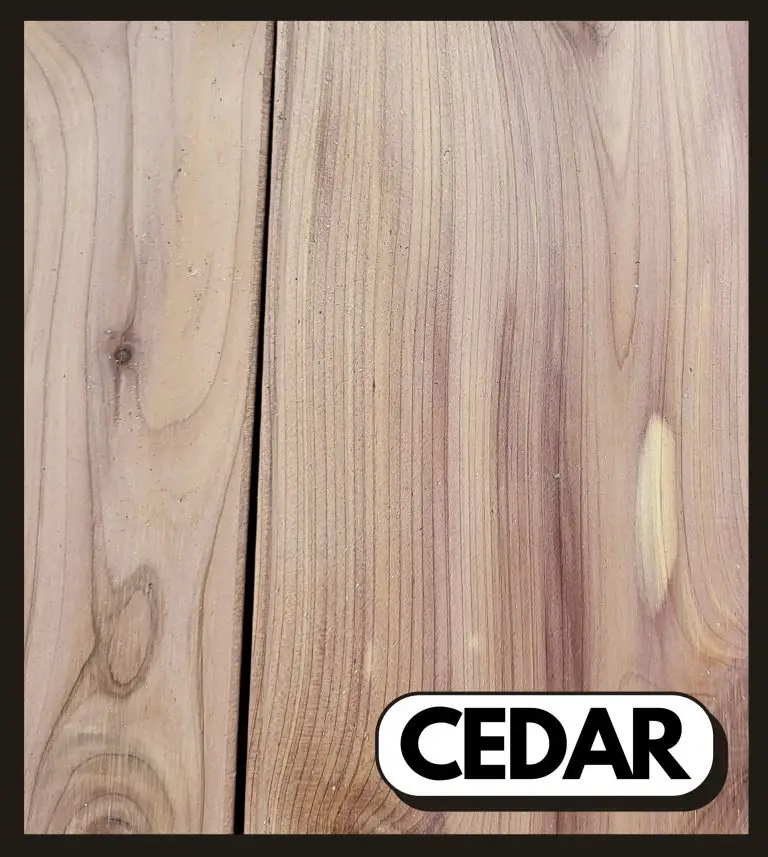
Cost: $$
Cedar has a nice smell and good color, but the knots in the wood can make it a bit difficult to work with.
Also, because it’s a softer wood, you need to be careful with tear outs – this is a common problem with cedar. To avoid the tear-out issue, try doing multiple passes.
There are some who swear by soaking and freezing cedar before working with it as a way to get a better finished product.
Cherry
Cost: $$$$
Cherry wood is hard, durable, resistant to rot and decay, and has a pretty good ability to withstand shock.
It’s also easy to carve, cut, and mold.
Cherry is interesting because it is a relatively soft hardwood.
In other words, cherry wood is a fantastic option for CNC wood routing, and you’ll find that it is popular among hobbyists and professionals alike. Cherry has a reputation for being easy to work with due to its versatility.
Cyprus
Cost: $
Cypress wood is extremely soft, and a lot of woodworkers will tell you that this stuff carves like butter.
Cypress is a really great option if you’re looking at making signs. Cypress also holds up extremely well outdoors. It is a decay-resistant wood.
One downside to cypress would be that it can be a knotty wood, similar to cedar.
In other words, cherry wood is a fantastic option for CNC wood routing, and you’ll find that it is popular among hobbyists and professionals alike. Cherry has a reputation for being easy to work with due to its versatility.
Elm
Cost: $$$
Elm wood has fairly open pores, which can lead to a lot of tear-outs if you’re not careful.
Some people also find Elm to be a bit stringy. However, elm is also known for being extremely tough, so if you can avoid tear-outs and your project isn’t too stringy, you will have your elm wood project for a long time to come.
Elm is a little pricier now than it used to be because “Dutch Elm Disease” wiped out a good portion of elms around the world.
Fir
Cost: $$
Fir has a nice consistent pattern and is pretty easy to work with.
Fir can have some issues with tear-outs, but most people can easily avoid these through climb cuts. Though Fir can splinter a bit, it isn’t known for having knots, which makes it easier to work with.
Mahogany
Cost: $$$$$
Many woodworkers the world over will consider genuine mahogany to be the best wood on the market.
It’s durable, stable, and looks beautiful. It’s a fairly hardwood but is easy to work with. Its mostly straight, open grains mean the wood rarely tears out.
When working with mahogany, you should go a bit slower in terms of your feeding, and don’t overload your carvers.
Maple
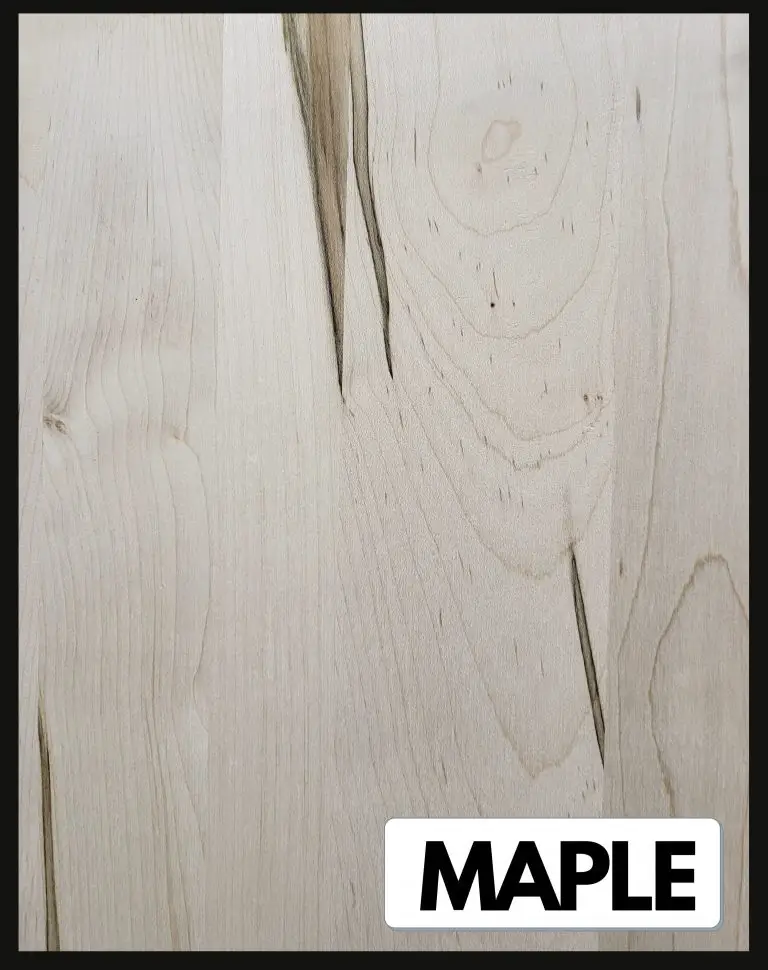
Cost: $$$$$
If you don’t have a ton of experience, maple can be a little bit difficult to work with.
The wood is extremely hard, so you’ll need very sharp cutters, though the maple will dull them while cutting.
You should also cut at a lower speed to prevent any burning. Though maple might be hard to work with, you’ll love the final product because it’s a beautiful wood.
MDF
Cost: $
Medium-density fiberboard is super cheap and versatile. MDF is basically sawdust and glue, so be prepared for a sandstorm when you’re working with it.
Still, people find MDF super easy to work with as it carves and cuts extremely easily.
Oak
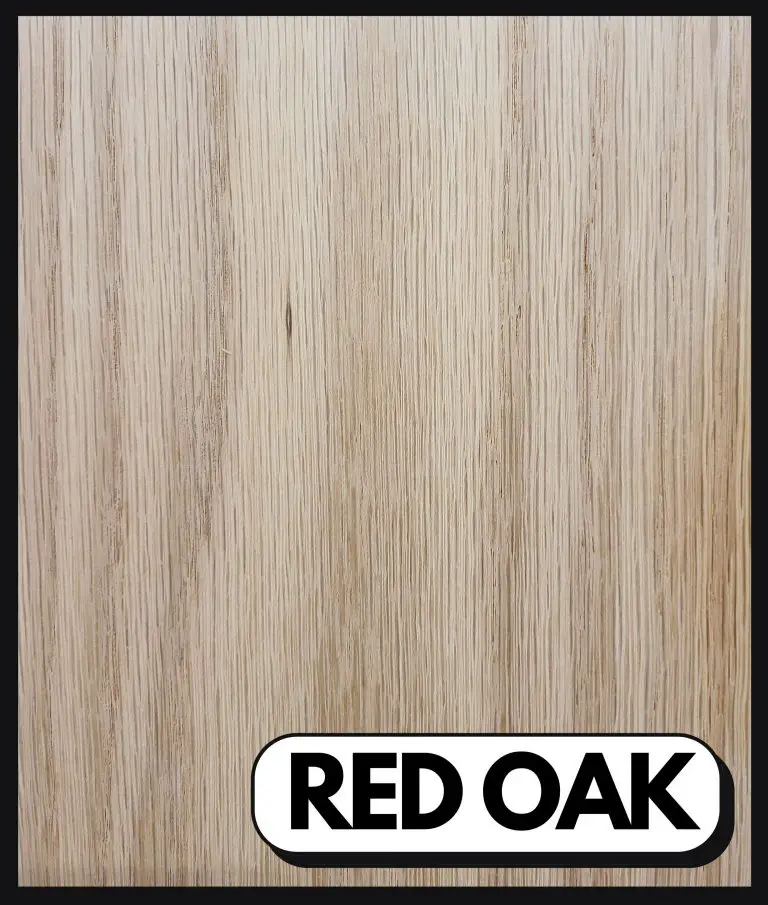
Cost: $$$$
Oak is a heavy, hard wood that rarely breaks. Since it’s so hard, you want to be a little careful when it comes to cutting.
Make smaller passes, and take multiple passes, so you don’t break any of your bits. Also, watch out for any burning.
Paduak
Cost: $$$
You’ll really like the way padauk carves but be sure to bring a sharp bit. The reason people like to work with Padauk is that it has nice, straight grains.
One thing to watch out for when working with Padauk is the dust. When you start cutting this wood, you’ll get a lot of dust, so you might find a dust boot helpful.
Pine
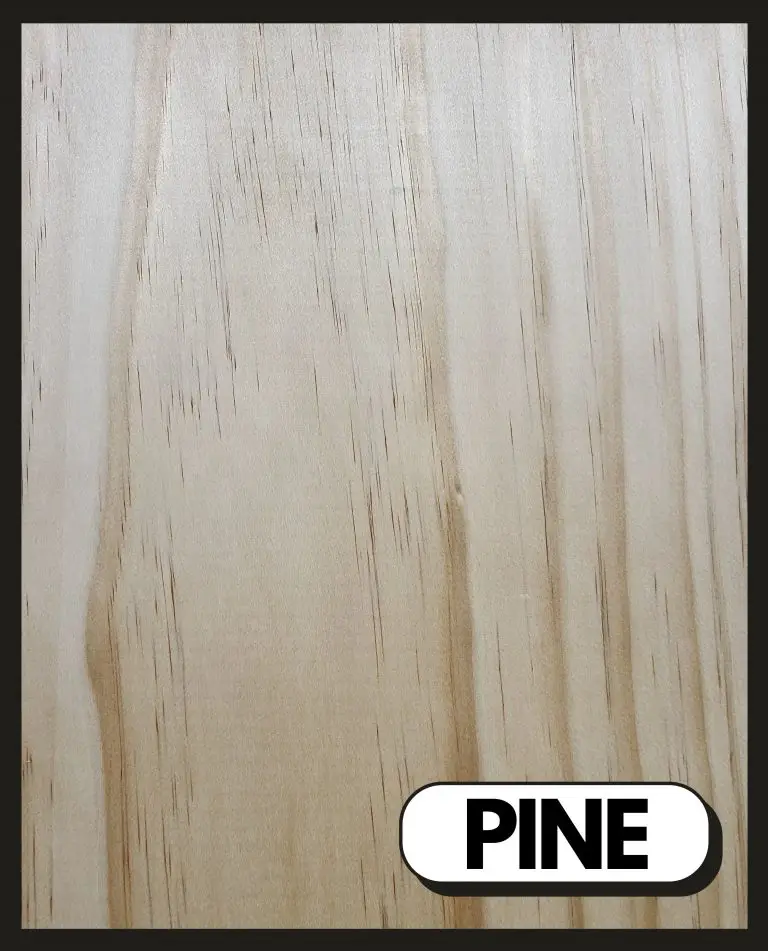
Cost: $
Pine generally machines well, but sometimes certain cuts can get a little bit gummy on you.
Another thing about pine is that it’s a fuzzy wood, so it can be helpful to sand the wood down both before and after you work with it.
Making multiple passes can also reduce some of the fuzz. Pine may not be your first choice to work with, but you should learn how to machine pine because it’s reasonably cheap and available everywhere.
Pine plywood
Cost: $
Like with regular pine, again get a lot of fuzz. The benefit here, though, is that this stuff is so easy to find and it’s cheap.
Be sure not to cut too deep and take multiple passes when working with pine plywood. Patience will be key if you want the project to turn out well.
Poplar
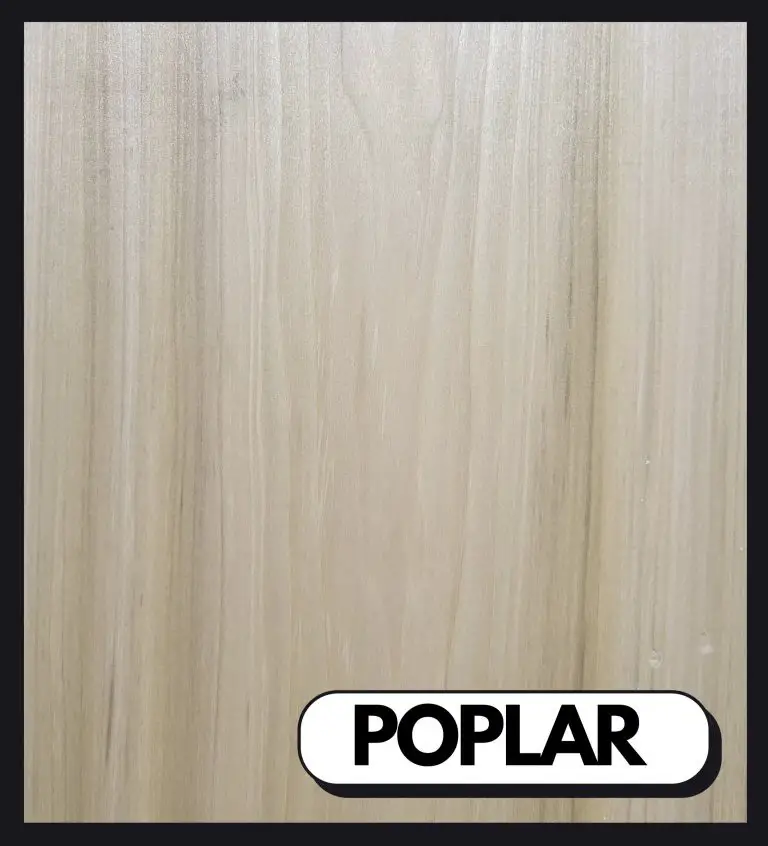
Cost: $
Similar to pine, Poplar is widely available, cheap, and leaves behind a lot of fuzz.
So, like with Pine, be sure to sand the Poplar down well. You will also want to have sharp bits and a slower speeds and feeds to avoid any tearing.
Poplar will take paint really well, so if you’re working on a project that you’ll ultimately want to paint poplar might be your choice of wood.
Red gum
Cost: $$$
Due to its softness and low density, people generally find red gum easy to work with.
However, red gum does have interlocked fibers, so be careful to avoid tear-outs. Another criticism of red gum is that it can warp a lot when drying out.
Redwood
Cost: $$$
While Redwood is light but strong, it does splinter fairly easily. Make sure you’re using shallow cuts to avoid tear-outs.
If you’re just looking for a carving project, redwood will be fantastic due to its softness.
Spruce
Cost: $
Spruce is not really known for being great wood to route with. It splinters easily and can have hidden sap pockets that can’t be cut through and will make your bit super sticky.
With short fibers and many knots, you may find it difficult to work with spruce.
Walnut
Cost: $$$$
Walnut is a very popular wood when it comes to routing. It cuts well. If you have a sharp bit, then cutting through walnut is like passing a hot knife through butter.
Another great feature of walnut is that it is not really known to burn while routing. However, Walnut dust can be highly irritating, so be sure to protect your eyes. A dust collection system of some sort would be advised.
Western red cedar
Cost: $$$
Western red cedar has a really wide grain which can be helpful for routing. That said, this wood can easily tear out if you’re not careful. This red cedar can be a better option than regular cedar because it has fewer knots.
Another benefit of red cedar is that it is good to use for outdoor projects.
Yew
Cost: $$$$
Yew can be a tough wood to work with. For one, when yew trees grow, they can contort in a way to that creates a lot of cross-fibers, which can lead to tear-outs.
Additionally, Yew wood can come with a whole lot of knots that you’ll have to work around.
Things to consider when choosing your wood for CNC routing
Clean up
Some woods that create more fuzz – such as pine and poplar – are going to require additional sanding. You can’t just pull these woods off the machine and expect a finished product.
Other woods may not have fuzz, but the cutting action will create rough edges that have to be sanded out. Keep this in mind when creating a project timeline.
Additionally, some of these woods are heavy on the dust. All of the woods listed will create some dust, but some woods are worse than others. You’ll definitely need a shop vac or other form of dust collection in use, and it could be very helpful to have a dust boot.
Knots
A knot is a portion of a branch or limb that has become incorporated in the trunk of a tree. Knots can change the direction of the wood, which make the wood vulnerable to tear-outs.
Your machining parameters should be reduced when working with a knotted portion of the workpiece to avoid shock loading.
Before you can machine them, use 5-minute epoxy to lock loose and loosening knots into place and fill any gaps and voids. When the epoxy cures, you can saw, joint, or plane the wood without fear of knocking the knot out, or worse, sending it flying across the shop or hurting you or your machine.
Price
Depending on what wood you use, your project can skyrocket up in price.
The more exotic woods you use, the more expensive they will be.
Redwood, for example, only grows in a very specific location and environment, so that makes it rarer. Pine, on the other hand, is easily available so it’s cheap.
Expensive woods can be worth it if you’re making a nice project, but don’t spend a bunch of money on wood if you’re not sure how the project will turn out. It is best to practice with the cheap stuff until you get things more figured out.
When you do start moving up to more expensive woods, run some test cuts or small test projects to try out your setup before committing to a large project.
Where to buy wood for CNC routing
You can go to your local hardware store to check out their wood selection. Some stores will have scrap or damaged pcs that can be had for free or at a large discount.
This can be a good way to get material for a small project or for testing out cuts on different types of wood.
You can also find a lumber mill near you and see if they’ll sell you any wood. Oftentimes, lumber mills will have excess wood that they can’t use that they will sell you for cheap.