Table of Contents
ToggleWhat is a feature control frame?
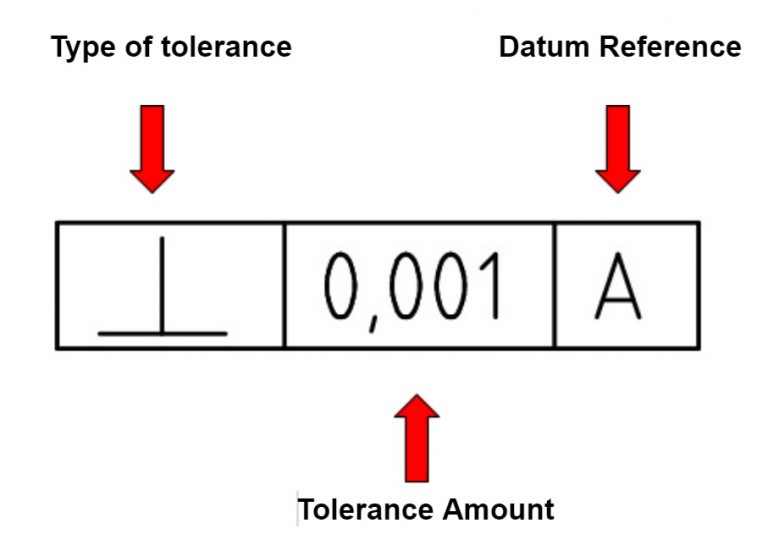
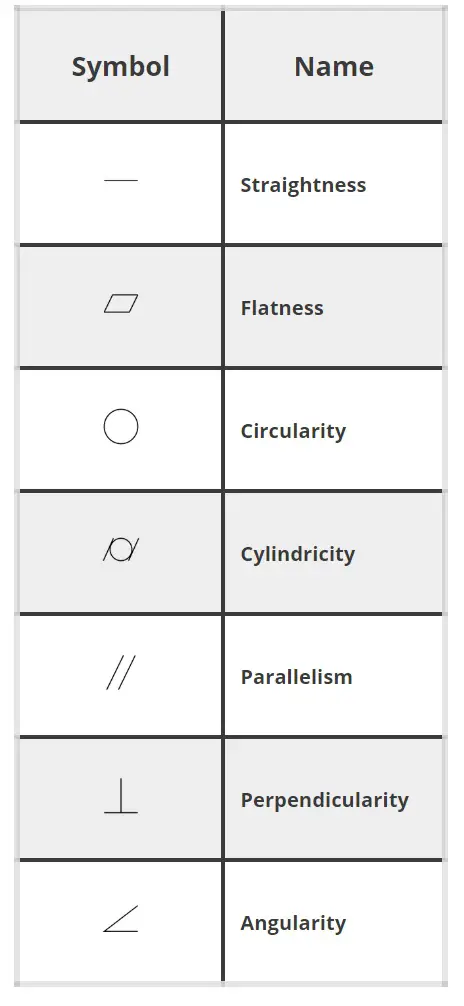
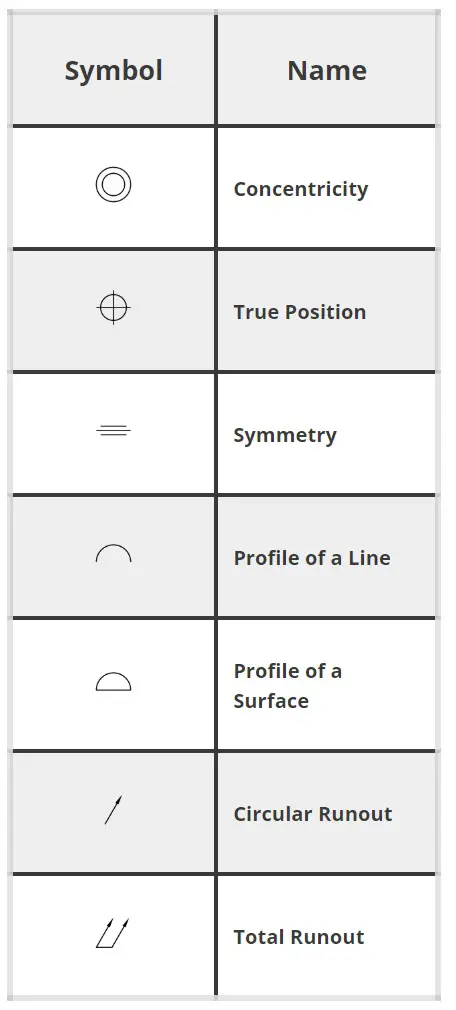
A key component of geometric dimensioning and tolerancing (commonly referred to as GD&T). On engineering blueprints, the feature control frame consists of a symbol to identify the type of tolerance, the amount of tolerance and reference datums if applicable.
How to read a feature control frame
A feature control frame is read from left to right. It reads “Type of control” of “Tolerance” to Datum. It should be noted that if a diameter symbol is present before “Tolerance” then it indicates the shape of the tolerance zone is cylindrical.
Examples

True position of 0.2 to datums A and B

Perpendicularity of 0.001 to datum A

Cylindricity of 0.001

Circular runout of 0.010 to datum A
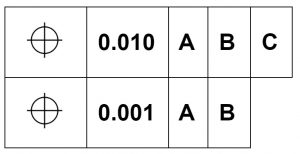
Composite feature control frame
A composite feature control frame controls both a pattern on a part and the location of individual items in the pattern.
The upper section of a composite feature control frame specifies the tolerance for the pattern to the overall part.
The lower section specifies the tolerance for individual features to the pattern. In the example of a bolt hole circle, the upper section controls the tolerance for the location of the bolt hole circle on the part. The lower section would control how closely the individual holes must follow the pattern.
Basic dimensions

Basic dimensions are identified by a rectangular frame around the dimension.
They are dimensions that are theoretically exact. They do not have a tolerance themselves (general blueprint tolerances do not apply).
Instead they are controlled by another characteristic. This is often seen with positional tolerances such as the true position of a hole. The hole location will be specified as basic dimensions.
A true position tolerance will then be assigned to the hole which will control how far off the nominal location the hole can be.
Want to learn more?
GD&T is a complicated subject and understanding it correctly can be the difference between a perfect part and scrap.
The best way to learn GD&T is from experienced teachers who can break down the material into manageable pieces.
Luckily, we know someone.
And MachinistGuides.com readers get an exclusive discount on training!
Related Articles
For more information see these related articles:
