Where to Sell Your CNC Projects

person on phone in front of map with pins in it and text that reads best places to sell you cnc projects

Who doesn’t like to earn a little extra dough?

Whether you have a CNC router, laser engraver or plasma cutter, selling your projects locally or online can bring in a pretty penny.

But where is the best place to sell those cool creations?

We picked the best spots to set up shop and turn a tidy profit with tips to help you make the most of each marketplace.

Fire up the CNC, it’s time to make some money!

Best Places to Sell Your CNC Projects

You can sell your products both locally and on the internet. Billions of people buy and sell goods online thanks to the widespread internet access. Here are some of the places you should explore:

Facebook Marketplace

hand holding a phone that shows the facebook login page

Facebook Marketplace is one of the best and easiest ways to market your CNC projects to a local audience for free.

Through the marketplace, people can browse through your product portfolio and message or call you with offers. Getting started is super easy, especially if you’re already a Facebook user. You can use your personal account or create one for your business.

All you need are a couple nice pictures of your CNC projects, a thorough description of the products, their conditions (new), price, and where willing buyers can pick them from.

The pictures are very important because they are what will help get people to share and tag others on your listing. Spend a little time getting good pictures.

Locally, it is best to meet buyers face to face and cash is always best. You can sell and ship products through Facebook Marketplace, but Facebook charges a 5% fee.

Tip: Be careful accepting some forms of payment such as PayPal or Venmo. People have been known to dispute transactions leaving sellers without their payment or their product.
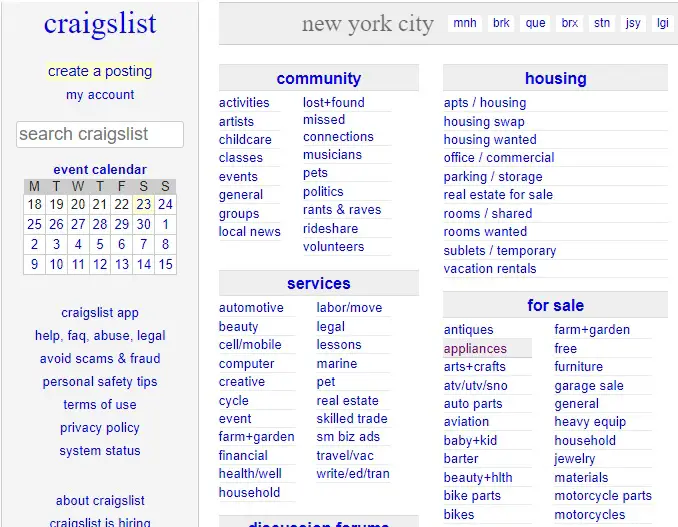
Craigslist

Craigslist has been around since 1995 and is still one of the most popular online marketplaces to sell all sorts of items. This makes it a great place to sell your CNC projects and best of all there is not cost for selling.

It has taken a hit in popularity since the introduction of Facebook Marketplace, but plenty of buyers and sellers still use the site.

Creating a Craigslist ad is so simple that you don’t even need a Craigslist account.

How to list your CNC projects on Craigslist

  • Go to the Craigslist website and set it to your current city or area
  • Click on the ‘Create a Posting’ link
  • Answer ‘what type of posting is this’. In your case select ‘ for sale by owner’
  • Select your item category. For you that would be ‘furniture by owner’ or ‘arts & craft’
  • Write a clear and precise product description. Add price. Provide your contact information. Add mode of payment. Always prefer cash transactions. Meeting your customers face to face is safer.
  • Upload photos of your project and publish your ad.
the new york craigslist home page

Once posted you will simply need to monitor your email for interested buyers.

Craigslist is a great zero fee option for selling CNC products online locally.
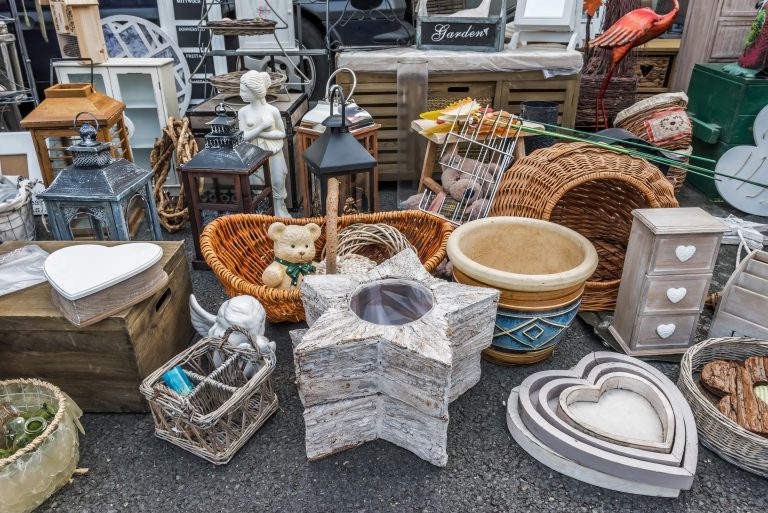
Craft Fairs

Craft fairs or craft shows are local craft events organized for artists to showcase and sell their products. Craft fairs are a superb way to show off your brand to the locals and hopefully make some sales while you’re at it.

CNC products can get a lot of attention at craft fairs because often there isn’t much competition. Many of the other vendors at the show will be focused on things such as jewelry, knitting and painting.

Get your products to stand out and put yourself out there and you can make sales even after the fair is over. Craft shows allow you to bring your CNC projects to the masses, network with peers, and acquire a new set of skills and techniques.

Most craft fairs and shows will charge a fee to display your wares. They can range from $10 to hundreds of dollars, it varies a lot by event. Bigger venues with more traffic are going to be more costly to attend but they also have the potential for much larger sales.

Some tips for selling at craft fairs:

  • Make sure that you’re adequately prepared before the show
  • Be friendly with your potential customers. Friendly conversation is a great way to generate sales.
  • Showcase your best work so more people come visit your booth or table.
  • Pricing your products correctly can be tricky, but don’t undercut yourself. Make sure you are turning a profit and account for your time as well.
  • Keep track of what sells. Keeping good records will help you plan for future events.
  • Hand out your business cards to increase your brand awareness.

Flea Markets

various things for sale at a flea market

Flea market are an outdoor street market where organizers rent spaces to vendors to sell their products. Some events will be indoors, but most flea markets are done outside in the warmer months.

Vendors commonly sell secondhand or used products at flea markets, but this doesn’t mean your unique brand-new CNC creations can’t be sold. You can make a pretty penny selling your CNC projects at flea markets the same way you would at craft shows.

Flea markets tend to have lower space rental fees which can increase your overall profits.

Many flea markets are temporary and open mainly in the summer late spring to early fall depending on your local climate. Some of the larger markets will be open year-round.

Renting a space in a flea markets will vary in cost much like craft fairs but can be anywhere between $10 to a couple hundred.

Tip: Check local newspapers and Facebook groups to find nearby markets to sell your wares and don’t be afraid to ask your friends and family if they have visited any that were particularly busy.

Craft Stores

Craft stores can be an interesting and extremely profitable proposition if done right.

The first step is finding a good craft store. A quick Google of “craft stores near me” may do the trick. Another good way to find the best craft stores to sell your projects is by talking to other sellers at events. This is only one of the reasons why networking with other makers is helpful.

Not all craft stores are created equal. They vary in the type and amount of fees they charge as well as their rules. Some may be strict on keeping your product stocked and others might not allow you to setup shop if someone else is already selling similar products there.

All this means you need to put some boots on the ground and get out there and check some local shops out. The best ones are close to you for easy stocking or not far from your normal commute.

Don’t be afraid to ask shop owners for suggestions to increase your sales. They see firsthand what people want and it will be best to stay on their good side after all.

Our best tip is to try out multiple craft stores over time and find out which ones work best for you and your product. Different locales will have varying tastes that may or may not cater to your specific product. Find your target market.

Yard Sales

yard sale sign on a mailbox with people browsing in the background

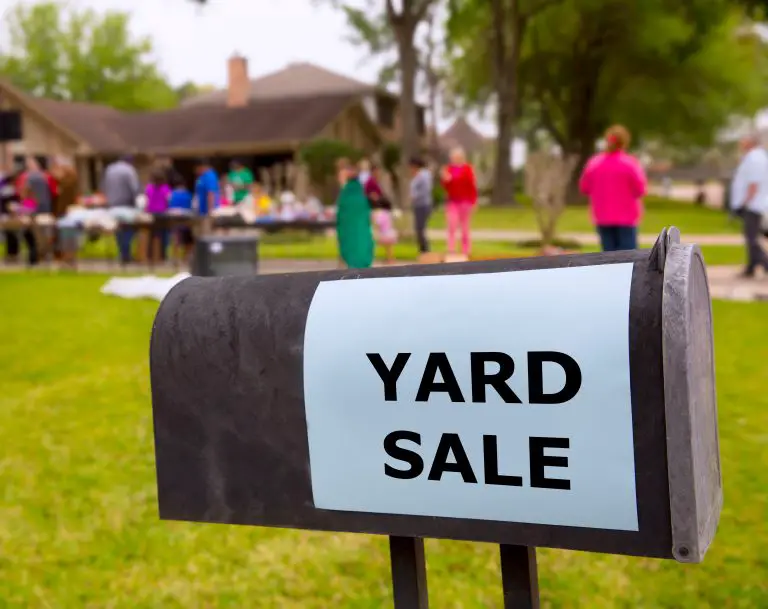
Think of it like a pop-up craft store and a good excuse to get rid of some stuff you don’t need at the same time. A good old fashion garage sale can be an excellent opportunity to kick start your side hustle.

Even better if you are near an area that gets a decent amount of traffic. If possible put up signs to advertise that are easy to read at a distance. Some towns or cities even hold town wide yard sales which brings even more traffic and potential customers in.

Make sure you price everything ahead of time and expect people to negotiate. Seriously, people can be brutal. I once saw an old lady offer a dime for a $10 item. And it sold! Don’t be afraid to stand firm on your prices as they won’t be normal yard sale fare but giving in a little is likely to improve your overall sales numbers.

Special events

people browsing tents at a special event

Local festivals, fairs, and events offer valuable opportunities to sell your CNC projects. Often people are in a happy mood and ready to buy more than they usually would.

What might seem like a small town event can be huge for the local community and bring out a large portion of the population. More eyes on your products means more potential customers.

Fees to set up shop at these types of events tends to be low so take advantage and make a killing even if the event is only once per year.

Some sample events to look for that usually have vendor spots available:

  • State, county and local fairs
  • Holiday events such as Halloween and 4th of July
  • Farmers markets
  • Chili cook offs
  • Food truck festivals
  • Music festivals

Etsy

Laptop computer displaying logo of Etsy

Etsy is a popular global marketplace for artisans with nearly 82 million monthly active users. The platform is dedicated to sellers and buyers of “handmade, vintage, custom, and unique” products.

This platform is crawling with buyers who are willing to splurge on unique items on sale. Don’t expect cookie cutter type products to do well here.

Your best bet to gain customers on Etsy is to highly customize your art to make sure nothing like it exists on the platform or any other place. When done correctly, sellers can often get top dollar for their products.

The best products on Etsy are unique. Etsy is a great market to sell products that cater to a specific audience. Custom board game tiles, 3d topographic maps of specific locales and personalized products of all kinds are just some examples of the types of things sold on Etsy.

Having the right product to list might not be simple but creating an Etsy account is super easy:

  • On the Etsy, landing page click the ‘Sell on Etsy’ link
  • Edit your shop’s settings including language, location, and your preferred currency among other customizations
  • Add a creative name that communicates your brand to potential buyers
  • List your products with titles, descriptions, photos, prices and how much inventory you have
  • Add shipping information for your products. Include the shipping fee, where the product is being shipped from, the time it will take to process the order and the weight of the product, and size.
  • Add a payment method. Most electronic payment methods including PayPal are accepted on Etsy. Select your preferred payment method.

Etsy charges a transaction fee of 6.5% for every product sold on its platform.

EBay

magnifying glass looking at ebay website

EBay is huge player in the ecommerce industry. Recent statistics show that EBay is used by nearly 35% of all active US mobile users. That’s a huge group of potential buyers.

EBay also has the potential to open your side hustle up to a global market giving you limitless possibilities.

You can list your item for sale as either a standard bidding auction or for a buy it now price. Buy it now prices tend to work best if you will be consistently offering the same products.

One of the best things about using EBay is how easy it is to set up a listing. Typical EBay listings requires a photo, product description, price, payment method, and shipping information.

EBay does a great job of integrating shipping and keeping the overall shipping cost low which helps drive more sales.

EBay takes a percentage of nearly every sale, ranging from 1.5% and 15%.

Amazon

Amazon logotype printed on cardboard box

Everyone knows Amazon. Over 197 million people around the world visit Amazon.com every month, making it by far, the most popular ecommerce site worldwide.

You can monetize most of your CNC project ideas on Amazon under their different categories and go about creating unique products for the worldwide market.

Furniture, arts & craft, ornaments, customized signs, and personalized nameplates, among others, can sell pretty quickly on Amazon.

Setting up an Amazon listing is simple but you should take care to accurately list your products to make sure that customers get what is expected.

To create a listing you will need to:

  • Adding your product title
  • Uploading high-quality images
  • List any variations of your products i.e. color, measurements, material, et al
  • Create a detailed description of the item including a bulleted summary of the most important features

You may sell your products on your Amazon customer account or create a seller’s account.

Amazon takes a cut of between 6% and 15% of every sale made on the platform. The percentage can go to as high as 45% for Amazon devices accessories.

While the platform is huge. You need to be ready for the potential demand. Because of this, it is best to make sure you have your business running smoothly before selling on Amazon.

Things to consider as a seller

Identifying where you can sell your CNC projects solves only a part of the puzzle. The other equally important part is getting the item ready for sale and shipping.  Even after finding the ideal outlet for your products, there are a couple of things you need to consider when selling. They include:

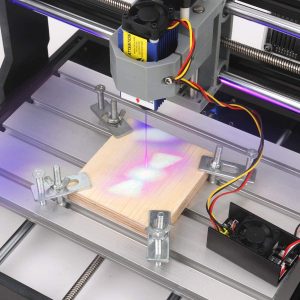
Project materials and supplies

CNC projects can be created on wood, plastic, light metals (aluminum, brass, and copper), and acrylics among others. You will want to create your projects on high quality materials, but make sure you don’t overpay because buyers like a good bargain as well.

Packaging

First impressions are important. Besides its main job of protecting your product from damage during shipment, the packaging is the first introduction the customer has to your brand.

Make it memorable. This can mean custom printed labels or laser engraved packaging but no matter which way you go try to stand out.

And toss a few business cards in the box. Happy customers are often willing to spread the word of your quality work. Make it easy for them.

Including a card or code that offers 5 or 10% off another purchase can also be a great way to keep the customers you already have coming back for more.

Shipping

Shipping can be costly and makes selling your products a little more complicated. This is why it is a great idea to start locally and work your way up to online only marketplaces.

Pay close attention to the sizes and weights of your products because they can make big changes in your shipping cost which can end up hurting your bottom line.

Warranties and returns

What happens when a product is faulty when it reaches the buyer? Can you refund their money or send them a replacement quickly?

It is bound to happen eventually when you start your own business. Make sure you are prepared for it to happen and act quickly. Quality customer service can make or break the customers opinion of your brand.

Make sure you clearly list your warranty and return policies because you will be expected to follow them and customers take them into account when making purchasing decisions. 

That’s plenty of ideas and tips about where to sell your projects, but what if you don’t know what to build?

Then check out our guide to the Best CNC Projects That Really Sell to kickstart your imagination.

Starrett vs Mitutoyo: Who is the Master of Measurement?

two calipers pitted against each other with text that says starrett vs mitutoyo

American precision measuring toolmaker, Starrett and her Japanese counterpart Mitutoyo are arguably the top players in the $25 billion measuring equipment market. Both companies boast rich production histories, and their tools are lauded for accuracy, dependability, and durability. 

Sure, there are dozens if not hundreds of measuring tool manufacturers but…

Let’s be real. These two are the best of the best.

We are going to take a look at the most popular measuring tools from both companies to find out how they stack up against each other. Spoiler! They both have their specialties.

But first let’s dive into a quick overview of the two companies because to many people, where the tools are made says more about the quality than any spec sheet ever could.

History of Starrett

Starrett tools factory building in 1905 on river with smokestack
Starrett factory in 1905

Starrett is old.

Like 140+ years old actually, but age is just a number right?

Well, with all those years Starrett has had plenty of time to perfect their tool making business. While we are going to focus on their measuring tools, they are also well-known for making about 5,000 other tools.

They make everything from precision measuring tools to saw blades, hand tools all the way up to fancy computerized inspection equipment. They make a lot of stuff and overall, they are known for making that stuff well.

While Starrett is headquartered in Athol, Massachusetts, USA, it operates several satellite facilities in different parts of the world including Mexico, Scotland, Brazil, and China. Some argue that those satellite facilities have made Starrett take a step down in quality but in general they have good quality control in place and their tools are still well-made.

History of Mitutoyo

outside of Mitutoyo corporate building

Mitutoyo, on the other hand, has yet to celebrate its first century in business. The company was established in Japan around 1934. Fast forward eight decades later, and Mitutoyo boasts a catalog of over 5,000 tools as well.

There tools are more focused on measuring related items and they make less hand tools than Starrett. Mitutoyo manufacturers the majority of their tools in Japan, however some tools are made in Brazil.

Enough history already, right? We’re here to talk about their most popular measuring tools. The kind every hobbyist or machinist is likely to be using.

Digital Calipers

The king of the calipers in my opinion. Digital calipers make for a versatile measuring tool that can take a large variety of measurements. Most are capable of measuring inside, outside, depth and step measurements with an accuracy of 0.001” or .02mm.

Remember that accuracy is the important feature to pay attention to with any measuring tool. Often manufacturers will try to list the resolution, which is the graduations that can be read with the tool. Just because you can read a measurement out to 0.0005” doesn’t mean the tool is accurate to that degree.

Now let’s look at the features of the digital calipers from both Starrett and Mitutoyo:

Starrett EC799A-6 Digital Caliper

Features:

  • Made of stainless steel
  • Measurement range of 6”/150mm
  • Has an accuracy of +/- 0.001”/0.02mm
  • Has a resolution of 0.0005”/0.01 mm
  • Large LCD display
  • Made in China

Take note that some Starrett calipers are made in the United States. The EC799A is made in China and still comes with a hefty price tag. To get a set made in America will likely set you back double.

We have included the EC799A because it is their standard digital caliper. If you Google “Starrett digital caliper”, the EC799A is what pops up. We have done the same with the Mitutoyo digital caliper as both companies make a wide range of calipers.

Mitutoyo 500-196-30 Digital Caliper

  • Made of hardened stainless steel
  • 5-year battery life
  • Measurement range of 6”/150mm
  • Has an accuracy of +/-0.001”/0.02mm
  • Resolution of 0.0005”/0.01mm
  • Large LCD display
  • Made in Japan

Best Digital Caliper

On paper, both tools have very similar stats. In use, the Mitutoyo digital caliper comes out on top with a better build quality, super-fast updating display and extremely long battery life.

Mitutoyo claims a 5-year battery life but unless you are using it all day every day, you can likely expect even longer.

Mitutoyo wins hands down.

Dial Calipers

Dial calipers are the digital calipers older, less tech savvy brother. What they lack in flash, they make up for in dependability. You’ll never pick them up only to find out that your battery is dead and you’re fresh out of button cell batteries in your junk drawer.

Dial calipers are capable of almost everything a digital caliper is with the exception of switching between units. A nice feature to have but not a necessity, especially when many people will find themselves always working in a single set of units.

Starrett 3202-6 Dial Caliper

Features:

  • Made of stainless steel
  • Has a range of 0-6 inches
  • Measures to an accuracy of +/- 0.001”
  • Has a resolution of 0.001”

Just like their digital calipers, Starrett makes a wide range of different dial calipers in various styles and measuring ranges. At the time of writing, they offer 34 different types of dial calipers with 26 made in the U.S and 8 manufactured overseas. 

Mitutoyo 505-742 Dial Caliper

Features:

  • Made of stainless steel
  • Has a range of 0-6 inches
  • Measures to an accuracy of +/- 0.001”
  • Has a resolution of 0.001”

Do those features look familiar? Yeah, they should. Copy. Paste. In fact you should expect the same of any dial caliper maker. They have been around long enough and almost because standardized. Unless you go with an ultra-cheap plastic caliper, you can expect similar specs from any 0-6” dial caliper.

Note: Mitutoyo has about 30 different types of dial calipers and all are currently made in Japan. 

Best Dial Caliper

On paper they are the same. Take a look at the pictures. They even have the same shape and same white dial face. In this case, I would give the edge to the Starrett dial caliper.

I think their action has always been consistently excellent, even on their Chinese made calipers. Also, the fine thumb roll adjustments are a little smoother, but it really is splitting hairs. The Mitutoyo is an excellent dial caliper too.

If you can find a good deal on one go for it but if the price is equal, I say go Starrett for your dial caliper.

Vernier Calipers

Vernier calipers are an interesting take on calipers. They don’t require batteries like digital calipers and they don’t have precision gear mechanisms that are susceptible to damage either. They are basically just two rulers that have their measurements read where the lines match up.

While these advantages would seem to make them the superior type of caliper, they do have some downfalls. For one they can be difficult for some people to read. Some people have trouble figuring out how to read the measurements while others have trouble visually reading them.

I say go digital for your calipers but it you must go old school, here is how Starrett and Mitutoyo stack up with their vernier calipers.

Starrett 125MEA-6/150 Vernier Caliper

Features:

  • Made of hardened stainless steel
  • 6”/150mm measuring range
  • Accuracy from 0-4” is +/- 0.001”
  • Accuracy from 4-6” is +/- 0.0015”

Mitutoyo 530-316 Vernier Caliper

Features:

  • Made of hardened stainless steel
  • 6”/150mm measuring range
  • Accuracy of +/- 0.002”

Best Vernier Caliper

Accuracy rules all when it comes to measuring tools and vernier calipers are no different. Starrett wins with double the accuracy and an included protective case as well.

I would still advise thinking about getting a set of digital calipers and maybe keeping some extra batteries on hand so you know they will be ready when you need them. Digital calipers are just infinitely faster and easier to read.

Standard Micrometers

Micrometers are made for checking extremely precise measurements. Many models are capable of checking tolerances of 0.0001” or better. That is 10x more accurate than a good caliper!

The downfall is what they gain in accuracy they lose in versatility. While a normal set of calipers can measure inside, outside and depth measurements from 0-6”, a micrometer will measure only one type of measurement and only over a 1-inch measuring range.

Starrett 436.1XRL-1 Standard Micrometer

Starrett’s micrometers are what they are most known for. They have been making them, and making them well for a very long time.

Features:

  • Narrow frame for measuring in tight spaces
  • Black enamel protective finish
  • Accuracy of +/- 0.0001”
  • Ratchet stop

Mitutoyo 103-177 Standard Micrometer

Features: 

  • Blue protective enamel finish
  • Accuracy of +/-0.0001”
  • Ratchet stop

Best Standard Micrometer

Once again, we see similar features from both manufacturers. This is to be expected as these are standard specs for a 0-1” micrometer.

One item to note is that the micrometers from both Starrett and Mitutoyo will be the same even as their sizes get larger. Expect a very similar product from both in their 5-6” micrometers and so on.

Even though they are similar, Starrett wins this category for multiple reasons. Their protective finish is nice and, in my experience, more durable. Their protective case is much more rugged, and their ratchet stop mechanism is smoother. That isn’t to say that the micrometer from Mitutoyo is bad, it just misses the mark compared to what Starrett produces.

Digital Micrometers

Digital mics are able to perform the same type of work as a standard micrometer. They add on an easy-to-read LCD display and depending on the model, they can allow the output of measurement data.

Often digital micrometers are the top tier tools and therefore have excellent accuracy, but they do tend to be a bit bulkier than a standard micrometer which can make them a little more awkward to use. Most won’t notice a huge difference but if you are planning to do a lot of one-handed measurements then you might want to stick with a lighter micrometer.

Best Digital Micrometer

I’m going to skip right to the chase and tell you that Mitutoyo hands down makes the best digital micrometers.

I don’t mean Starrett’s digital mics are bad, Mitutoyo is just that good.

They are extremely accurate and will measure down to +/- 0.00005”. That’s a lot of zeroes! Starrett’s digital micrometer is half as good. We know accuracy is huge when it comes to measurement, but the Mitutoyo’s also have a better ratchet stop to help get the most out of that accuracy whereas the Starrett mic has a friction thimble.

Personally, I have found friction thimbles to be slightly less accurate and not be as consistent over time (like 10 years, but still).

Lastly, the Mitutoyo digital mic has the same super long battery life as their digital calipers. Don’t plan on changing the battery or my mind anytime soon. Mitutoyo digital micrometers for the win!

Conclusion

Both Starrett and Mitutoyo make excellent measuring tools of all kinds. You honestly can’t go wrong with either one, but if you were paying attention then you may have noticed a pattern.

If you want the absolute best in category, then go with Starrett for your analog measuring tools and Mitutoyo for your digital options I guarantee you won’t be disappointed.

VINCA DCLA-0605 Digital Caliper Review

plus symbol

Pros

Great price
Has features not normally seen in its price range
Excellent customer service

minus symbol

Cons

Unusual display

Features

The VINCA DCLA-0605 0-6” digital caliper is nice little measuring tool. It is made of stainless steel and is capable of taking measurements in inches, metric and fractional units with an accuracy of +/- .001”.

The VINCA like many other calipers is able to take external, internal, step and depth measurements.

We tested those capabilities by measuring various size gauge blocks over the total measuring range of the tool and found them to be accurate to the manufacturers specs in all instances.

VINCA digital caliper display mm
Metric measurements
VINCA digital caliper display fractions
Fractional measurements

The DCLA-0605 comes with a large, easy to read display. One thing that does take some getting used to is that the first two digits are larger on the display. 

This allows the fractional units to be displayed. An odd choice when most will use the caliper in either inches or millimeters, but definitely not a deal breaker.

VINCA digital caliper display mm
Battery compartment shown

The VINCA caliper comes with an LR44 button cell battery installed along with  two spares. While the battery life isn’t as good as something like a Mitutoyo, it isn’t awful either. The caliper has an auto shut off feature for the display when not in use which helps it from draining all the juice.

The screen also flashes when the battery is low to let you know it’s time to swap batteries. Some digital calipers have been known to behave strangely when their batteries are low so this is a welcome feature.

VINCA digital caliper in case unwrapped
Nice protective case

The DCLA-0605 comes with a protective case which is a nice bonus that some cheaper digital calipers don’t have. 

VINCA digital caliper data port
The RS232 data transfer port - DO NOT plug a USB cable in

Another feature not commonly seen on lower priced digital calipers is an RS232 port.

This will allow you to hook your caliper up to a computer to record measurements. It is worth noting that you should NEVER try to use a USB cable to hook the caliper up to a computer as this can cause the battery to explode. There are warnings all over the case and on the backside of the caliper to remind you.

Make sure to use the manufacturers recommended cable to connect your tool.

VINCA digital caliper rust on bar
Some rust on the frame

This VINCA caliper comes with a 1 year warranty and it is worth noting that by all accounts the company’s customer service is excellent. Considering my caliper arrived with some rust on the backside slot where the depth rod sits, that is probably a good thing. 

I am not planning on testing it for a budget level caliper, but they are noted as being quick to respond and offer solutions to any issues that are encountered. Maybe if there had been issues with the accuracy as a result.

VINCA digital caliper measuring 4 inch block
Accurate measurements across the board

The overall build quality of the tool is good. It isn’t the smoothest sliding caliper I have used but it does slide freely and it doesn’t catch or hang up at all. 

The fine adjustment wheel works well too and helps make those critical measurements as accurate as possible.

Verdict

VINCA digital caliper packaging
The packaging looks cool

The VINCA DCLA-0605 digital caliper is an excellent budget tool. It has accuracy on par with other calipers in its price range.

The addition of a nice protective case, a couple extra batteries and an RS232 port make it a great choice especially for those looking to record their measurements directly to their computer.

The 1 year warranty and noted excellent customer service make this VINCA caliper a great budget friendly digital caliper.

Neiko 01407A 0-6″ Digital Caliper Review

plus symbol

Pros

Great value for price
Measures in inches, millimeters and fractions

minus symbol

Cons

None

Full review

The Neiko 0-6” digital caliper is made of stainless steel. It features a metric measuring range of 0-150mm. It is capable of measuring in inches, millimeters and fractions. Although most people won’t use the fractional mode, it is nice to have the option. 

Neiko digital caliper display mm
Metric measurements
Neiko digital caliper display fractions
Fractional measurements

The Neiko caliper is capable of taking outside, inside, step and depth measurements. The manufacturer claims that the caliper has an accuracy of .001” or .02 mm. 

I tested that claim by measuring various gauge blocks sizes over the entire measuring range of the calipers and found them to be well within the claimed accuracy. Quite a feat for a budget friendly tool.

The most important quality of any set of digital calipers is good accuracy and these Neikos got it.

Neiko digital caliper display inches
Three small digits when measuring in inches, Two when measuring in mms

The display on the 01407A reads out to .0005” or .01 mm when in metric mode. The fraction mode has a resolution of 1/128 of an inch.

Unfortunately the caliper is incapable of rounding to a different fraction such as 1/32. 1/128th of an inch isn’t exactly the most practical units to use. The display does display reduce the fractions down so you will see 1/2″ instead of 64/128″ which is nice.

The display is large which makes it easy to read, but I am not a fan of the format. It is obvious that it is made like that to read the fractional measurements, but having 2 or 3 of the digits smaller is just weird. It’s not a deal breaker but it does take a little getting used to.

Neiko digital caliper battery closeup
Open battery compartment

The digital caliper comes with an extra LR44 button cell battery which is handy because many report issues with dead batteries on arrival. I ran into the same issue and quickly swapped in the fresh battery.

Luckily the battery is easily changed with no tools required. The battery cover simply slides off with a swipe of your thumb. 

Additionally the caliper is often reported to turn itself on frequently which causes the battery to die quickly. The caliper can be locked in place to keep it from turning itself on but it still might not be a bad idea to try and keep an extra battery on hand.

The caliper also comes with a sturdy plastic case to protect it. 

Neiko digital caliper in case unwrapped
The case is solid with nice padding and room to store an extra battery

One of the harder qualities to convey is the overall build. Some might call it the “feel” of the tool. This is where the Neiko 01407A excels. 

They feel like a much higher priced tool. The jaws slide smoothly along the frame. This is one area that many budget level calipers struggle with. Often they can get the accuracy but the tools just feels like junk when using it. Not the case here. 

The only other build quality item I would note is the fine adjustment roller wheel. While other cheap calipers either tack on a bad one or skip it entirely, Neiko has added one that is comparable to much higher priced calipers. 

When you combine the smoothness and the excellent fine adjustment, it is much easier to get the accuracy you want because over time you will be able to feel your measurements. This is not something that would be possible without this kind of build quality.

Verdict

The Neiko 01407A digital caliper is not the best caliper that money can buy, but it just might be the best value.

The display is a little quirky but it is definitely something that you can get used to. 

In the end, the overall accuracy and the build quality at a bargain price are what make the Neiko 01407A digital caliper one of the best around. 

Adoric 0-6″ Digital Caliper Review

plus symbol

Pros

Cheap
Not magnetic

minus symbol

Cons

No fractional mode
You get what you pay for in accuracy

Features

These digital calipers from Adoric feature your typical caliper measuring range of 0-6” or 0-150mm.

They have a claimed accuracy of +/- .010” or +/- 0.2mm. I tested this claim by measuring various gauge block sizes over their measuring range. I repeated this for inside, outside and depth measurements. In all measurements, the tool met its claimed accuracy.

Adoric digitial caliper measuring block
Testing the accuracy of the caliper

Still, their accuracy isn’t great when compared to many other calipers but at the same time their cost reflects it. When you are buying a set of calipers in the neighborhood of ten bucks you can’t expect a lot.

For instance the packaging:

Adoric digital caliper in packaging
Action figure packaging
Adoric digital caliper back of packaging 2
Highly branded packaging

It screams kids toy more than it does precision measuring tool.

In fact, the packaging is so generic that the only mention of Adoric on it is on a sticker slapped on the backside. I’m pretty sure this means there are carbon copies of this same caliper being put out by other companies.

Carbon fiber copies might be more appropriate because that is what these calipers from Adoric are made of. They definitely don’t feel as rugged as metal calipers, but they don’t feel flimsy either.

The carbon fiber construction does have some benefits. Firstly, they are non magnetic  which means measuring magnetic materials will be much simpler than with standard stainless steel calipers. It also means that these calipers are less likely to scrape or scratch your workpiece during measurement. 

The nicest benefit of being made from carbon fiber is that they are extremely lightweight. I really thought these were going to be a cheapo tool, but the caliper has enough weight to make it feel strong while still being light enough to make it very easy to use one-handed and maneuver for all kinds of measurements. 

Adoric digital caliper display
The display when measuring inches

Similar to most calipers, these Adoric digital calipers are capable of taking inside, outside, step and depth measurements.

These measurements can be taken in inch or metric readings. Unfortunately there is no fractional mode which in my opinion would be a nice addition considering their accuracy. A fractional mode that read to 1/64″ or 1/32″ would probably have worked well more many people.

Units are easily switched with the inch/mm button on the face of the caliper. A simple selection of buttons surround the easy to read display. Besides the inch/mm units button there is also an off/on and zero button.

Adoric digital caliper battery
Open battery compartment and extra battery

Battery life is decent thanks to the tool’s ability to turn off automatically. When not in use, the caliper turns itself off after about 4.5 minutes.

The caliper also turns on automatically when it senses movement. So why even have an On/Off button? Use it or not, it’s there.

The Adoric caliper comes with an LR44 button cell battery already installed and a spare in the package.

One last note about the battery is that it is easily changed, possibly too easily. Many people have noted the battery cover accidentally coming off during use. I had not issues with the set I ordered for this review.

There is no ability to lock the caliper during measurement as seen on many other calipers. Additionally there is no protective case provided which is unfortunate but at this price point you can’t expect many extras.

Verdict

Adoric digital caliper full
Limited accuracy but otherwise surprisingly good especially for the price

A nice alternative to your standard tape measure for shorter measurements. These calipers are a great tool for homeowners to take precise measurements.

Their accuracy is lacking but for many applications such as working with crafts or 3d printing, they will be sufficient. The most important thing will to know what type of tolerances you need to hold. Higher quality calipers will be usually be accurate to +/- 0.001″.

If you require more accuracy, but are on a tight budget check out the Neiko 01407A 0-6″ digital calipers. They make a decent alternative.

All-in-all for the price, these Adoric digital calipers are great to throw in a junk drawer or garage toolbox to keep handy for a quick and easy measurement.

Mitutoyo 500-196-30 0-6″ Digital Caliper Review

plus symbol

Pros

Excellent accuracy
Resistant to dirt, oil and water

minus symbol

Cons

Quality comes at a price
Doesn’t measure in fractions

Features

Mitutoyo’s 500-196-30 0-6” digital caliper is a true quality measuring tool. Made in Japan, they have a measuring range of 0-6” or 0-150mm. These calipers are made of stainless steel and have a resolution of .0005” or .01mm. 

mitutoyo digital caliper packaging
The calipers arrive in some snazzy orange packaging

They are advertised as having an accuracy of +/- .001” or .025mm. In my experience they are closer to +/- .0005”. This is a nice contrast to some of the cheaper alternatives that claim a better accuracy than they actually possess. 

mitutoyo digital caliper measuring 1 inch block
Measuring a 1 inch gauge block
mitutoyo digital caliper measuring 4 inch block
Measuring a 4 inch gauge block

If you do require calibration documentation, you will most likely be performing the operation in house or through your normal calibration vendor. Long story short, if your using them for personal use then skip the extra cost and just check your zero when you go to use them.

They already come with an inspection certificate from Mitutoyo anyways.

Note: These calipers can be purchased with a calibration certificate if desired. Most people will get no added benefit from the extra calibration. 

mitutoyo digital caliper inspection certificate
Inspection certificate from Mitutoyo

If you do require calibration documentation, you will most likely be performing the operation in house or through your normal calibration vendor. Long story short, if your using them for personal use then skip the extra cost and just check your zero when you go to use them.

They already come with an inspection certificate from Mitutoyo anyways.

mitutoyo digital caliper depth rod
Closeup of the depth rod for taking depth measurements

This 0-6” caliper is capable of taking inside, outside, step and depth measurements like many others. It has a large easy to read display. Buttons for on/off, zero/abs, in/mm and origin are present on the face. Units can be switched from inch to metric in an instant. 

mitutoyo digital caliper display in inches
Measuring in inches
mitutoyo digital caliper display in mm
Metric measurements

Unfortunately there is no option for fractional units but most will find their application doesn’t require them. The zero position can be changed making comparison measurements easier. 

mitutoyo digital caliper with battery installed
The battery compartment with SR44 battery installed

Battery life is very good with this model. Mitutoyo claims a 3.5 year battery life with normal use. That sounds too good to be true. In reality the battery lasts a very long time.

The calipers come with a battery and if needed the battery is easily changed with no tools required. The battery cover simply slides off.

One thing of note is that these calipers don’t turn off automatically like other models so make sure to hit the off button when you’re finished. A final note related to the battery is that these calipers feature a low battery indicator to let you know when it is time for a change. 

Unlike many other digital calipers, these ones are resistant to dirt, oil and water. Mitutoyo claims they are coolant proof. I wouldn’t recommend submerging them in anything but a light splash shouldn’t hurt anything. They come with a nice plastic case which protects them while not in use.

mitutoyo digital caliper in case
The caliper comes with a sturdy well fitting case

Verdict

I can’t say enough good about them. The Mitutoyo 0-6” digital caliper is a step above most of their competitors. 

Amazing accuracy, excellent battery life and resistance to contamination that might affect your measuring tool makes for a reliable, dependable measuring tool. They are perfect for reloading, engine work or every day use in a machine shop and will easily stand up to all of your measurement needs.

Frequently asked questions

Where are Mitutoyo tools made?

Mitutoyo are manufactured in Japan and rival the quality of many American made tools.

How long is the Mitutoyo warranty?

mitutoyo digital caliper warranty
Warranty documentation from Miitutoyo

The warranty on these calipers is one year. If you register your tool with Mitutoyo you can extend this to a total of three years. Definitely something worth doing.

What type of battery does the Mitutoyo caliper use?

mitutoyo digital caliper sr44 battery
The included battery from Mitutoyo

The Mitutoyo 500-196-30 digital caliper and many others by Mitutoyo use an SR44 battery. A 357 battery is the equivalent by various other manufacturers and can be used also.

How to reset the Mitutoyo digital caliper

If your caliper is ever flashing or needs to be reset because of something such as a dead battery, follow these simple steps.

First close the jaws so they are in the zero position. Now hold the origin button. This will reset the display. Verify your instrument is working by checking against a known standard such as a gage block.

How to calibrate Mitutoyo calipers

To learn how to calibrate your Mitutoyo caliper, follow the calibration instructions in our Beginner’s Guide to Calipers.

What does the error code on my Mitutoyo caliper mean?

Check out this thread for a great rundown of all the error codes you might run into using Mitutoyo digital calipers. I have never used a set that has thrown a code other than one for the battery but just in case.

Related articles

Best Beginner CNC Machines and Routers

Whether you want to learn a new skill, work on a pet project, or start a small business there is a CNC machine or router for you. CNCs, which are generally thought of as being ridiculously expensive don’t have to be.

These beginner machines prove the assumption wrong. While you won’t be able to cut a giant chuck of hardened steel with them, they will cut through wood, plastic and other soft materials like butter. With the right machine and some tweaking you might even cut aluminum.

All of the CNC machines listed below are excellent machines. However, it is important to take note of some of features such as the work area of the machine. Feel free to skip to the end of this article to see our comprehensive list of things to consider when looking for your first CNC machine or router.

Budgets vary, but all of these machines should be considered affordable, entry level CNC machines that are extremely capable.

Now, let’s get to the meat and potatoes and find out which machines top our list.

Name

Awards

Work Area

Where to Buy

BobsCNC Evolution 4 CNC Router Kit

Best Overall CNC,
Best for Woodworking & Carving

24"x24"x3.3"

SainSmart Genmitsu CNC 3018-PRO

Best Budget CNC,
Best CNC for Beginners

11.8"x7.0"x1.7"

SainSmart Genmitsu 3018-PROVer

Best Mini CNC,
Best CNC under $1,000

11.8"x7.0"x1.7"

MYSWEETY DIY CNC 3018-PRO

Best Beginner CNC Router and Laser Engraver Combo

11.8"x7.0"x1.7"

BobsCNC Evolution 4 CNC Router Kit

plus symbol

Pros

Customer support is second to none
Large work area - great for making bigger signs

minus symbol

Cons

More detailed assembly
Not setup for laser engraving

Materials it will cut: Wood, plastic, soft aluminum, acrylic, PCB, leather, others possible with experimentation

Work area: 24” x 24” x 3.3” = 610 mm x 610 mm x 85 mm

Warranty: 60 Days

BobsCNC makes machines that are a pretty big step above other entry level CNC machines. Bobs makes machines that are aimed at users that want to machine wood, plastic and other soft materials. CNC wood routing is their specialty.

Size matters and the work area of the Evolution 4 (E4) is two to three times larger than other machines. This makes a huge difference in what you can make. 

Many people use the E4 for making CNC routed signs or art. BobsCNC even has some “unofficial” plans that allow you to expand the machine even more. The work area can be expanded to 24”x48”x3”.

One downfall is that the E4 is not designed to be used with a laser. The company claims this is for safety reasons and honestly it makes a lot of sense. Lasers can be very dangerous. 

Many of the beginner level laser engravers have a small work area. This makes it easier to build an enclosure for protection. The E4 is a much larger machine.

A key difference of the E4 when compared to other starter CNCs is that the setup is more involved. 

While other machines often arrive mostly assembled, this is not the case with machines from BobsCNC. You will need to assemble everything yourself. It will likely take a day or two but you will develop a good understanding of the machine itself doing it. 

Luckily, the included instructions are detailed and thorough. If there are any questions, there are plenty of good resources on YouTube and in Facebook groups.

Speaking of questions, if you have any issues BobsCNC has top notch support. Like ridiculously good support. By all accounts they are extremely fast to respond. It is not unheard of for Bob himself to respond and help to troubleshoot any issues by phone or email outside of normal working hours.

A couple things to know about the E4:

It’s louder than most entry level machines. The router/spindle is a real power tool, so it makes quite a bit of noise.

It’s messy. The E4 is capable of cutting a lot more than other entry level machines. This means it generates substantially more dust as a result. Think about getting a dust shoe and dust collection system to keep things tidy.

Overall, the Evolution 4 from BobsCNC is an extremely well designed and built product. It does exactly what it is meant to do, which is CNC routing of wood and other soft materials. Some light metal work might be possible but realize this is still a starter tool.

In the end, I think a picture is worth a thousand words so check out the gallery on BobsCNC to get an idea of the types of projects you can make.

SainSmart Genmitsu CNC 3018-PRO

plus symbol

Pros

Easy assembly
Great for beginners
Easily switch to laser engraving

minus symbol

Cons

Limited work area

Materials it will cut: Wood, plastic, soft aluminum, acrylic, PCB, leather, others possible with experimentation

Work area: 30 cm x 18 cm x 4.5 cm = 300 mm x 180 mm x 45 mm = 11.8” x 7.0” x 1.7”

Warranty: 1 Year

The 3018 Pro is a great starter CNC machine. Primarily meant to be used for engraving, it is extremely well built for such a budget friendly machine.

The 3018 Pro will easily cut softer materials such as plastic and wood. Metals are a little more of a challenge. 

Aluminum can be cut but it will require playing with the speeds and feeds to find something that works for your machine and cutting tools. Other soft metals may be possible but expect to experiment quite a bit. 

This is a nicely built machine. The frame is rigid and assembly is easy.

The 3018 Pro can easily be switched to a laser engraver by purchasing a laser unit and swapping it in place of the router/spindle. The swap only takes 2-3 minutes on the machine.

The Genmitsu 3018 Pro is an excellent choice for anyone who is just starting out with CNC. 

The one big downfall of the 3018 Pro is the work area. You simply won’t be able to work on large projects. 

The manufacturer’s support and communities such as the dedicated Facebook group are a huge help to those trying to learn CNC. Because these 3018 CNCs are so common, chances are that any question you have has already been answered.

The Genmitsu 3018 Pro is a quality, versatile machine for beginner level CNC machining, routing and laser engraving.

SainSmart Genmitsu 3018-PROVer

plus symbol

Pros

Pre-assembled
Comes with most common upgrades

minus symbol

Cons

Not a full enclosure

Materials it will cut: Wood, plastic, soft aluminum, acrylic, PCB, leather, others possible with experimentation

Work area: 30 cm x 18 cm x 4.5 cm = 300 mm x 180 mm x 45 mm = 11.8” x 7.0” x 1.7”

Warranty: 1 Year

Essentially the Genmitsu 3018-PROVer is the same as the Genmitsu 3018 with the exception that it comes with almost all of the upgrades that people normally add on to their machine.

Let’s get to the upgrades.

One area which is nicely improved is the body of the 3018-PROVer. It is now all aluminum. This improves the rigidity of the machine which increases cutting performance. 

The drivers have been upgraded too. They are more powerful while also being much quieter. This is a nice change for anyone who might be operating the machine in close proximity to their neighbors.

Limit switches have been added which help to keep your machine from crashing. While these are a great addition, it should be noted that they actually decrease the work area by a small amount. Not a huge concern but plan on losing a little travel.

The biggest change is the addition of an offline controller display and emergency stop button. The emergency stop or e-stop button is a welcome addition. 

The machine will crash. It’s inevitable. Being able to hit a big red stop button is fairly important. Emergency stop buttons are standard on anything bigger than an absolute beginner model and for good reason.

The offline controller allows you to run the machine without having a computer attached. For a good rundown of the offline controller check out this guide from the manufacturer.

The added side enclosures on the machine are just OK. They won’t contain all the noise or dust but they help a little. Not a big change over the other Genmitsu 3018 models. They feel kinda pointless because when it comes to dust, you need to go all out and get a full enclosure or just deal with the mess.

The last upgrade is the addition of a z-axis tool setting touch probe. This allows you to set the location of your part without messing with sheets of paper or something similar. 

Place the probe on the workpiece and connect the clip to your cutting tool. Lower the tool until it touches the probe. The machine will automatically set the height of your workpiece and you are ready to cut.

The Genmitsu 3018-PROVer is an excellent all-around CNC for the beginner. It combines the already stellar 3018-PRO CNC machine with the most common and beneficial upgrades to make setup and use easy.

MYSWEETY DIY CNC 3018-PRO

plus symbol

Pros

Easy to use laser engraving software

minus symbol

Cons

Laser focus lens

Materials it will cut: Wood, plastic, soft aluminum, acrylic, PCB, leather, others possible with experimentation

Work area: 30 cm x 18 cm x 4.5 cm = 300 mm x 180 mm x 45 mm = 11.8” x 7.0” x 1.7”

Warranty: 90 Days

The MYSWEETY CNC 3018-PRO is a great starter CNC machine especially for those looking to get into laser engraving. Overall the build is very similar to other 3018 model CNC machines. What sets it apart is the included laser.

The MYSWEETY comes in 3 different versions:

  • Large = 3 watt laser
  • Extra Large = 5 watt laser
  • Full Size = 7 watt laser

It’s an odd naming structure but I guess with a name like MYSWEETY maybe that should be expected.

The machine comes in need of full assembly. The included instructions leave something to be desired, so seek out some YouTube videos to help you along. Assembly should take about an hour, possibly a little longer to watch instructional videos.

The build is sturdy and most of the components are aluminum. Let’s talk about the included laser.

The lasers available are passable. Don’t expect to do much cutting with them. They are primarily for engraving. Remember these are beginner machines and whether you are CNC routing or laser engraving, they often end up lacking somewhat in the power department.

That being said, the included blue laser is capable of cutting smaller pieces of wood such as 1/8” balsa wood. It might just take some experimenting to get right.

A frequent complaint about the laser module is that the focus lens fits rather loosely. This makes it too easy to turn accidently. A little bit of Teflon tape on the threads will go a long way towards remedying the problem. This will keep your laser focused where it needs to be on the workpiece. A correctly focused laser will increase its performance.

Also included in the package is a set of laser safety glasses. Read the instructions and make sure to use these when operating the laser. Lasers can be quite dangerous. Safety first! You don’t want to put an eye out with this thing.

An offline controller comes as part of the package. This is a welcome addition for those who don’t want to dedicate a computer to the use of their CNC machine.

The software that comes with the MYSWEETY CNC-3018 PRO is a mixed bag. Laser engraving works very well and in most cases the machine can be setup and engraving in no time.

It is enough to get you started but if you want to get serious with laser engraving then you will want to pick up a copy of Lightburn sooner rather than later. It is reasonably priced and works extremely well.

Unfortunately, the software for the milling aspect isn’t quite as user friendly as the included laser software. Expect to take a little time to learn some of the intricacies of the program before you get you used to it. Or jump straight to one of the other software packages out there. Easel by Inventables can be a good starter software to make your first projects more simple to get going.

All in all, the MYSWEETY CNC-3018 PRO is a good beginner laser/mill combo for someone who is looking to get their feet wet in CNC routing and laser engraving. The build is in line with other entry level machines such as the Gemnitsu. It comes with a nice set of extras and makes an excellent learning tool. Small scale laser engraving is this machines specialty.

Conclusion

BobsCNC Evolution 4 Router Kit is the clear winner with a much larger work area and improved cutting performance when compared to other beginner CNC machines. 

The other CNC routers listed, such as the Genmitsus and MYSWEETY, can do most of the same tasks just on a much smaller scale. However, they do it at a budget friendly price.

The MYSWEETY machine makes a nice compromise between CNC routing and laser engraving if you aren’t sure which way you want to go yet and would like to try both out before stepping up to a more capable machine once you know which you like more.

Keep this in mind and check out the list of things to consider that follows to help you get started and if you have any questions, please leave them in the comments below. 

Things to consider

Safety

While some of these entry level machines can be “cute”, don’t let them fool you. These are powerful tools that are capable of causing serious damage. Treat them like the dangerous power tools that they are.

Read your instructions.

Wear property safety equipment including eye and ear protection.

Be careful and if you aren’t sure about something, don’t be afraid to reach out to the manufacturers or other learning resources to make sure you are being safe.

Size of work area

The size of the work area is very important part of a CNC machine. Many hobbyist machines do not have a large envelope that they are capable of cutting, routing or engraving in.

The Z axis (up and down) is always the axis with the least amount of travel. This will determine how thick of a work piece you are able to cut. Keep in mind that this will be further reduced by your tooling. If you have a long end mill or router bit that you are using, then it will shorten the thickness of the part which you are able to cut.

Please note that the physical dimensions of the CNC are not the same as the work area.

For example, the Genmitsu CNC 3018-PRO has a physical size of 15.7” x 13.0” x 9.4”. The work area is only 11.8” x 7.1” x 1.8”. Clearly there is a significant difference between the two. So make sure that you know the two specs are different and how they relate to what you can cut and where you can physically place your machine.

Speeds and feeds

Speeds and feeds can be a fairly complicated subject but here are some resources to get you started:

As you work with more difficult materials such as metals, you will find that the window of speeds and feeds that will work will shrinks up drastically. 

If you are sticking with soft stuff like wood or plastic, then your window for success will be more open and forgiving. For this reason, wood is a great material to practice with when you are first getting acquainted with your CNC.

CNC routers vs spindles

When it comes to beginner level CNC machines, the terms router and spindle are used almost interchangeably. Some machines, such as the ones from BobsCNC, use an actual router like you would buy at a hardware store. Others use spindles.

Practically, they are both simply motors that have a collet or chuck to hold a cutting tool such as a router bit or end mill. For the beginner level machines, an actual router such as one from Dewalt or Makita will be more powerful than the spindle included in similar machines.

Tooling

Tooling is your cutters. This includes router bits and end mills of all shapes and sizes. The right cutter will make all the difference when machining. Cutters can be purchased for many different types of materials.

Many CNC machines will come with some type of cutter right out of the box. They aren’t usually great. They will get you started however and as you gain experience you can look into adding additional tooling for your application.

The most important bits for getting started with you CNC are end mills (both flat bottom and ball nose), v bits and a surfacing bit. These are the first ones you will want to get and the first ones you will want to upgrade down the road. For a full guide check out our Ultimate Beginner’s Guide to CNC Router Bits.

Customer service

Pay attention to the level of customer service that the manufacturer provides. While the machines are not overly complex, they can pose some challenges for someone just starting.

Look for companies that are quick to reply and don’t be afraid to check their website for tutorials or additional information. While some of the foreign made machines might not have the best phone support, they often have support groups and communities that do an excellent job of helping you with any issues.

Software

There is a large variety of software that gets used on these machines. Covering them all would be a giant topic by itself. To get you started here is a quick rundown:

  • CAD or computer aided drafting is software that will allow you to create models to machine or engrave. This is only a drawing and needs further processing before your machine will know what to do with it. The most commonly used CAD software are Fusion 360 and Tinkercad
  • CAM or computer aided manufacturing is the software that takes your model and turns it into code that your CNC will understand. If you are familiar with 3D printers, CAM software is similar to slicing software. The most common CAM software are Fusion 360, CamBam, SheetCam and MeshCam.

A good starting point is to look into Fusion 360. It has an enormous number of tutorials on YouTube. You are likely to find help for any issue you run into and there are many guided courses on use of the software.

Related articles

Beginners Guide to Micrometer Ratchets [Tips and Tricks for Use]

micrometer ratchets

Click, click, click. 

Is that the sound of a good measurement?

If you follow our guide to using your micrometer ratchet, then maybe. You can’t say we didn’t try.

Some of these tips might just surprise you. After all, it is all the little details coming together that let you get a good reading from your micrometer.

Check them out but remember that no amount of reading will beat some quality time practicing with your mic.

What is the ratchet on a micrometer used for?

Ratchets on a micrometer are used for consistency of measurement. The ratchet allows the micrometer user to apply a consistent amount of force to the tool resulting in more consistent measurements.

Micrometers are capable of taking measurements with a great deal of accuracy, most often to 0.0001” or 0.002mm. That is about 30 times smaller than a human hair.

The ratchet mechanism on a micrometer limits the amount of force that can be applied to applied to the tool.

Imagine taking a measurement with your micrometer by gently closing the tool on the part you are measuring. By doing this you get a measurement reading of 0.5000”.

Now with that same part you twist the thimble as hard as you can. Now the micrometer reads .4995”. Notice how the excess force has caused your reading to change.


Closing the micrometer quickly can have the same effect (too much force) and the ratchet mechanism will help in this situation as well.

Ratcheting mechanisms are especially helpful for anyone who is not used to working with a micrometer. The biggest thing to remember is that they aren’t perfect and there are many old micrometers out there with ratchets that don’t function properly.

Take multiple measurements and verify your tool to a known standard such as a calibrated gauge block to give yourself the best chance at an accurate measurement.

Will using a ratchet stop on your micrometer make your measurements more accurate?

This one is tricky.

No, using a ratchet stop will not immediately mean that your readings are more accurate. They can however make it easier to get accurate measurements.

If you are new to working with a micrometers we recommend you use the ratchet mechanism. But don’t assume this removes you from the equation. You should still do your best to be consistent in your measurements.

This means using a fairly gentle and above all consistent amount of force when using your micrometers. Spin it as fast as you want (within reason) until you are just about to contact the part you will measure. Improving the accuracy of your measurements happens in those last few thousandths of an inch.

yellow and black quick tips icon

Count your clicks

To improve your consistency, use the same amount of ratchet clicks when taking your measurements. We recommend starting with three clicks.

Ratchet or not, make sure to take multiple measurements to improve your skill using your micrometer. In fact, with enough practice, many people prefer to use their micrometer without the ratchet and instead relying on their “feel or touch” with the micrometer.

This isn’t beginner level stuff though, it will take some time and practice to develop the touch and even once you have gotten good with your tool, you should still be taking multiple measurements.

It only takes a spec of dust or lint, or a slight twist of your micrometer to give a measurement that is a few “thou” off. A few thousandths can often be the difference between perfect parts and scrap.

Ratchet stops vs friction thimbles

Ratchet stop
micrometer friction thimble example
Friction thimble

Ratchets aren’t the only type of mechanism used on micrometer to improve accuracy. Not only are there multiple types of ratchets with different levels of force, but there are also other options from different manufacturers such as friction thimbles.

With a friction thimble, once a certain amount of force has been applied the thimble will spin freely. No click, click, click.

Friction thimbles are still subject to the same issues as ratchet stops. They still require you to be consistent with the amount of force applied and it is best practice to take multiple measurements.

Friction thimbles, like ratchets, will lessen the effect that the micrometer user will have on their measurements, but they don’t eliminate that effect.

Tips for getting the most accurate measurements with your micrometers

The goal when using a micrometer is always to get the most accurate reading possible. To do this follow the tips below and give yourself the best shot at getting that measurement right on the money each and every time.

Keep it clean

contaminants that affect measurements

Your micrometer, your part, your workspace. Just keep everything clean.

Dirt, grime, lint, and oil are all enemies of accuracy. Clean everything with low lint wipes whenever possible. A quick visual inspection can help you determine whether your tool and part are free of contaminants.

Verify your micrometer

gauge block set
Check your micrometer with gauge blocks regularly

Whenever possible, check your tool at a size as close to the measurement size you are checking as feasible. If you are going to measure a 0.510” thickness, then grab a calibrated 0.500” gauge block and give it a quick check. This will provide some confidence that your tool is functioning correctly.

I always say that you never know what happened to your micrometer when you weren’t looking. Don’t think your kids or coworker wouldn’t knock it on the concrete floor, give a shifty glance around, put it back on your workbench and then walk away never saying a thing.

Right measurements are at right angles

a micrometer measuring a part at 90 degrees

You should be measuring your parts normal, or 90 degrees, to the surface being measured. What this means is that if you try to take a reading and your mic is cock-eyed, then you will get a bad measurement.

When at an angle other than 90 degrees, you will be measuring the hypotenuse of a triangle which will result in a larger than actual measurement.

This can largely be avoided by using a slight, gentle rocking of your micrometer when taking your measurements. With a little practice, you will feel the tool and part settle in and know that you aren’t getting a crooked measurement.

Be consistent

I covered it quite a bit earlier, but it is so important I want to touch on it again.

Consistency is king when it comes to measurement. Practice, practice, practice and you will develop that consistency. Some of it is just muscle memory so grab a known standard such as a gauge block or the standards that come with your mics to practice with. Measuring them over and over will allow you to develop that consistent form and force that will give you the most accurate readings possible.

Take multiple measurements

headline that says check, check and check again

Even the best machine shop inspectors can get a bad reading once. The tolerances are just too tight and the margin of error is too small.

A good inspector might get one bad reading, but you can bet that they won’t get three in a row.

Check your part multiple times to increase your confidence that you got a good reading. If you find that your measurements vary, then practice some more on a known size to work on your feel and form.

Check your tool again when finished measuring

Imagine you just finished taking multiple readings on a dozen parts with your micrometer. What should you do now?

Go check a gauge block! If you don’t have one, then at least check the zero of your micrometer. Too often something can happen to cause your measuring tool to be out of whack.

If you check the tool when you start and check it when you are done then you will only add to the confidence that all the measurements taken in between were accurate.

Safe storage

black plastic case for mitutoyo caliper
Many measuring tools come with plastic cases. Use them!

Take care of those precision measuring tools. If it came with a case, then put it back in the case and stash it in a desk, cabinet or somewhere else out of harms way.

Keep them away from those who would do harm to your precious instruments. I have never known anyone to have regretted putting their tools away and locking them up.

What can a micrometer measure? [Uses and comparisons]

a photo of someone holding a micrometer measuring a part with text that says what can a micrometer measure

Micrometers can measure a large variety of things, but they do have their limitations.

Those limitations are based on their accuracy and their measuring range as well as the type of micrometer.

Because they are specialized measuring tools, you need to make sure that you use micrometers for the right application and wouldn’t be better off with another measuring tool.

How accuracy affects what a micrometer can measure

Accuracy is one of the most important features of a micrometer.

Micrometers are commonly used to measure parts or features of a part, such as its thickness, to a high level of accuracy. Engine components are just one example of the types of highly accurate parts that micrometers are used to check.

Micrometers that read in inches are commonly accurate to +/- 0.0001” while metric micrometers usually measure to +/- 0.002mm.

There are some that do better and some that do worse, but in general most will measure with the above listed accuracy.

Because they are so accurate, they don’t work well for all measurements. For example, if you need to measure a board for a cut and you only need it accurate to 1/16 of an inch (which equals .0625”), then the micrometer is major overkill. It measures 625 times more accurate than you need!

They are slower too. If you only need accuracy of 1/16 of an inch, then bust out the tape measure, take your measurement and keep on trucking.

Micrometer measuring ranges

The other major limitation of a micrometer is its measuring range.

Inch micrometers measure in increments of 1”. So you will have a 0-1”, 0-2”, 0-3” micrometer and so on. This is why micrometers are often sold as a set with 0-3”, 0-6” and 0-12” sets being the most common.

starrett micrometer set in case with reference standards
A 0-6" set of micrometers

Having a set of micrometers allows you to take accurate measurements over a larger range of sizes.

Metric micrometers are found in 25mm increments. 0-25mm, 25-50mm and so on. They too are sold as sets to cover larger measuring ranges.

Basically, a micrometer will take a very accurate measurement at the sacrifice of speed and the range of measurements it is capable of.

For many measuring devices you will find that as the accuracy of the tool gets better, the range it can measure over will get smaller.

Types of micrometers

Micrometers are also called screw gauges. There are many different types of micrometers that use the same screw gauge mechanism to measure different types of features. It’s doubtful you need to know about all of them so let’s stick to the basics.

Standard micrometer

outside micrometer
Analog micrometer
mitutoyo digital micrometer
Digital micrometer

First off is your standard micrometer. If someone simply says micrometer then they are referring to an outside micrometer or ‘mic’.

Outside mics are used to measure external dimensions such as the length, width, or thickness of a part.

They are by far the most common micrometer used.

Inside micrometer

mitutoyo inside micrometer set
Inside micrometer set

Inside micrometers get used to measure internal features such as hole diameters or slot widths. One thing to know about inside mics is that they are often not as accurate as outside micrometers.

The most common accuracy for an inside micrometer is +/- 0.001”.

Depth micrometer

depth micrometer
0-1" Depth micrometer

You are never going guess what a depth micrometer measures. Wait… you already know?!

Well thanks for ruining the surprise.

Depth mics measure the depth of features such as holes or slots. Just like an inside micrometer, they are often not as accurate as outside micrometers and usually measure to an accuracy of +/- 0.001”. Their design also means that they can be easier to get an incorrect measurement.

Practice using them on a known standard such as a gauge block is the best way to get good with them.

Accuracy vs resolution

We’ve talked a lot about the accuracy of micrometers, but we haven’t yet talked about their resolution.

Accuracy is how close to a true measurement the micrometer is capable of.

Resolution is how small the graduations that it can resolve are. At times the resolution of a micrometer, especially digital micrometers, may be better than the accuracy which can lead you to believe that you are measuring to tighter tolerances than you actually are.

When comparing micrometers make sure to pay attention to the accuracy of the tool.

Alternatives to micrometers

When it comes to picking a tool other than a micrometer to use, it all comes back to your accuracy needs and the speed of the measurement.

Let’s discuss the two main alternatives to micrometers:

Calipers

digital caliper measuring gauge block
Set of digital calipers measuring a gauge block

Calipers, whether digital, dial or vernier, are less accurate than micrometers. They typically measure to an accuracy of +/- 0.001”.

But what they sacrifice in accuracy they gain in versatility and speed of measurement.

While micrometers only measure a single type of measurement such as an outside, inside or depth measurement, most calipers will take all three.

They also have a larger measuring range with the most common type being able to take readings from 0-6”. You would need six separate micrometers to match the outside dimension measuring capability of a single set of calipers.

We discussed earlier how micrometers aren’t the fastest measuring tool to use. When compared to calipers this really becomes noticeable. A set of calipers could take dozens of measurements across their entire measuring range in the time it would take to take a few readings with a micrometer.

Calipers compared to micrometers have their advantages and their disadvantages. Pay attention to these differences when deciding which one is right for your measurement.

Dial indicators

dial indicator
Dial test indicator

Dial indicators come in a couple different varieties. First is the dial test indicator.

Dial test indicators are used to take comparison measurements. They get set up or “zeroed” to a known standard such as a stack of gauge blocks and measurements are taken relative to that standard.

A dial test indicator will have a relatively small measuring range, usually measured in thousandths of an inch (0.001”) and will measure to a high degree of accuracy such as 0.0001” or better.

They specialize in taking very accurate measurements repeatedly. If they are used to check a variety of measurements, then they will be quite slow to use because they need to be set up for each different measurement.

mahr drop indicator
Drop indicator

Another type of dial indicator is drop indicator. They most often come with a larger dial face, usually about 2-3” across, and they have larger measuring ranges.

A typical measuring range for a drop indicator is one inch but they do vary and can be smaller or larger. When compared to dial test indicators, they have significantly less accuracy. Most drop indicators are accurate to 0.001”. Their most common application is set up in either a snap gauge or a height stand which allows them to be used to take quick, repetitive measurements.

Ultimate Guide to Measuring Caliper Sizes

What size do calipers come in?

Dial, digital and vernier calipers come in a large variety of sizes.

On the smaller end of measuring ranges would be a 0-3” caliper, though these tend to be pretty rare. 0-4” calipers sneak in there in small quantities and then by far the most common measuring range of a caliper is 0-6”.

A 0-6” measuring caliper is the typical everyday workhorse of the machine shop.

Custom calipers can be made to just about any size measuring range. However, the largest normal calipers are generally 0-24”. I am sure that many people have experience working with larger sets, but they certainly are not what I would call common.

Measuring Range in Inches

Measuring Range in MM

0-3"

0-75mm

0-4"

0-100mm

0-6"

0-150mm

0-8"

0-200mm

0-12"

0-300mm

0-24"

0-600mm

0-40"

0-1000mm

Are there any differences between calipers with small and large measuring ranges?

Measuring Range

Advantages

Disadvantages

Smaller Calipers

Accurate, easier to use

Limited measuring range

Larger Calipers

Can measure larger distances

Less accurate, hard to manuever for measurements, expensive

Accuracy and ease of use would be the primary differences between small and large measuring calipers.

Smaller sets of calipers can get into tight spaces, and they are much easier to maneuver to take your measurements.

Anyone who has tried to measure a smaller dimension with a set of large calipers knows exactly how awkward they can be in that situation.

A 0-6” set of calipers works well for all but the tightest spaces and I recommend using them for all measurements under six inches. This is because not only are the larger calipers unwieldy at times, but they typically sacrifice some accuracy to gain the larger measuring range.

A good set of 0-24” calipers will often be accurate to +/- 0.002” while a good set of 0-6” calipers will be accurate to +/- 0.001”. Extra-large calipers such as any that are over 24” are going to suffer and even bigger hit to their accuracy.

Keep in mind that we are talking about good quality calipers. You can find junk in all sizes, be sure to avoid them.

Below is a table that compares the measuring range of typical high-quality calipers such as those from Starrett and Mitutoyo and their accuracy. Lesser quality tools could easily be half as accurate or less.

Measuring Range in Inches

Measuring Range in MM

Typical Accuracy in Inches

Typical Accuracy in MM

0-3"

0-75mm

+/- 0.001"

+/- 0.02mm

0-4"

0-100mm

+/- 0.001"

+/- 0.02mm

0-6"

0-150mm

+/- 0.001"

+/- 0.02mm

0-8"

0-200mm

+/- 0.001"

+/- 0.02mm

0-12"

0-300mm

+/- 0.001"

+/- 0.02mm

0-24"

0-600mm

+/- 0.002"

+/- 0.05mm

0-40"

0-1000mm

+/- 0.003"

+/- 0.07mm

What is the most common measuring caliper size?

By far the most common size of calipers is 0-6”. Calipers with a 0-12” measuring would be the next most common.

After that, things vary a little bit. 0-24” would be the next logical choice, but many people purchase random in between sizes such as 0-4” or 0-8”. If you have a 0-6” and 0-12” set already, I would definitely recommend a 0-24” set as the next set to own.

Are digital calipers better than dial or vernier calipers?

comparison of digital, dial and vernier calipers

No, digital calipers are not better. In fact, they are very similar to dial and vernier calipers. Measuring ranges and accuracy remain similar across all three types of calipers.

This isn’t the case with all manufacturers, so make sure to pay attention to the reported accuracy of any tool you purchase.

We do recommend digital calipers because they are easier for beginners to use and read their measurements accurately but many people prefer the old school route.