Beginner’s Guide to Machine Shop Math

title image that shows a triangle drawn on a paper with pencil next to it

How important is math when working in a machine shop?

Math is something that anyone working in a machine shop will use on a daily basis.

The good news is that everything you need to know can be learned on the job and it isn’t too difficult.

Basic middle school level math skills can take you quite far with machining.

Find out which math skills are the most important and how to do them.

What type of math is used in machining?

a speech bubble that shows how machinists speak
Say what?

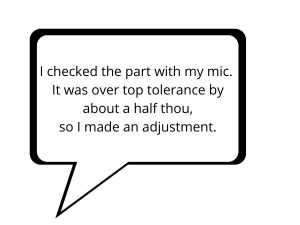
First, I want to point out that learning to speak like a machinist isn’t a math skill necessarily, but it is a skill that anyone working in a machine shop will need to have to do math in the shop.

Our guide to learning how to talk like a machinist teaches you the differences between machining terms such as “thou” or “tenth” and how they compare to normal math terms you may have already learned.

Now on to the real math!

Easy math skills

The math skills needed by a machinist are pretty simple, with a few exceptions. Luckily, a good calculator and a cheat sheet of common formulas (like the one provided below) will make almost all the math used in a machine shop easy enough for just about anyone to solve.

1+1=? written on chalkboard
The easy stuff really is this easy

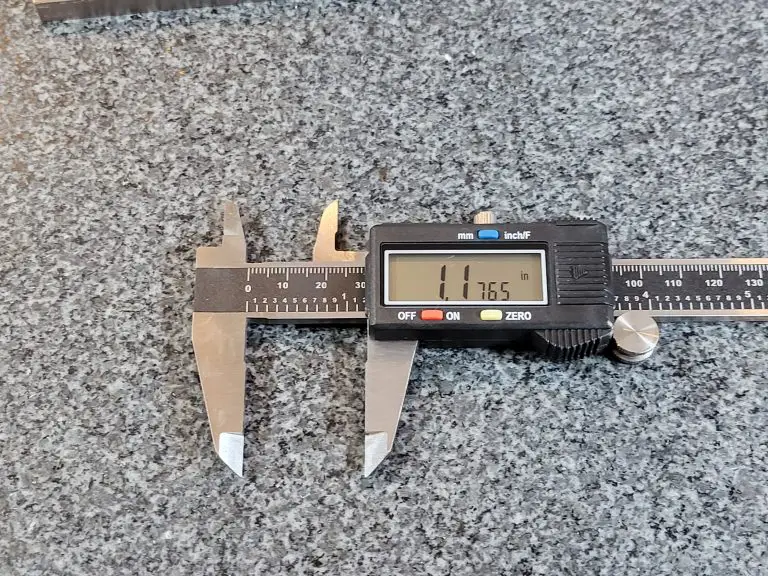
A large portion of the math you will need to do when machining is working with decimals. If you can do the following operations while working with decimals, you will have a solid start to learning machine shop math:

  • Addition
  • Subtraction
  • Multiplication
  • Division

Addition and subtraction are regularly used to calculate the top and bottom of your part tolerance.

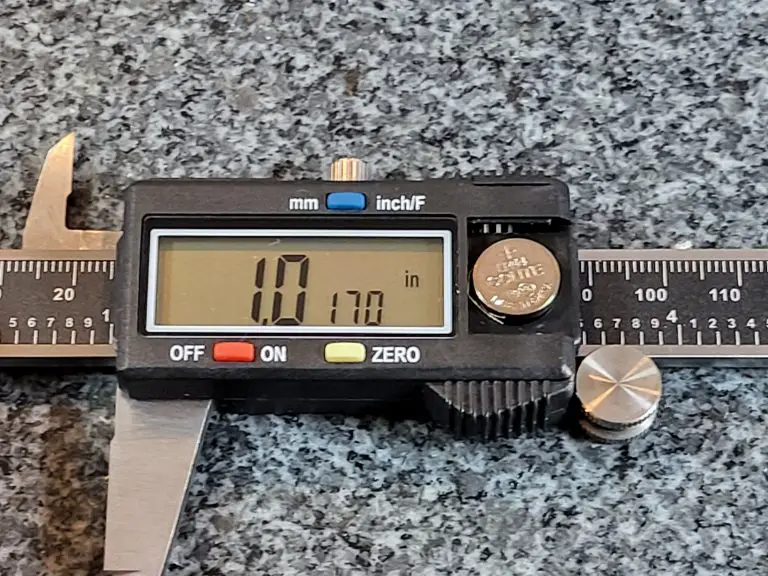
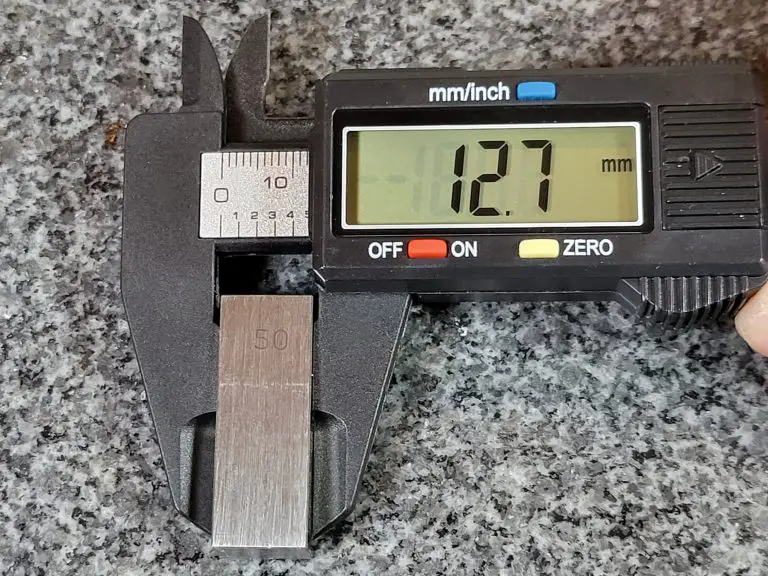
Multiplication and division are used to convert between units such as taking a metric value and converting it into inches.

This is easy stuff to do with a calculator, which you should have by the way.

Speaking of calculators, I recommend going with an actual calculator and not just using your phone. You will look much more professional using an actual calculator. It won’t matter if you are using your smartphone for calculating setups and offsets, people are going to assume you are watching cat videos.

There are some good, specialized calculators for machining, but a cheap Texas Instruments calculator will do everything you need it to.

Unless you know you want a calculator with special functions for machining, it’s best to start out with something like a TI-30 series calculator.

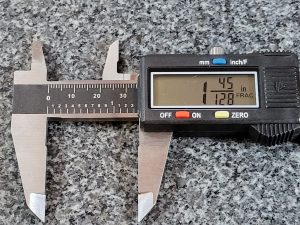
One last easy one that helps is knowing how to calculate the decimal equivalent of various fractions. Again, this is simple to do with a calculator. Quick reference cheat sheets work well also.

Harder math skills

On to the fun stuff! 

I say that jokingly because I know that many are scared to even say these words:

  • Trigonometry
  • Geometry
  • Algebra

But they really aren’t that bad, especially because there are so many resources available to make them easier.

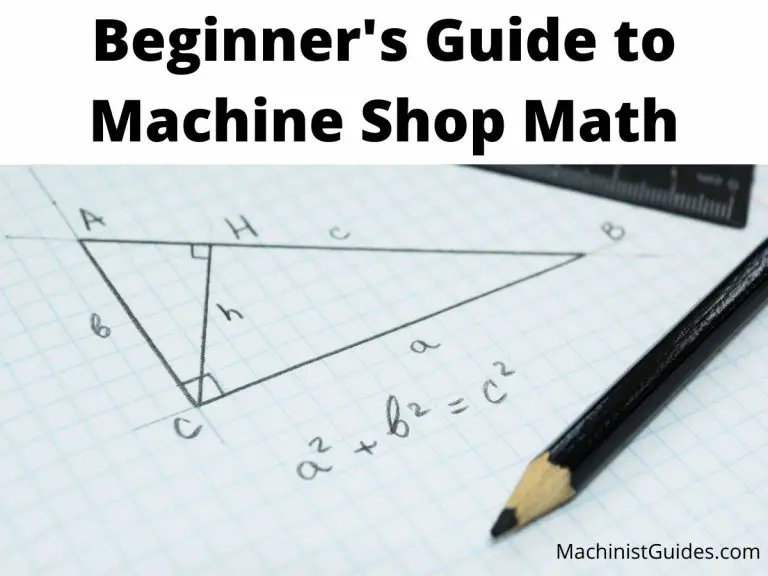
Take for example trigonometry.

Trigonometry is math for working with triangles. Sure, some people will use it frequently working in a machine shop, but there are tons of online calculators that basically make it a no brainer. And to top it off, you will only really use a handful of formulas anyways.

Geometry is no different than trig. Knowing where to find the formula or an online calculator is half the battle.

Most shops will have a trusty reference book such as Machinery’s Handbook or another good machining textbook available with all the formulas you will need. If not, luckily Google will usually turn up anything you need pretty quick.

You'll use the same formulas over and over so just keep practicing

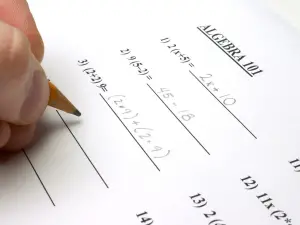
Algebra is probably the most difficult math you will work with if you aren’t very good at math. A little bit of rearranging equations goes a long way.

And honestly, even if you will never be good at algebra, you can go pretty far in the machine trade.

There are multiple online algebra calculators/solvers to help you solve those equations without breaking a sweat. What did we do before the internet?

Lastly, statistics gets used in manufacturing, but in most instances this is something left to higher level engineers and/or management. It’s not something that anyone just starting out in a machine shop should be worried about.

What can you use to make machine shop math easier?

I touched on it earlier, but skip the slide rule and get a good calculator!

After that, bookmark some handy references whether they are online or in an actual book.

Lastly, just practice. The more you use the types of math that get used in a machine shop, the better you will get. 

Bookmark the best resources and practice to master machine shop math.

If you want the easy button instead…

Focus on the most important stuff first.

You need to know how to do a limited number of calculations.

Hit the “easy button” for Machine Shop Math and find out what you really need to know.

Don't overthink it, take the easy route

Other resources

Common machining formulas

Speeds and feeds formulas – Make sure you don’t mix inches and mm! Always stay in the same units

  • Feed rate (inches per minute) = RPM x feed per tooth x number of teeth/flutes in cutter
  • Surface feet per minute = RPM x diameter of cutter / 3.82
  • RPM = surface feet per minute x 3.82 / diameter of cutter
  • Inches per Tooth = inches per minute / RPM / number of teeth/flutes in cutter


Conversion formulas

  • Inches = mm / 25.4
  • MM = inches x 25.4
  • Diameter = radius x 2
  • Radius = diameter / 2

Best online calculators for machine shop math

Starrett vs Mitutoyo: Who is the Master of Measurement?

two calipers pitted against each other with text that says starrett vs mitutoyo

American precision measuring toolmaker, Starrett and her Japanese counterpart Mitutoyo are arguably the top players in the $25 billion measuring equipment market. Both companies boast rich production histories, and their tools are lauded for accuracy, dependability, and durability. 

Sure, there are dozens if not hundreds of measuring tool manufacturers but…

Let’s be real. These two are the best of the best.

We are going to take a look at the most popular measuring tools from both companies to find out how they stack up against each other. Spoiler! They both have their specialties.

But first let’s dive into a quick overview of the two companies because to many people, where the tools are made says more about the quality than any spec sheet ever could.

History of Starrett

Starrett tools factory building in 1905 on river with smokestack
Starrett factory in 1905

Starrett is old.

Like 140+ years old actually, but age is just a number right?

Well, with all those years Starrett has had plenty of time to perfect their tool making business. While we are going to focus on their measuring tools, they are also well-known for making about 5,000 other tools.

They make everything from precision measuring tools to saw blades, hand tools all the way up to fancy computerized inspection equipment. They make a lot of stuff and overall, they are known for making that stuff well.

While Starrett is headquartered in Athol, Massachusetts, USA, it operates several satellite facilities in different parts of the world including Mexico, Scotland, Brazil, and China. Some argue that those satellite facilities have made Starrett take a step down in quality but in general they have good quality control in place and their tools are still well-made.

History of Mitutoyo

outside of Mitutoyo corporate building

Mitutoyo, on the other hand, has yet to celebrate its first century in business. The company was established in Japan around 1934. Fast forward eight decades later, and Mitutoyo boasts a catalog of over 5,000 tools as well.

There tools are more focused on measuring related items and they make less hand tools than Starrett. Mitutoyo manufacturers the majority of their tools in Japan, however some tools are made in Brazil.

Enough history already, right? We’re here to talk about their most popular measuring tools. The kind every hobbyist or machinist is likely to be using.

Digital Calipers

The king of the calipers in my opinion. Digital calipers make for a versatile measuring tool that can take a large variety of measurements. Most are capable of measuring inside, outside, depth and step measurements with an accuracy of 0.001” or .02mm.

Remember that accuracy is the important feature to pay attention to with any measuring tool. Often manufacturers will try to list the resolution, which is the graduations that can be read with the tool. Just because you can read a measurement out to 0.0005” doesn’t mean the tool is accurate to that degree.

Now let’s look at the features of the digital calipers from both Starrett and Mitutoyo:

Starrett EC799A-6 Digital Caliper

Features:

  • Made of stainless steel
  • Measurement range of 6”/150mm
  • Has an accuracy of +/- 0.001”/0.02mm
  • Has a resolution of 0.0005”/0.01 mm
  • Large LCD display
  • Made in China

Take note that some Starrett calipers are made in the United States. The EC799A is made in China and still comes with a hefty price tag. To get a set made in America will likely set you back double.

We have included the EC799A because it is their standard digital caliper. If you Google “Starrett digital caliper”, the EC799A is what pops up. We have done the same with the Mitutoyo digital caliper as both companies make a wide range of calipers.

Mitutoyo 500-196-30 Digital Caliper

  • Made of hardened stainless steel
  • 5-year battery life
  • Measurement range of 6”/150mm
  • Has an accuracy of +/-0.001”/0.02mm
  • Resolution of 0.0005”/0.01mm
  • Large LCD display
  • Made in Japan

Best Digital Caliper

On paper, both tools have very similar stats. In use, the Mitutoyo digital caliper comes out on top with a better build quality, super-fast updating display and extremely long battery life.

Mitutoyo claims a 5-year battery life but unless you are using it all day every day, you can likely expect even longer.

Mitutoyo wins hands down.

Dial Calipers

Dial calipers are the digital calipers older, less tech savvy brother. What they lack in flash, they make up for in dependability. You’ll never pick them up only to find out that your battery is dead and you’re fresh out of button cell batteries in your junk drawer.

Dial calipers are capable of almost everything a digital caliper is with the exception of switching between units. A nice feature to have but not a necessity, especially when many people will find themselves always working in a single set of units.

Starrett 3202-6 Dial Caliper

Features:

  • Made of stainless steel
  • Has a range of 0-6 inches
  • Measures to an accuracy of +/- 0.001”
  • Has a resolution of 0.001”

Just like their digital calipers, Starrett makes a wide range of different dial calipers in various styles and measuring ranges. At the time of writing, they offer 34 different types of dial calipers with 26 made in the U.S and 8 manufactured overseas. 

Mitutoyo 505-742 Dial Caliper

Features:

  • Made of stainless steel
  • Has a range of 0-6 inches
  • Measures to an accuracy of +/- 0.001”
  • Has a resolution of 0.001”

Do those features look familiar? Yeah, they should. Copy. Paste. In fact you should expect the same of any dial caliper maker. They have been around long enough and almost because standardized. Unless you go with an ultra-cheap plastic caliper, you can expect similar specs from any 0-6” dial caliper.

Note: Mitutoyo has about 30 different types of dial calipers and all are currently made in Japan. 

Best Dial Caliper

On paper they are the same. Take a look at the pictures. They even have the same shape and same white dial face. In this case, I would give the edge to the Starrett dial caliper.

I think their action has always been consistently excellent, even on their Chinese made calipers. Also, the fine thumb roll adjustments are a little smoother, but it really is splitting hairs. The Mitutoyo is an excellent dial caliper too.

If you can find a good deal on one go for it but if the price is equal, I say go Starrett for your dial caliper.

Vernier Calipers

Vernier calipers are an interesting take on calipers. They don’t require batteries like digital calipers and they don’t have precision gear mechanisms that are susceptible to damage either. They are basically just two rulers that have their measurements read where the lines match up.

While these advantages would seem to make them the superior type of caliper, they do have some downfalls. For one they can be difficult for some people to read. Some people have trouble figuring out how to read the measurements while others have trouble visually reading them.

I say go digital for your calipers but it you must go old school, here is how Starrett and Mitutoyo stack up with their vernier calipers.

Starrett 125MEA-6/150 Vernier Caliper

Features:

  • Made of hardened stainless steel
  • 6”/150mm measuring range
  • Accuracy from 0-4” is +/- 0.001”
  • Accuracy from 4-6” is +/- 0.0015”

Mitutoyo 530-316 Vernier Caliper

Features:

  • Made of hardened stainless steel
  • 6”/150mm measuring range
  • Accuracy of +/- 0.002”

Best Vernier Caliper

Accuracy rules all when it comes to measuring tools and vernier calipers are no different. Starrett wins with double the accuracy and an included protective case as well.

I would still advise thinking about getting a set of digital calipers and maybe keeping some extra batteries on hand so you know they will be ready when you need them. Digital calipers are just infinitely faster and easier to read.

Standard Micrometers

Micrometers are made for checking extremely precise measurements. Many models are capable of checking tolerances of 0.0001” or better. That is 10x more accurate than a good caliper!

The downfall is what they gain in accuracy they lose in versatility. While a normal set of calipers can measure inside, outside and depth measurements from 0-6”, a micrometer will measure only one type of measurement and only over a 1-inch measuring range.

Starrett 436.1XRL-1 Standard Micrometer

Starrett’s micrometers are what they are most known for. They have been making them, and making them well for a very long time.

Features:

  • Narrow frame for measuring in tight spaces
  • Black enamel protective finish
  • Accuracy of +/- 0.0001”
  • Ratchet stop

Mitutoyo 103-177 Standard Micrometer

Features: 

  • Blue protective enamel finish
  • Accuracy of +/-0.0001”
  • Ratchet stop

Best Standard Micrometer

Once again, we see similar features from both manufacturers. This is to be expected as these are standard specs for a 0-1” micrometer.

One item to note is that the micrometers from both Starrett and Mitutoyo will be the same even as their sizes get larger. Expect a very similar product from both in their 5-6” micrometers and so on.

Even though they are similar, Starrett wins this category for multiple reasons. Their protective finish is nice and, in my experience, more durable. Their protective case is much more rugged, and their ratchet stop mechanism is smoother. That isn’t to say that the micrometer from Mitutoyo is bad, it just misses the mark compared to what Starrett produces.

Digital Micrometers

Digital mics are able to perform the same type of work as a standard micrometer. They add on an easy-to-read LCD display and depending on the model, they can allow the output of measurement data.

Often digital micrometers are the top tier tools and therefore have excellent accuracy, but they do tend to be a bit bulkier than a standard micrometer which can make them a little more awkward to use. Most won’t notice a huge difference but if you are planning to do a lot of one-handed measurements then you might want to stick with a lighter micrometer.

Best Digital Micrometer

I’m going to skip right to the chase and tell you that Mitutoyo hands down makes the best digital micrometers.

I don’t mean Starrett’s digital mics are bad, Mitutoyo is just that good.

They are extremely accurate and will measure down to +/- 0.00005”. That’s a lot of zeroes! Starrett’s digital micrometer is half as good. We know accuracy is huge when it comes to measurement, but the Mitutoyo’s also have a better ratchet stop to help get the most out of that accuracy whereas the Starrett mic has a friction thimble.

Personally, I have found friction thimbles to be slightly less accurate and not be as consistent over time (like 10 years, but still).

Lastly, the Mitutoyo digital mic has the same super long battery life as their digital calipers. Don’t plan on changing the battery or my mind anytime soon. Mitutoyo digital micrometers for the win!

Conclusion

Both Starrett and Mitutoyo make excellent measuring tools of all kinds. You honestly can’t go wrong with either one, but if you were paying attention then you may have noticed a pattern.

If you want the absolute best in category, then go with Starrett for your analog measuring tools and Mitutoyo for your digital options I guarantee you won’t be disappointed.

VINCA DCLA-0605 Digital Caliper Review

plus symbol

Pros

Great price
Has features not normally seen in its price range
Excellent customer service

minus symbol

Cons

Unusual display

Features

The VINCA DCLA-0605 0-6” digital caliper is nice little measuring tool. It is made of stainless steel and is capable of taking measurements in inches, metric and fractional units with an accuracy of +/- .001”.

The VINCA like many other calipers is able to take external, internal, step and depth measurements.

We tested those capabilities by measuring various size gauge blocks over the total measuring range of the tool and found them to be accurate to the manufacturers specs in all instances.

VINCA digital caliper display mm
Metric measurements
VINCA digital caliper display fractions
Fractional measurements

The DCLA-0605 comes with a large, easy to read display. One thing that does take some getting used to is that the first two digits are larger on the display. 

This allows the fractional units to be displayed. An odd choice when most will use the caliper in either inches or millimeters, but definitely not a deal breaker.

VINCA digital caliper display mm
Battery compartment shown

The VINCA caliper comes with an LR44 button cell battery installed along with  two spares. While the battery life isn’t as good as something like a Mitutoyo, it isn’t awful either. The caliper has an auto shut off feature for the display when not in use which helps it from draining all the juice.

The screen also flashes when the battery is low to let you know it’s time to swap batteries. Some digital calipers have been known to behave strangely when their batteries are low so this is a welcome feature.

VINCA digital caliper in case unwrapped
Nice protective case

The DCLA-0605 comes with a protective case which is a nice bonus that some cheaper digital calipers don’t have. 

VINCA digital caliper data port
The RS232 data transfer port - DO NOT plug a USB cable in

Another feature not commonly seen on lower priced digital calipers is an RS232 port.

This will allow you to hook your caliper up to a computer to record measurements. It is worth noting that you should NEVER try to use a USB cable to hook the caliper up to a computer as this can cause the battery to explode. There are warnings all over the case and on the backside of the caliper to remind you.

Make sure to use the manufacturers recommended cable to connect your tool.

VINCA digital caliper rust on bar
Some rust on the frame

This VINCA caliper comes with a 1 year warranty and it is worth noting that by all accounts the company’s customer service is excellent. Considering my caliper arrived with some rust on the backside slot where the depth rod sits, that is probably a good thing. 

I am not planning on testing it for a budget level caliper, but they are noted as being quick to respond and offer solutions to any issues that are encountered. Maybe if there had been issues with the accuracy as a result.

VINCA digital caliper measuring 4 inch block
Accurate measurements across the board

The overall build quality of the tool is good. It isn’t the smoothest sliding caliper I have used but it does slide freely and it doesn’t catch or hang up at all. 

The fine adjustment wheel works well too and helps make those critical measurements as accurate as possible.

Verdict

VINCA digital caliper packaging
The packaging looks cool

The VINCA DCLA-0605 digital caliper is an excellent budget tool. It has accuracy on par with other calipers in its price range.

The addition of a nice protective case, a couple extra batteries and an RS232 port make it a great choice especially for those looking to record their measurements directly to their computer.

The 1 year warranty and noted excellent customer service make this VINCA caliper a great budget friendly digital caliper.

Neiko 01407A 0-6″ Digital Caliper Review

plus symbol

Pros

Great value for price
Measures in inches, millimeters and fractions

minus symbol

Cons

None

Full review

The Neiko 0-6” digital caliper is made of stainless steel. It features a metric measuring range of 0-150mm. It is capable of measuring in inches, millimeters and fractions. Although most people won’t use the fractional mode, it is nice to have the option. 

Neiko digital caliper display mm
Metric measurements
Neiko digital caliper display fractions
Fractional measurements

The Neiko caliper is capable of taking outside, inside, step and depth measurements. The manufacturer claims that the caliper has an accuracy of .001” or .02 mm. 

I tested that claim by measuring various gauge blocks sizes over the entire measuring range of the calipers and found them to be well within the claimed accuracy. Quite a feat for a budget friendly tool.

The most important quality of any set of digital calipers is good accuracy and these Neikos got it.

Neiko digital caliper display inches
Three small digits when measuring in inches, Two when measuring in mms

The display on the 01407A reads out to .0005” or .01 mm when in metric mode. The fraction mode has a resolution of 1/128 of an inch.

Unfortunately the caliper is incapable of rounding to a different fraction such as 1/32. 1/128th of an inch isn’t exactly the most practical units to use. The display does display reduce the fractions down so you will see 1/2″ instead of 64/128″ which is nice.

The display is large which makes it easy to read, but I am not a fan of the format. It is obvious that it is made like that to read the fractional measurements, but having 2 or 3 of the digits smaller is just weird. It’s not a deal breaker but it does take a little getting used to.

Neiko digital caliper battery closeup
Open battery compartment

The digital caliper comes with an extra LR44 button cell battery which is handy because many report issues with dead batteries on arrival. I ran into the same issue and quickly swapped in the fresh battery.

Luckily the battery is easily changed with no tools required. The battery cover simply slides off with a swipe of your thumb. 

Additionally the caliper is often reported to turn itself on frequently which causes the battery to die quickly. The caliper can be locked in place to keep it from turning itself on but it still might not be a bad idea to try and keep an extra battery on hand.

The caliper also comes with a sturdy plastic case to protect it. 

Neiko digital caliper in case unwrapped
The case is solid with nice padding and room to store an extra battery

One of the harder qualities to convey is the overall build. Some might call it the “feel” of the tool. This is where the Neiko 01407A excels. 

They feel like a much higher priced tool. The jaws slide smoothly along the frame. This is one area that many budget level calipers struggle with. Often they can get the accuracy but the tools just feels like junk when using it. Not the case here. 

The only other build quality item I would note is the fine adjustment roller wheel. While other cheap calipers either tack on a bad one or skip it entirely, Neiko has added one that is comparable to much higher priced calipers. 

When you combine the smoothness and the excellent fine adjustment, it is much easier to get the accuracy you want because over time you will be able to feel your measurements. This is not something that would be possible without this kind of build quality.

Verdict

The Neiko 01407A digital caliper is not the best caliper that money can buy, but it just might be the best value.

The display is a little quirky but it is definitely something that you can get used to. 

In the end, the overall accuracy and the build quality at a bargain price are what make the Neiko 01407A digital caliper one of the best around. 

Adoric 0-6″ Digital Caliper Review

plus symbol

Pros

Cheap
Not magnetic

minus symbol

Cons

No fractional mode
You get what you pay for in accuracy

Features

These digital calipers from Adoric feature your typical caliper measuring range of 0-6” or 0-150mm.

They have a claimed accuracy of +/- .010” or +/- 0.2mm. I tested this claim by measuring various gauge block sizes over their measuring range. I repeated this for inside, outside and depth measurements. In all measurements, the tool met its claimed accuracy.

Adoric digitial caliper measuring block
Testing the accuracy of the caliper

Still, their accuracy isn’t great when compared to many other calipers but at the same time their cost reflects it. When you are buying a set of calipers in the neighborhood of ten bucks you can’t expect a lot.

For instance the packaging:

Adoric digital caliper in packaging
Action figure packaging
Adoric digital caliper back of packaging 2
Highly branded packaging

It screams kids toy more than it does precision measuring tool.

In fact, the packaging is so generic that the only mention of Adoric on it is on a sticker slapped on the backside. I’m pretty sure this means there are carbon copies of this same caliper being put out by other companies.

Carbon fiber copies might be more appropriate because that is what these calipers from Adoric are made of. They definitely don’t feel as rugged as metal calipers, but they don’t feel flimsy either.

The carbon fiber construction does have some benefits. Firstly, they are non magnetic  which means measuring magnetic materials will be much simpler than with standard stainless steel calipers. It also means that these calipers are less likely to scrape or scratch your workpiece during measurement. 

The nicest benefit of being made from carbon fiber is that they are extremely lightweight. I really thought these were going to be a cheapo tool, but the caliper has enough weight to make it feel strong while still being light enough to make it very easy to use one-handed and maneuver for all kinds of measurements. 

Adoric digital caliper display
The display when measuring inches

Similar to most calipers, these Adoric digital calipers are capable of taking inside, outside, step and depth measurements.

These measurements can be taken in inch or metric readings. Unfortunately there is no fractional mode which in my opinion would be a nice addition considering their accuracy. A fractional mode that read to 1/64″ or 1/32″ would probably have worked well more many people.

Units are easily switched with the inch/mm button on the face of the caliper. A simple selection of buttons surround the easy to read display. Besides the inch/mm units button there is also an off/on and zero button.

Adoric digital caliper battery
Open battery compartment and extra battery

Battery life is decent thanks to the tool’s ability to turn off automatically. When not in use, the caliper turns itself off after about 4.5 minutes.

The caliper also turns on automatically when it senses movement. So why even have an On/Off button? Use it or not, it’s there.

The Adoric caliper comes with an LR44 button cell battery already installed and a spare in the package.

One last note about the battery is that it is easily changed, possibly too easily. Many people have noted the battery cover accidentally coming off during use. I had not issues with the set I ordered for this review.

There is no ability to lock the caliper during measurement as seen on many other calipers. Additionally there is no protective case provided which is unfortunate but at this price point you can’t expect many extras.

Verdict

Adoric digital caliper full
Limited accuracy but otherwise surprisingly good especially for the price

A nice alternative to your standard tape measure for shorter measurements. These calipers are a great tool for homeowners to take precise measurements.

Their accuracy is lacking but for many applications such as working with crafts or 3d printing, they will be sufficient. The most important thing will to know what type of tolerances you need to hold. Higher quality calipers will be usually be accurate to +/- 0.001″.

If you require more accuracy, but are on a tight budget check out the Neiko 01407A 0-6″ digital calipers. They make a decent alternative.

All-in-all for the price, these Adoric digital calipers are great to throw in a junk drawer or garage toolbox to keep handy for a quick and easy measurement.

Mitutoyo 500-196-30 0-6″ Digital Caliper Review

plus symbol

Pros

Excellent accuracy
Resistant to dirt, oil and water

minus symbol

Cons

Quality comes at a price
Doesn’t measure in fractions

Features

Mitutoyo’s 500-196-30 0-6” digital caliper is a true quality measuring tool. Made in Japan, they have a measuring range of 0-6” or 0-150mm. These calipers are made of stainless steel and have a resolution of .0005” or .01mm. 

mitutoyo digital caliper packaging
The calipers arrive in some snazzy orange packaging

They are advertised as having an accuracy of +/- .001” or .025mm. In my experience they are closer to +/- .0005”. This is a nice contrast to some of the cheaper alternatives that claim a better accuracy than they actually possess. 

mitutoyo digital caliper measuring 1 inch block
Measuring a 1 inch gauge block
mitutoyo digital caliper measuring 4 inch block
Measuring a 4 inch gauge block

If you do require calibration documentation, you will most likely be performing the operation in house or through your normal calibration vendor. Long story short, if your using them for personal use then skip the extra cost and just check your zero when you go to use them.

They already come with an inspection certificate from Mitutoyo anyways.

Note: These calipers can be purchased with a calibration certificate if desired. Most people will get no added benefit from the extra calibration. 

mitutoyo digital caliper inspection certificate
Inspection certificate from Mitutoyo

If you do require calibration documentation, you will most likely be performing the operation in house or through your normal calibration vendor. Long story short, if your using them for personal use then skip the extra cost and just check your zero when you go to use them.

They already come with an inspection certificate from Mitutoyo anyways.

mitutoyo digital caliper depth rod
Closeup of the depth rod for taking depth measurements

This 0-6” caliper is capable of taking inside, outside, step and depth measurements like many others. It has a large easy to read display. Buttons for on/off, zero/abs, in/mm and origin are present on the face. Units can be switched from inch to metric in an instant. 

mitutoyo digital caliper display in inches
Measuring in inches
mitutoyo digital caliper display in mm
Metric measurements

Unfortunately there is no option for fractional units but most will find their application doesn’t require them. The zero position can be changed making comparison measurements easier. 

mitutoyo digital caliper with battery installed
The battery compartment with SR44 battery installed

Battery life is very good with this model. Mitutoyo claims a 3.5 year battery life with normal use. That sounds too good to be true. In reality the battery lasts a very long time.

The calipers come with a battery and if needed the battery is easily changed with no tools required. The battery cover simply slides off.

One thing of note is that these calipers don’t turn off automatically like other models so make sure to hit the off button when you’re finished. A final note related to the battery is that these calipers feature a low battery indicator to let you know when it is time for a change. 

Unlike many other digital calipers, these ones are resistant to dirt, oil and water. Mitutoyo claims they are coolant proof. I wouldn’t recommend submerging them in anything but a light splash shouldn’t hurt anything. They come with a nice plastic case which protects them while not in use.

mitutoyo digital caliper in case
The caliper comes with a sturdy well fitting case

Verdict

I can’t say enough good about them. The Mitutoyo 0-6” digital caliper is a step above most of their competitors. 

Amazing accuracy, excellent battery life and resistance to contamination that might affect your measuring tool makes for a reliable, dependable measuring tool. They are perfect for reloading, engine work or every day use in a machine shop and will easily stand up to all of your measurement needs.

Frequently asked questions

Where are Mitutoyo tools made?

Mitutoyo are manufactured in Japan and rival the quality of many American made tools.

How long is the Mitutoyo warranty?

mitutoyo digital caliper warranty
Warranty documentation from Miitutoyo

The warranty on these calipers is one year. If you register your tool with Mitutoyo you can extend this to a total of three years. Definitely something worth doing.

What type of battery does the Mitutoyo caliper use?

mitutoyo digital caliper sr44 battery
The included battery from Mitutoyo

The Mitutoyo 500-196-30 digital caliper and many others by Mitutoyo use an SR44 battery. A 357 battery is the equivalent by various other manufacturers and can be used also.

How to reset the Mitutoyo digital caliper

If your caliper is ever flashing or needs to be reset because of something such as a dead battery, follow these simple steps.

First close the jaws so they are in the zero position. Now hold the origin button. This will reset the display. Verify your instrument is working by checking against a known standard such as a gage block.

How to calibrate Mitutoyo calipers

To learn how to calibrate your Mitutoyo caliper, follow the calibration instructions in our Beginner’s Guide to Calipers.

What does the error code on my Mitutoyo caliper mean?

Check out this thread for a great rundown of all the error codes you might run into using Mitutoyo digital calipers. I have never used a set that has thrown a code other than one for the battery but just in case.

Related articles

Beginners Guide to Micrometer Ratchets [Tips and Tricks for Use]

micrometer ratchets

Click, click, click. 

Is that the sound of a good measurement?

If you follow our guide to using your micrometer ratchet, then maybe. You can’t say we didn’t try.

Some of these tips might just surprise you. After all, it is all the little details coming together that let you get a good reading from your micrometer.

Check them out but remember that no amount of reading will beat some quality time practicing with your mic.

What is the ratchet on a micrometer used for?

Ratchets on a micrometer are used for consistency of measurement. The ratchet allows the micrometer user to apply a consistent amount of force to the tool resulting in more consistent measurements.

Micrometers are capable of taking measurements with a great deal of accuracy, most often to 0.0001” or 0.002mm. That is about 30 times smaller than a human hair.

The ratchet mechanism on a micrometer limits the amount of force that can be applied to applied to the tool.

Imagine taking a measurement with your micrometer by gently closing the tool on the part you are measuring. By doing this you get a measurement reading of 0.5000”.

Now with that same part you twist the thimble as hard as you can. Now the micrometer reads .4995”. Notice how the excess force has caused your reading to change.


Closing the micrometer quickly can have the same effect (too much force) and the ratchet mechanism will help in this situation as well.

Ratcheting mechanisms are especially helpful for anyone who is not used to working with a micrometer. The biggest thing to remember is that they aren’t perfect and there are many old micrometers out there with ratchets that don’t function properly.

Take multiple measurements and verify your tool to a known standard such as a calibrated gauge block to give yourself the best chance at an accurate measurement.

Will using a ratchet stop on your micrometer make your measurements more accurate?

This one is tricky.

No, using a ratchet stop will not immediately mean that your readings are more accurate. They can however make it easier to get accurate measurements.

If you are new to working with a micrometers we recommend you use the ratchet mechanism. But don’t assume this removes you from the equation. You should still do your best to be consistent in your measurements.

This means using a fairly gentle and above all consistent amount of force when using your micrometers. Spin it as fast as you want (within reason) until you are just about to contact the part you will measure. Improving the accuracy of your measurements happens in those last few thousandths of an inch.

yellow and black quick tips icon

Count your clicks

To improve your consistency, use the same amount of ratchet clicks when taking your measurements. We recommend starting with three clicks.

Ratchet or not, make sure to take multiple measurements to improve your skill using your micrometer. In fact, with enough practice, many people prefer to use their micrometer without the ratchet and instead relying on their “feel or touch” with the micrometer.

This isn’t beginner level stuff though, it will take some time and practice to develop the touch and even once you have gotten good with your tool, you should still be taking multiple measurements.

It only takes a spec of dust or lint, or a slight twist of your micrometer to give a measurement that is a few “thou” off. A few thousandths can often be the difference between perfect parts and scrap.

Ratchet stops vs friction thimbles

Ratchet stop
micrometer friction thimble example
Friction thimble

Ratchets aren’t the only type of mechanism used on micrometer to improve accuracy. Not only are there multiple types of ratchets with different levels of force, but there are also other options from different manufacturers such as friction thimbles.

With a friction thimble, once a certain amount of force has been applied the thimble will spin freely. No click, click, click.

Friction thimbles are still subject to the same issues as ratchet stops. They still require you to be consistent with the amount of force applied and it is best practice to take multiple measurements.

Friction thimbles, like ratchets, will lessen the effect that the micrometer user will have on their measurements, but they don’t eliminate that effect.

Tips for getting the most accurate measurements with your micrometers

The goal when using a micrometer is always to get the most accurate reading possible. To do this follow the tips below and give yourself the best shot at getting that measurement right on the money each and every time.

Keep it clean

contaminants that affect measurements

Your micrometer, your part, your workspace. Just keep everything clean.

Dirt, grime, lint, and oil are all enemies of accuracy. Clean everything with low lint wipes whenever possible. A quick visual inspection can help you determine whether your tool and part are free of contaminants.

Verify your micrometer

gauge block set
Check your micrometer with gauge blocks regularly

Whenever possible, check your tool at a size as close to the measurement size you are checking as feasible. If you are going to measure a 0.510” thickness, then grab a calibrated 0.500” gauge block and give it a quick check. This will provide some confidence that your tool is functioning correctly.

I always say that you never know what happened to your micrometer when you weren’t looking. Don’t think your kids or coworker wouldn’t knock it on the concrete floor, give a shifty glance around, put it back on your workbench and then walk away never saying a thing.

Right measurements are at right angles

a micrometer measuring a part at 90 degrees

You should be measuring your parts normal, or 90 degrees, to the surface being measured. What this means is that if you try to take a reading and your mic is cock-eyed, then you will get a bad measurement.

When at an angle other than 90 degrees, you will be measuring the hypotenuse of a triangle which will result in a larger than actual measurement.

This can largely be avoided by using a slight, gentle rocking of your micrometer when taking your measurements. With a little practice, you will feel the tool and part settle in and know that you aren’t getting a crooked measurement.

Be consistent

I covered it quite a bit earlier, but it is so important I want to touch on it again.

Consistency is king when it comes to measurement. Practice, practice, practice and you will develop that consistency. Some of it is just muscle memory so grab a known standard such as a gauge block or the standards that come with your mics to practice with. Measuring them over and over will allow you to develop that consistent form and force that will give you the most accurate readings possible.

Take multiple measurements

headline that says check, check and check again

Even the best machine shop inspectors can get a bad reading once. The tolerances are just too tight and the margin of error is too small.

A good inspector might get one bad reading, but you can bet that they won’t get three in a row.

Check your part multiple times to increase your confidence that you got a good reading. If you find that your measurements vary, then practice some more on a known size to work on your feel and form.

Check your tool again when finished measuring

Imagine you just finished taking multiple readings on a dozen parts with your micrometer. What should you do now?

Go check a gauge block! If you don’t have one, then at least check the zero of your micrometer. Too often something can happen to cause your measuring tool to be out of whack.

If you check the tool when you start and check it when you are done then you will only add to the confidence that all the measurements taken in between were accurate.

Safe storage

black plastic case for mitutoyo caliper
Many measuring tools come with plastic cases. Use them!

Take care of those precision measuring tools. If it came with a case, then put it back in the case and stash it in a desk, cabinet or somewhere else out of harms way.

Keep them away from those who would do harm to your precious instruments. I have never known anyone to have regretted putting their tools away and locking them up.

What can a micrometer measure? [Uses and comparisons]

a photo of someone holding a micrometer measuring a part with text that says what can a micrometer measure

Micrometers can measure a large variety of things, but they do have their limitations.

Those limitations are based on their accuracy and their measuring range as well as the type of micrometer.

Because they are specialized measuring tools, you need to make sure that you use micrometers for the right application and wouldn’t be better off with another measuring tool.

How accuracy affects what a micrometer can measure

Accuracy is one of the most important features of a micrometer.

Micrometers are commonly used to measure parts or features of a part, such as its thickness, to a high level of accuracy. Engine components are just one example of the types of highly accurate parts that micrometers are used to check.

Micrometers that read in inches are commonly accurate to +/- 0.0001” while metric micrometers usually measure to +/- 0.002mm.

There are some that do better and some that do worse, but in general most will measure with the above listed accuracy.

Because they are so accurate, they don’t work well for all measurements. For example, if you need to measure a board for a cut and you only need it accurate to 1/16 of an inch (which equals .0625”), then the micrometer is major overkill. It measures 625 times more accurate than you need!

They are slower too. If you only need accuracy of 1/16 of an inch, then bust out the tape measure, take your measurement and keep on trucking.

Micrometer measuring ranges

The other major limitation of a micrometer is its measuring range.

Inch micrometers measure in increments of 1”. So you will have a 0-1”, 0-2”, 0-3” micrometer and so on. This is why micrometers are often sold as a set with 0-3”, 0-6” and 0-12” sets being the most common.

starrett micrometer set in case with reference standards
A 0-6" set of micrometers

Having a set of micrometers allows you to take accurate measurements over a larger range of sizes.

Metric micrometers are found in 25mm increments. 0-25mm, 25-50mm and so on. They too are sold as sets to cover larger measuring ranges.

Basically, a micrometer will take a very accurate measurement at the sacrifice of speed and the range of measurements it is capable of.

For many measuring devices you will find that as the accuracy of the tool gets better, the range it can measure over will get smaller.

Types of micrometers

Micrometers are also called screw gauges. There are many different types of micrometers that use the same screw gauge mechanism to measure different types of features. It’s doubtful you need to know about all of them so let’s stick to the basics.

Standard micrometer

outside micrometer
Analog micrometer
mitutoyo digital micrometer
Digital micrometer

First off is your standard micrometer. If someone simply says micrometer then they are referring to an outside micrometer or ‘mic’.

Outside mics are used to measure external dimensions such as the length, width, or thickness of a part.

They are by far the most common micrometer used.

Inside micrometer

mitutoyo inside micrometer set
Inside micrometer set

Inside micrometers get used to measure internal features such as hole diameters or slot widths. One thing to know about inside mics is that they are often not as accurate as outside micrometers.

The most common accuracy for an inside micrometer is +/- 0.001”.

Depth micrometer

depth micrometer
0-1" Depth micrometer

You are never going guess what a depth micrometer measures. Wait… you already know?!

Well thanks for ruining the surprise.

Depth mics measure the depth of features such as holes or slots. Just like an inside micrometer, they are often not as accurate as outside micrometers and usually measure to an accuracy of +/- 0.001”. Their design also means that they can be easier to get an incorrect measurement.

Practice using them on a known standard such as a gauge block is the best way to get good with them.

Accuracy vs resolution

We’ve talked a lot about the accuracy of micrometers, but we haven’t yet talked about their resolution.

Accuracy is how close to a true measurement the micrometer is capable of.

Resolution is how small the graduations that it can resolve are. At times the resolution of a micrometer, especially digital micrometers, may be better than the accuracy which can lead you to believe that you are measuring to tighter tolerances than you actually are.

When comparing micrometers make sure to pay attention to the accuracy of the tool.

Alternatives to micrometers

When it comes to picking a tool other than a micrometer to use, it all comes back to your accuracy needs and the speed of the measurement.

Let’s discuss the two main alternatives to micrometers:

Calipers

digital caliper measuring gauge block
Set of digital calipers measuring a gauge block

Calipers, whether digital, dial or vernier, are less accurate than micrometers. They typically measure to an accuracy of +/- 0.001”.

But what they sacrifice in accuracy they gain in versatility and speed of measurement.

While micrometers only measure a single type of measurement such as an outside, inside or depth measurement, most calipers will take all three.

They also have a larger measuring range with the most common type being able to take readings from 0-6”. You would need six separate micrometers to match the outside dimension measuring capability of a single set of calipers.

We discussed earlier how micrometers aren’t the fastest measuring tool to use. When compared to calipers this really becomes noticeable. A set of calipers could take dozens of measurements across their entire measuring range in the time it would take to take a few readings with a micrometer.

Calipers compared to micrometers have their advantages and their disadvantages. Pay attention to these differences when deciding which one is right for your measurement.

Dial indicators

dial indicator
Dial test indicator

Dial indicators come in a couple different varieties. First is the dial test indicator.

Dial test indicators are used to take comparison measurements. They get set up or “zeroed” to a known standard such as a stack of gauge blocks and measurements are taken relative to that standard.

A dial test indicator will have a relatively small measuring range, usually measured in thousandths of an inch (0.001”) and will measure to a high degree of accuracy such as 0.0001” or better.

They specialize in taking very accurate measurements repeatedly. If they are used to check a variety of measurements, then they will be quite slow to use because they need to be set up for each different measurement.

mahr drop indicator
Drop indicator

Another type of dial indicator is drop indicator. They most often come with a larger dial face, usually about 2-3” across, and they have larger measuring ranges.

A typical measuring range for a drop indicator is one inch but they do vary and can be smaller or larger. When compared to dial test indicators, they have significantly less accuracy. Most drop indicators are accurate to 0.001”. Their most common application is set up in either a snap gauge or a height stand which allows them to be used to take quick, repetitive measurements.

Ultimate Guide to Measuring Caliper Sizes

What size do calipers come in?

Dial, digital and vernier calipers come in a large variety of sizes.

On the smaller end of measuring ranges would be a 0-3” caliper, though these tend to be pretty rare. 0-4” calipers sneak in there in small quantities and then by far the most common measuring range of a caliper is 0-6”.

A 0-6” measuring caliper is the typical everyday workhorse of the machine shop.

Custom calipers can be made to just about any size measuring range. However, the largest normal calipers are generally 0-24”. I am sure that many people have experience working with larger sets, but they certainly are not what I would call common.

Measuring Range in Inches

Measuring Range in MM

0-3"

0-75mm

0-4"

0-100mm

0-6"

0-150mm

0-8"

0-200mm

0-12"

0-300mm

0-24"

0-600mm

0-40"

0-1000mm

Are there any differences between calipers with small and large measuring ranges?

Measuring Range

Advantages

Disadvantages

Smaller Calipers

Accurate, easier to use

Limited measuring range

Larger Calipers

Can measure larger distances

Less accurate, hard to manuever for measurements, expensive

Accuracy and ease of use would be the primary differences between small and large measuring calipers.

Smaller sets of calipers can get into tight spaces, and they are much easier to maneuver to take your measurements.

Anyone who has tried to measure a smaller dimension with a set of large calipers knows exactly how awkward they can be in that situation.

A 0-6” set of calipers works well for all but the tightest spaces and I recommend using them for all measurements under six inches. This is because not only are the larger calipers unwieldy at times, but they typically sacrifice some accuracy to gain the larger measuring range.

A good set of 0-24” calipers will often be accurate to +/- 0.002” while a good set of 0-6” calipers will be accurate to +/- 0.001”. Extra-large calipers such as any that are over 24” are going to suffer and even bigger hit to their accuracy.

Keep in mind that we are talking about good quality calipers. You can find junk in all sizes, be sure to avoid them.

Below is a table that compares the measuring range of typical high-quality calipers such as those from Starrett and Mitutoyo and their accuracy. Lesser quality tools could easily be half as accurate or less.

Measuring Range in Inches

Measuring Range in MM

Typical Accuracy in Inches

Typical Accuracy in MM

0-3"

0-75mm

+/- 0.001"

+/- 0.02mm

0-4"

0-100mm

+/- 0.001"

+/- 0.02mm

0-6"

0-150mm

+/- 0.001"

+/- 0.02mm

0-8"

0-200mm

+/- 0.001"

+/- 0.02mm

0-12"

0-300mm

+/- 0.001"

+/- 0.02mm

0-24"

0-600mm

+/- 0.002"

+/- 0.05mm

0-40"

0-1000mm

+/- 0.003"

+/- 0.07mm

What is the most common measuring caliper size?

By far the most common size of calipers is 0-6”. Calipers with a 0-12” measuring would be the next most common.

After that, things vary a little bit. 0-24” would be the next logical choice, but many people purchase random in between sizes such as 0-4” or 0-8”. If you have a 0-6” and 0-12” set already, I would definitely recommend a 0-24” set as the next set to own.

Are digital calipers better than dial or vernier calipers?

comparison of digital, dial and vernier calipers

No, digital calipers are not better. In fact, they are very similar to dial and vernier calipers. Measuring ranges and accuracy remain similar across all three types of calipers.

This isn’t the case with all manufacturers, so make sure to pay attention to the reported accuracy of any tool you purchase.

We do recommend digital calipers because they are easier for beginners to use and read their measurements accurately but many people prefer the old school route.

Complete Guide to Measuring Caliper Calibration

Calipers are precision measuring instruments that get used for a large variety of types of measurements. Most can measure outside, inside, depth and step measurements. That’s a wide assortment of things they can check for such an accurate tool.

But the question is how do you know you can trust the measurements you get from your set of calipers?

By calibrating them of course! Luckily, we got a thorough guide to take you through the ins and outs of calibrating your calipers. We included the hows, the whys, the what fors and most importantly, the actual steps you need to take calibrate your calipers.

Keep reading our guide to become a true caliper calibration connoisseur.

digital caliper measuring gauge block
Reading right on the money

Why do calipers need to be calibrated?

Calipers, including both dial and digital versions, get used for all types of precision measurements from engine work to reloading. It should be easy to see that these aren’t the type of measurements you want to get wrong.

For this reason, it is important to calibrate your calipers and ensure the readings you get are indeed correct. Calibration will allow you to verify that your caliper is accurate for all the measurements it can take and to top it all off, calibration isn’t that difficult. Simply follow our step-by-step guide below.

How often should you calibrate your calipers?

Before we get to the procedure for calibrating your calipers, there are some important factors to consider. The visual below lists some of the most common factors that affect how often you should calibrate your calipers.

calibration frequency infographic

Calipers can be calibrated at many different intervals. When setting the calibration frequency, you should take into account factors such as:

  • How the tool will be used? Will the caliper be used to measure critical dimensions?
  • How tight are the tolerances it will be used to measure?
  • Will it be subjected to stresses such as heat, humidity, pressure, physical stress or other environmental?
  • Will it get used often?
  • Does it have a calibration history and if so, has it been consistent?

The best practice is to take all of these factors into consideration and set how often you often the tool will be calibrated.

If a caliper is taking important measurements often, the calibration interval will often be 3-4 months or possibly more often. When they don’t get used frequently or the measurements they are used for are less critical, then they can be calibrated once a year or less often.

It all depends on what works for you or your shop. If you are unsure of where to start, calibrate more frequently and then adjust based on usage and how well the tool holds its calibration over time.

What equipment do you need to calibrate your calipers?

gauge block set
Gauge block set
starrett tool and instrument oil bottle with cap
Tool oil

Calibrating a set of a calipers requires a known standard such as a set of gauge blocks. This standard gets used to compare the measurement readings

Additional supplies such as gage oil and task wipers will also come in handy but aren’t required.

Choose gauge blocks that are at least four times more accurate than the accuracy of your caliper. This is easy to achieve with your average caliper.

Most calipers are accurate to a thousandth of an inch (“thou”) or 0.001”. This means you need a set of gauge blocks that are accurate to 0.00025” (two and a half tenths).

This 4:1 requirement started with the military specification, or mil spec MIL-STD-45662. This specification defined the calibration requirements for companies.

This requirement is a minimum requirement. Using gauge blocks that are 10 times more accurate than the caliper is even better and common practice in many machine shops.

Do you need to buy a caliper that is already calibrated?

No, there is no need to buy a pre-calibrated caliper. The difference between verifying a caliper is accurate and calibrating it is small. Because you will need to verify the accuracy of the tool when you get it anyways, it is best to take a few extra steps and calibrate the tool.

One reason why pre-calibrated tools are not recommended is shipping companies. Pretty much everyone has had a package destroyed by the delivery service. What can happen is the tool will get calibrated and then shipped to you. In the process of shipping, your precision measuring instrument is dropped, kicked, maybe even dropkicked across the country to your doorstep.

Physical abuse can cause the tools calibration to be affected. For this reason, it is best to check the caliper yourself and know that from the point you received it, it was accurate.

box damaged in shipping
Handled with care

What do you need to maintain for calibration records?

At a minimum, your records should include calibration labels for your tools and a database where you record calibration information.

Your calibration records don’t need to be anything too fancy. Labels or stickers to place on your tool and a place to record the calibration data such as measurement values, dates, tool number, etc. This calibration database can be something as simple as a notecard system or full-blown calibration management software.

If the caliper is for personal use only then you may find that you don’t need the records or labels at all, though it can be handy to have the records for reference even if they only get jotted down into a notebook.

What information should the calibration label include?

calibration label
Example calibration label

Calibration labels should include at least the calibration date along with the next calibration due date. It is also a good idea to include the initials of the person who calibrated the tool and the tool #.

Note: Sometimes it isn’t practical to place a calibration label on the tool itself. If this is the case, it can be acceptable to place the label on the case of the tool. However, when possible, the label should be on the tool.

What information should be included in the calibration database?

The calibration database can come in many forms. Card systems, spreadsheets, database files and specialty programs are often used to maintain calibration records.

The following information should be recorded in the calibration database:

  • Who performed the calibration
  • Date calibration was performed
  • Master standard that was used for calibration (gauge block set #)
  • Calibration checks to be performed
  • Acceptable limits for calibration checks
  • Actual readings from the calibration checks
  • Next calibration due date

While it isn’t always a strict requirement, it is a good idea to think about recording the environmental conditions such as temperature and humidity when performing your calibration.

Example calibration procedure for a dial or digital measuring caliper

  1. Read the entire procedure before beginning calibration
  2. If at any time in the calibration procedure a problem is identified, the problem will be corrected and the process will start over. If the problem cannot be fixed, the caliper will be taken out of service.
  3. Check accuracy with gage block(s) having accuracy not less than 0.00025”. Verify measurements at sizes that are not even intervals. Use sizes such as .206”, 1.456” or 4.784”. Avoid common sizes such as .250”, .500” and .800”.
  4. Close the O.D. jaws and inspect for damage. Hold the calipers to a light source and inspect for light between the jaws. Jaws which are misaligned will not be parallel and create a gap between the jaws which is easily detected with backlighting.
  5. Verify the zero setting by taking a reading when the O.D. jaws are in the fully closed position. If the caliper does not read 0.000”, zero the calipers.
  6. Verify the accuracy of the O.D. jaws by checking known standards such as a set of gage blocks at intervals across the entire measuring range. Measuring at 1.000”, 2.000”, etc. is acceptable, but it is preferred to verify measurements at irregular intervals such as .754”, 3.345”, 5.687”, etc.
  7. Record your readings in the calibration database.
  8. Repeat steps 3 through 7 for both the I.D. jaws and depth measuring rod if present on your caliper. Instead of checking the O.D. jaws for damage, check the I.D. jaws and the depth measuring rod.