Best Micrometer Brands – New, Used and Everything In Between

Micrometers are incredibly accurate measuring tools. They get used for the most demanding measurements from engine work to reloading. Measurements that critical require tools that will ensure your project is done right.

When it comes to micrometers, the best manufacturers are the ones that consistently put out a quality product. These are those brands:

Best micrometer brand
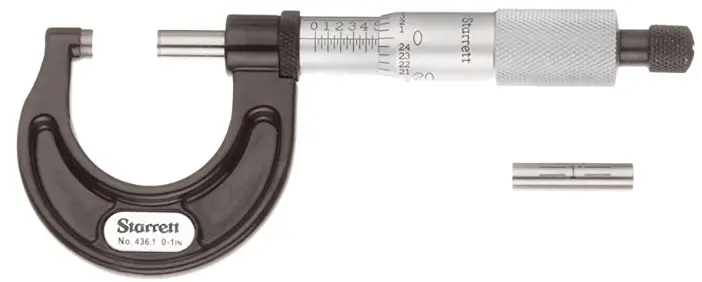
Starrett

Starrett has been in the micrometer business for a very long time. It’s no surprise that they are capable of creating quality measuring tools at such a consistent pace. They nearly perfected the micrometer and have maintained that excellence throughout the years. Starrett is a good brand to look into when buying a standard micrometer.

You are very unlikely to come across a Starrett micrometer that doesn’t measure accurately without being subjected to a substantial amount of abuse. Their digital micrometers face some stiff competition that keeps them from being the top dog but their standard analog mics are the best of the best.


Best budget micrometer brand
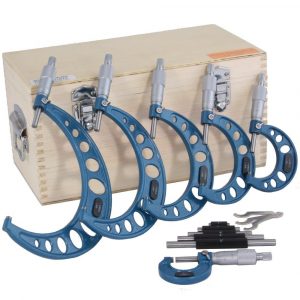
Anytime Tools

Anytime Tools is new to the game. Started in 1999, they have really come on strong. 20+ years in the industry might sound like a long time but and when it comes to measuring tools many of the players in the game have been around for decades not years.  Starrett and Mitutoyo have each been making gauges for over 100 years.

Much cheaper than other micrometer manufacturers such as Starrett, Mitutoyo or Fowler, Anytime Tools is an American company but I am fairly certain they source their products from another country. The good thing is that it seems to have no effect on their quality. They are consistently producing tools comparable to other big name manufacturers and at a fraction of the price.

As a side note, Anytime Tools also owns iGaging which has also been producing consistent quality measuring instruments.

Best digital micrometer
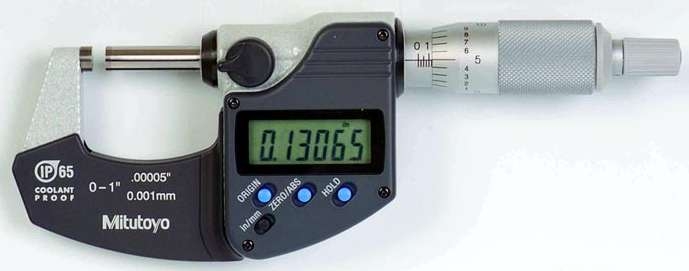
Mitutoyo

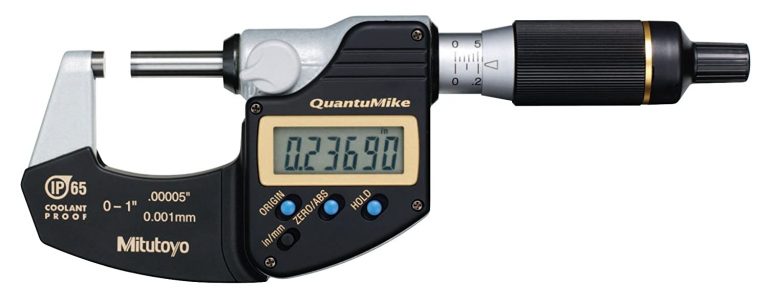
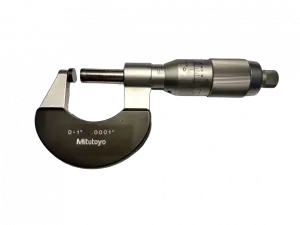
Mitutoyo is hands down the best digital micrometer manufacturer. Their Digimatic line of digital micrometers blows the competition away. They come at a premium cost, but the price is worth it.  Mitutoyo digital mics are the standard by which all other micrometers should be judged.

The build quality and accuracy of Mitutoyo’s Digimatic micrometers is second to none. They are precise, accurate and hold up very well to all types of abuse they might encounter in a normal machine shop environment.

If you really want the best, consider their QuantuMike. Read our review to understand why.

Best budget digital micrometer brand
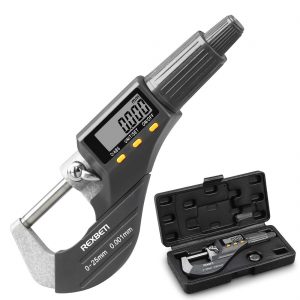
Rexbeti

Rexbeti is a newer competitor in the digital micrometer space. What they lack in experience they certainly make up for in quality.

While they can’t quite compete with the likes of Mitutoyo and their Digimatic micrometers, they do come pretty darn close at a fraction of the price. For most users, the .0001” accuracy of the Rexbeti digital micrometers will be more than sufficient.

One concern with just about all of the cheaper digital micrometers is that the battery life is much shorter than higher end models. Not a deal breaker but think about keeping some spares on hand so you know the tool is ready to go when you need it.

Also, if you won’t be using the micrometer frequently then think about taking out the battery between uses to save on battery life.

Best used analog micrometer brand

Starrett

We already covered Starrett’s long track record of producing excellent micrometers above. Just a reminder that this is a very good thing for anyone shopping for a quality used mic as well.

Very little has changed over the years with their standard micrometer line. There have been small variations in the frames and other components but nothing earth shattering. The most important aspect of their micrometers hasn’t changed. The accuracy has consistently been excellent.

While it would be great to purchase a brand-new micrometer and care for it lovingly from day one, sometimes you just want to save a little cash. The good news is that as long as you verify the accuracy of the tool, there is very little reason to expect that a used micrometer would perform any differently than a new one.

In fact, a huge portion of Starrett micrometers made decades ago are still measuring good as new. They aren’t the only ones either just one of the most consistent. For some more used micrometer recommendations see other brands to consider section below.

Best used digital micrometer brand

Mitutoyo

Digital micrometers are different from your standard analog micrometers. They have changed substantially over the years.

The earliest digital micrometers were not nearly as reliable. If you are looking for a used digital micrometer, stick with something from Mitutoyo’s Digimatic line. They have been exceptional for many years.

There have been other good digital micrometers over the years from various manufacturers, but the quality has been kind of up and down. Some had battery life issues. Others are not nearly as accurate as you would hope. Battery life is easily remedied by keeping a spare in your toolbox. They are cheap enough nowadays.

When it comes to any micrometer, analog or digital, accuracy is the most important factor.

At the risk of sounding like a broken record, check the accuracy of any used tools before purchasing.


Please note there are also an assortment of mechanical digital micrometers on the market. Some people like them. I have never been that person. Their greatest positive is that they don’t require batteries. Unfortunately, all of the mechanical digital micrometers I have used were not precise enough for my taste. They are not something that I recommend but mechanical digital micrometers are an interesting tools nonetheless.

Other brands to consider
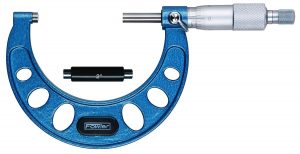
fowler micrometer
Fowler micrometer

While we have listed the absolute cream of their crop in their respective categories, there are many other brands to consider.

The hard part is that unfortunately many brands which were known for their quality in years past have moved manufacturing to new locations and quality has suffered as a result.

This can make it difficult to know whether their tools are quality or trash because they simply aren’t consistent.

I recommend the following brands for both new and used tools. Still make sure to verify their accuracy whether buying new or used. You never know how the previous owner or the UPS man treated them.

  • Fowler
  • Brown and Sharpe
  • Etalon

Things to consider when buying a micrometer new or used

Check the specified accuracy

Most micrometers should be accurate to .0001”. Some of the best such as the Mitutoyo digital mics listed above are good to .00005”. That’s twice as good and going to be overkill for most users.

One thing to watch out for is that some older micrometers are only accurate to .001”. If you only need accuracy of .001” then go with a caliper instead. They provide more versatility in your measurements. You should be buying a micrometer for extreme accuracy. Avoid mics that are only accurate to .001”

Check the accuracy yourself
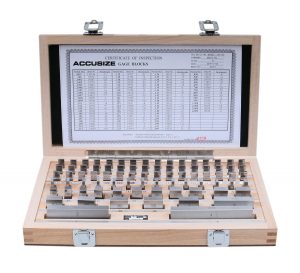
gauge block set
Gauge block set

Micrometers are precision measuring tools. Because their accuracy is so important, it is essential that its accuracy is verified before purchasing if used or immediately after receiving the tool if new.

Take a known standard such as a set of calibrated gauge blocks and check the tool at various steps across its measuring range.

For example, if you have a 0-1” micrometer, try to check it at 0.000”, .250”, .500”, .750” and 1.000”. Sometimes this might not be possible but it is good practice to check at random intervals. Many times, users will only check the tool at the two ends of the measuring ranges, in this case 0.000” and 1.000”. In most cases, this is sufficient but if you can check intervals in between it will be a better verification of the accuracy.

How to care for your micrometer
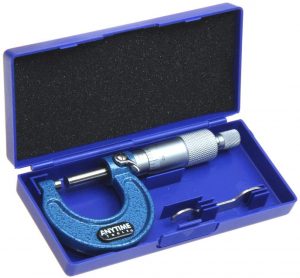
anytime tools 0-1" micrometer in case
The best type of micrometer case

Look for a micrometer with a case. For used tools, this is a great indicator that the tool was well cared for. A case doesn’t need to be anything fancy.

I have seen used tools with purple velvet lined cases. They were actually the worst. The velvet, felt or whatever the material was gets dirty with oil and coolant eventually. A simple, easy to clean plastic case is the best type to have.

If you keep your micrometer in a case or toolbox, you will be handling 95% of the care needed. You would think that a tool as precise as a micrometer would be a delicate instrument. In reality, they are quite rugged.

Keep your mic clean and out of harms way and it will measure accurately for many years to come.

Do I need a calibration or NIST traceable certificate?

No, a calibration certificate is not needed. You need to verify the accuracy yourself and should make sure to do it regularly.

The best practice is to check the accuracy every time you use the micrometer. You should always assume that the janitor at your shop or your kids in your garage have knocked the tool on the floor and put it back in its place hoping no one will be any wiser.

A calibration certificate only certifies that the tool was accurate somewhere else. It doesn’t do you any good in your shop.

Tips for finding a quality used micrometer

Don’t be afraid to explore Craigslist or Facebook for cheap micrometers. Yard sales and estate sales are another good option for budget tools.

In most cases, people will price them one of two ways. Either same as brand new or dirt cheap.

Do not buy used at like new prices. If it isn’t a quarter or a third of the new price then avoid the deal. You would be better off spending a little more and knowing the history of the tool.

If you can find a good cheap used micrometer there is no reason to believe it won’t last for years to come.

If there are any tips we forgot please let us know and share them in the comments below.

Related articles

Mitutoyo QuantuMike Review

plus symbol

Pros

Fast
Accurate
Special

minus symbol

Cons

Case is simply standard

Summary

Straight to the point. The Mitutoyo QuantuMike digital micrometer is an excellent inspection tool. It does everything an ordinary micrometer does but four times faster. Simply put, this is a top of the line measuring tool but the quality comes at a price.

Let’s get into the features.

Features

The QuantuMike has a big easy to read LCD display. It reads measurements in both inches and millimeters. Inch and metric values are switched at the press of a button.

Speaking of buttons…

The buttons on this micrometer and frankly all of the Mitutoyo Digimatic micrometers I have used, pull off something that seems very simple but in practice isn’t. The buttons are both easy to use and hard to press on accident. What this means is that your measurements are never lost because you accidentally hit the origin button. It can be hard to describe how the feel of a tool plays into its quality. In this case the QuantuMike just feels good.

Build quality

The build of the QuantuMike digital micrometer is excellent. None of the plastic and metal components of the mic seem cheap or flimsy. It’s solid. One potential negative is that some may find the weight of tool a little on the heavy side. I have never found this to be the case but all of Mitutoyo’s Digimatic micrometers are balanced differently than a normal, non-digital micrometer which might feel strange to some. It may take a little getting used to but once it clicks, you won’t want to go back to a standard mic.

Battery

Battery life for the QuantuMike is listed at 2.4 years. That seems a little long to me, but in practice the standard SR44 battery lasts long enough that I don’t think about it and just try to keep an extra battery on hand. This has been my experience with what I would call a medium amount of use in your standard machine shop. If you are going to use it in your garage sporadically, then I would venture to guess the battery will die of old age before being drained.

Protection from the elements

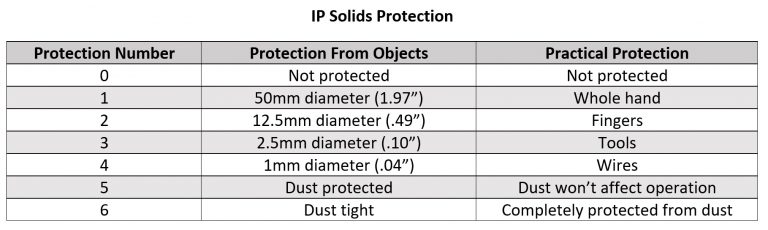
The QuantuMike has an IP rating of IP65. IP stands for ingress protection and the two numbers tell you how well protected from solids and liquids the instrument is. Protection from dust and coolant is what you should look for in an IP rating.

The first digit, 6 in this case, is for solids protection and the QuantuMike is completely protected from dust. This is the highest level of solids protection on the IP rating scale.

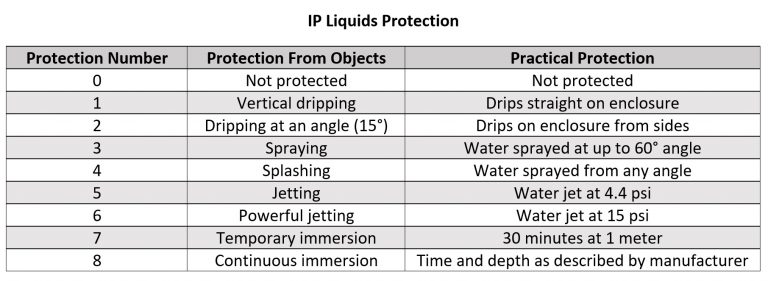
The second digit, 5 for the QuantuMike, is for liquids protection. The QuantuMike is protected from water jets from any direction. 

The video below shows what level of protection this provides. I would not recommend recreating the test at home with something as nice as this digital mic. Practically, it means your tool will be safe from splashing coolant. However, you should still do your best to keep it clean and dry.

Speaking of clean and dry, the provided plastic case will help you keep it that way. The QuantuMike comes with a fairly standard plastic case but it gets the job done. I should also note that while not all micrometers come with a case, I would certainly expect one for a tool in this price range.

Accuracy

comparing high and low accuracy and precision

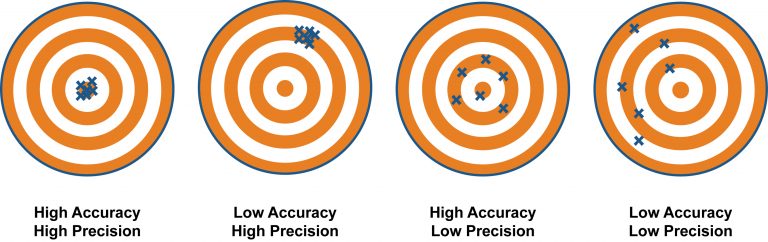
Let’s face it, accuracy is by far one of the most important qualities of a micrometer. It’s a measuring tool so it isn’t worth much if it won’t measure with accuracy and precision. Luckily the QuantuMike is extremely accurate. Boasting .00005”/.001mm accuracy, this micrometer is highly accurate and precise. Measurements repeat very well.

Speed

The standout speed of the QuantuMike is what sets it apart from other digital micrometers. Each revolution of the thimble moves the anvil in or out .080” or 2mm.

That is four times faster than a standard micrometer. Not the type of feature that matters to a hobbyist even though it is convenient, but for someone checking hundreds or possibly thousands of parts per day it can mean a huge amount of time saved.

Most machinists will use a 6” caliper or a 0-1” micrometer more than any other measurement device. It’s a good idea to have a quality set for these highly used tools.

Other features

  • Carbide tips
  • Thimble ratchet for consistent measurements
  • Measurement lock
  • Some versions have SPC output
  • 1 year warranty, 3 if registered with Mitutoyo

Verdict

The Mitutoyo QuantuMike digital micrometer is an excellent piece of measuring equipment. The precision and accuracy are top knotch. Battery life is looooooooooong and the speed of measurement is second to none. If you can afford it, you won’t regret it.

What to consider when buying a digital micrometer

Value

The price and the quality affect the overall value of a micrometer. The tricky part is that they really only come in two types, cheap and expensive. There isn’t much middle ground. The hard part is that price does not equal quality. Brands vary wildly in terms of quality. Mitutoyo is one of, if not the best micrometer manufacturer and their quality is in line with their prices. Expensive but worth it to the right user.

Accuracy

Anyone who wants or uses a micrometer needs an accurate measurement. The question is how accurate? Experienced users know the tolerances they need when it comes to a measuring tool. This micrometer measures to 0.00005” or .001mm and that is likely overkill for most people unless they work in a machine shop.

Many might not even know amount of accuracy they need. If this is the case, you would likely be perfectly fine going with a digital caliper. Like micrometers, calipers have a big range of prices. The difference is that calipers are quite a bit cheaper on the average than micrometers.

If you are just getting started when it comes to measurement, think about Mitutoyo calipers if your budget allows or this VINCA caliper. Mitutoyo is pretty consistent with their quality across most of their measuring tools but the VINCA caliper comes pretty close at a much cheaper price.

Absolute or incremental mode

Measurements can be taken in two forms. Absolute values or incremental values. Not all digital micrometers have incremental mode.

Absolute gives you a measurement from a zero point. For a 1-2” micrometer, the zero point would be 1”.

Incremental measures from a specific standard. Using the same 1-2” micrometer in incremental mode would allow the zero to be set at something other than 1”. The display would then read the deviation from the standard you are using such a set of gage blocks.

IP rating

Micrometers are usually rated at one of three IP ratings.

No rating which means there is no protection. Be especially careful around coolant.

IP54 means dust can get into the tool but it won’t affect it and that splashing water is fine. This is usually enough for most use cases.

IP65 is protected from dust and any amount of water that it would normally be exposed to. Anything over this is overkill.

ingress protection (IP) ratings solids description
ingress protection (IP) ratings liquid protection

Data ouput

An SPC output lets you send measurements to a printer or computer. Most won’t need this feature, but it could come in handy in a high volume machine shop.

Related articles

Least Count – All About

What is least count in measurement?

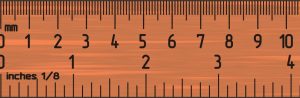
Least count is the smallest possible measurement that a tool or measuring instrument can resolve. For example, if a measuring tape has graduations of 1/8” then the least count would be 1/8”. As the least count of a measuring tool gets smaller, it is capable of taking more accurate and precise measurements. A measuring tool such as a micrometer or digital caliper will have a smaller least count than a standard ruler. This means it is able to measure in smaller increments and therefore is more accurate.

What is the formula for calculating least count?

ruler

Least count is calculated by taking a known interval and dividing by the number of divisions.

Least count = known interval / number of division

In the case of the ruler above, in each 1 inch interval there are eight divisions. This means that the least count of the inch ruler is 1/8”.

For the mm side of the ruler, in each 1 mm interval there are ten divisions. This means that the least count of the mm ruler is 0.1mm.

Micrometer least count formula

parts of a micrometer

The formula for calculating the least count of a micrometer is:

Least count of micrometer = least count of main scale / number of divisions on secondary scale

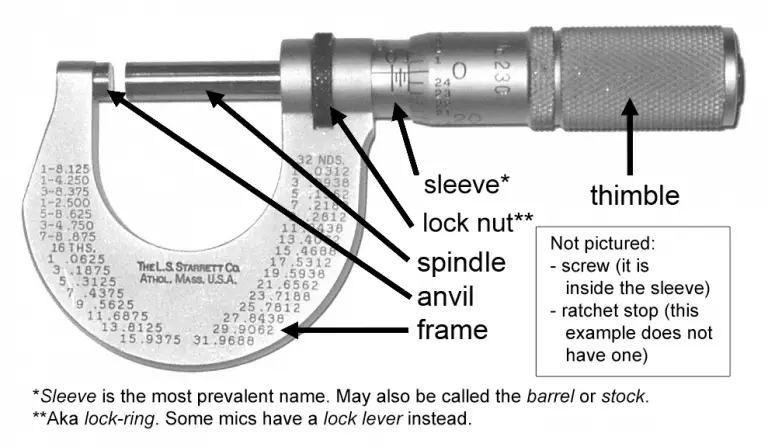
This is slightly different than our ruler example above. This is because a micrometer usually will have a secondary scale. The primary scale is along the sleeve of the micrometer while the secondary scale is around the thimble.

For most inch micrometers, the least count of the main scale is 0.025” and the number of divisions on the secondary scale is 25 therefore the least count would be 0.001”. Some micrometers have a tertiary scale around the sleeve. This third scale has 10 divisions. This allows the secondary scale to be read with greater accuracy. The least count of the secondary scale (0.001”) / number of divisions on tertiary scale (10) = 0.0001”.

For most metric micrometers, the least count of the main scale is 0.5mm and the number of divisions on the secondary scale is 50 therefore the least count would be 0.01mm.

Least count of vernier caliper

vernier caliper measuring inside diameter of brass part

The formula for calculating the least count of a micrometer is:

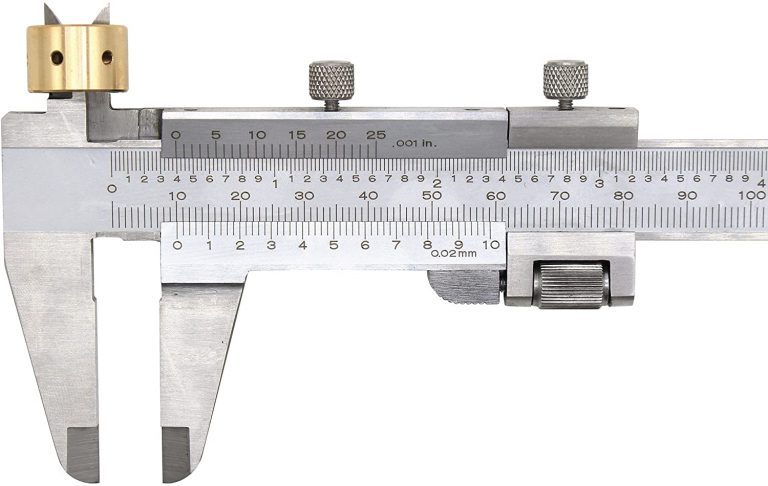
Least count of vernier caliper = least count of main scale / number of divisions on secondary scale

For most inch vernier calipers, the least count of the main scale is .025” and the number of divisions on the secondary scale is 25 therefore the least count would be .001”.

For most metric vernier calipers, the least count of the main scale is 1mm and the number of divisions on the secondary scale is 50 therefore the least count would be .02mm.

Least count of common length measuring instruments

Measuring instrument

Least count in inches

Least count in mm

Micrometer

.0001"

.001mm

Digital Micrometer

.0001"

.001mm

Dial Caliper

.001"

.01mm

Digital Caliper

.0005"

.01mm

Vernier Caliper

.001"

.02mm

Ruler

.100"

.1mm

Measuring tape

1/16"

1mm

Height gauge

.001"

.01mm

Dial indicator

.001"/.0001"

.01mm/.001mm

Spherometer

.0001"

.001mm

Micrometer screw

.0001"

.001mm

EAGems 0-6″ Digital Caliper Review

EAGems Caliper with case
plus symbol

Pros

IP54 protection rating
Two year warranty extended to three if registered
Responsive customer service

minus symbol

Pros

Stainless steel jaws

Features

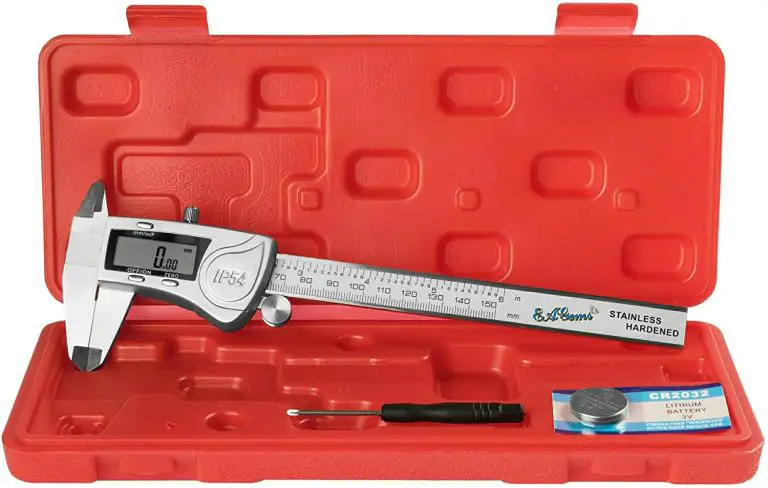
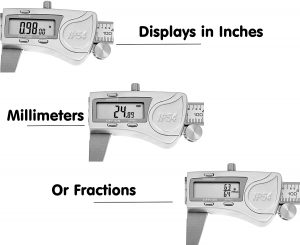
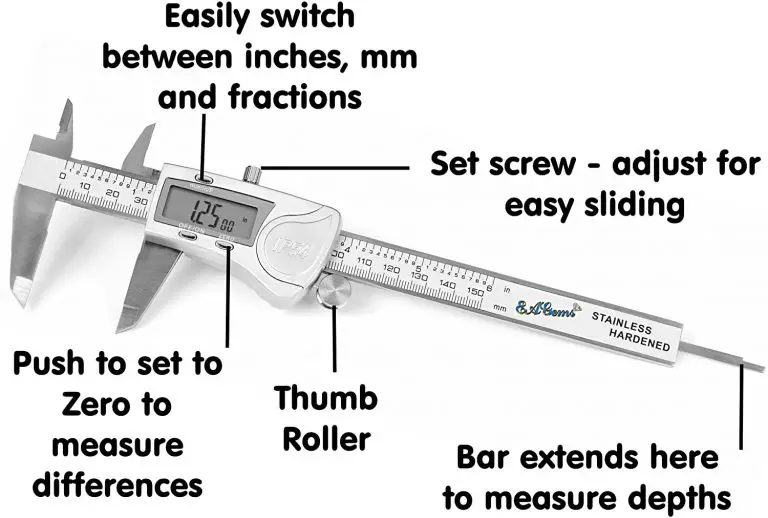
The EAGems 0-6” digital caliper is a good value for the price. Made of stainless steel, it takes measurements in inch, metric and fractional units. The fractional unit mode is especially useful for those looking to use this caliper for woodworking inspection. Boasting an accuracy of +/- .0005”, .01mm or 1/64th of an inch, the EAGems caliper is in line with most other tools in the price range and even some that are more expensive. The included thumb roller on the tool makes it easier to take measurements. Often calipers in a cheaper price range such as this one will lack this feature. Combined with the measurement lock feature, this competes with much more expensive digital calipers such as the Mitutoyo 500-196-30 0-6” Digital Caliper. The EAGems (which is short for Edward Allen Gems) caliper is capable of taking inside, outside, depth and step measurements to the noted accuracy.

EAGems caliper display

The large, easy to read display takes a little getting used to because the fractional display makes the last two digits smaller. The display has an automatic on/off feature which is designed to save battery life. Depending on the level of use, the typical battery will last about a year. Speaking of batteries, the caliper comes with an extra battery to give the user approximately 2 years of battery life out of the box.

EAGems caliper features

Battery replacement for the caliper is a simple task. To replace the battery of the caliper, use the included screwdriver to remove the screw from the back of the tool and swap out with the included extra battery or another purchased battery.

ingress protection (IP) ratings solids description
ingress protection (IP) ratings liquid protection

One of the best features of the EAGems caliper is the IP54 rating. Uncommon for a tool at this price point, the IP54 rating means that the caliper is protected against dust but not completely dust tight and protected against splashing water. Practically, this means the tool is resistant to most forms of normal contamination such as a coolant splash.

Verdict

For the price, the EAGems 0-6” digital caliper is a great tool. If you are looking for a quality measuring tool that won’t break the bank, keep this one in mind. While a caliper made by brands such as Mitutoyo might have a more proven level of reliability, this caliper is almost as good for about a third of the price. Don’t overlook the importance of the IP54 protection rating if you are going to be working in a very dusty environment or around splashing coolant. This is a valuable feature not included on many calipers that cost much more.

Rexbeti 0-1″ Digital Micrometer Review

plus symbol

Pros

Cheap price
Accuracy

minus symbol

Cons

Few extra features

Features

Rexbeti isn’t exactly a household name when it comes to inspection tools such as this 0-1” digital micrometer. What it lacks in name recognition, it makes up for in price but the question is can the quality keep up?
The Rexbeti 0-1” digital micrometer has a .00005” or .001mm resolution which is standard for most digital micrometers. It has an accuracy of +/- .0001” which is only slightly worse than some of the best digital mics such as this one from Mitutoyo but better than most budget options. Prices fluctuate some but the Rexbeti sacrifices very little in accuracy while cutting the cost dramatically.
The digital readout on this set of micrometers is large and easy to read. The display has a simple button layout with only 3 buttons on the face. These primary buttons are on/off, one for switching units between inches and millimeters, and one for zeroing the tool.

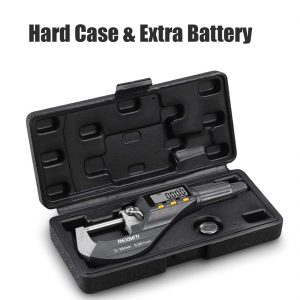
The Rexbeti 0-1” digital micrometer features a ratchet stop for taking consistent measurements. The ratchet stop when used correctly allows the user to exert a controlled amount of force when taking readings. This results in more accurate and consistent measurements. Additionally, when not in use this digital mic has an auto shut off feature to save battery life. The tool also comes with an extra battery and a protective case for storage.

Verdict

Beyond these simple features this Rexbeti micrometer doesn’t have anything too fancy going on. What it lacks in extras though, it makes up for in accuracy. When compared to many other budget digital micrometers, its accuracy stands out for the price. These Rexbeti 0-1” digital micrometers are a great buy at the price and capable of measuring up to all but the most precise digital micrometers.

iGaging 0-1″ Digital Micrometer Review

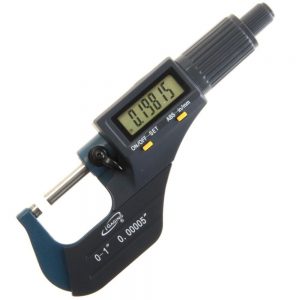
igaging digital micrometer
plus symbol

Pros

Extra features
Display

minus symbol

Cons

Battery life

Features

iGaging is a popular brand for budget friendly inspection tools. This set of digital micrometers is no different. They have a measuring resolution of .00005” or .001mm and an accuracy of +/- .00015” which equates to +/- .003mm. While not as good as some digital micrometers which cost 2-3 times as much, the iGaging digital mics come close at a fraction of the price.
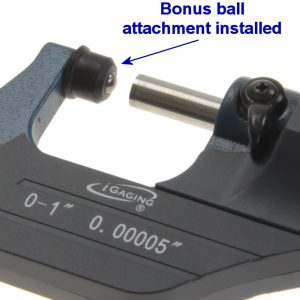
ball attachment for igaging digital micrometer
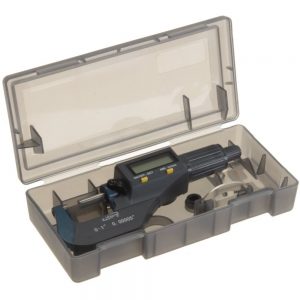
These iGaging digital micrometers have a very impressive feature set. Some of the extras that aren’t normally seen in its price range are a SPC output and a ball attachment for the anvil. The SPC output allows you to record measurements directly to your computer while the ball attachment allows you to measure round surfaces such as the wall thickness of tubing. Some of the more standard type features include an extra battery and a protective case to keep your tool safe. Carbide tips are a nice bonus that isn’t always seen on budget level digital micrometers. They provide superior wear resistance when compared to normal hardened steel.
A decent size display and simple button layout adorn the face of the tool. With the press of a button the micrometer switches units from inches to millimeters. The ability to switch between absolute and incremental measuring modes is available too. Nothing too out of the ordinary present in the normal use of the mic.
Like most other digital micrometers, this one from iGaging has a little more weight to it than a standard micrometer. Some don’t like the added weight because they feel it makes it harder to maneuver around their workpiece. With a little time and use, I don’t believe the weight will bother anyone.
Now onto some of the negatives. The biggest problem is that some buyers report instances of the display flickering. All of the budget digital micrometers have quality issues such as this one, the bigger problem is that the manufacturer isn’t the most responsive to problems. Another common issue for lower priced tools is limited battery life. For most this shouldn’t be too much of a bother but it’s best to keep an extra battery or two on hand. Lastly, the thimble feels cheap because of the plastic material used.
igaging digital micrometer in case

Verdict

The simplicity of the display and button layout are a nice touch and will be appreciated by those not as familiar with digital micrometers. The addition of the SPC output and ball attachment put these mics a step above most other entry level digital micrometers. To get a better micrometer you will need to pay 3 times the cost of these mics or more. The iGaging 0-1” digital micrometer is a solid budget priced inspection tool.

Engineering, Manufacturing and Quality Abbreviations and Acronyms

abbreviations and acronyms word bubble

OMG why are there so many acronyms and abbreviations? FYI here is a huge list of common meanings. Hopefully it helps decipher some of the jargon and gibberish. 

8D – method of problem solving commonly used in the automotive industry.

AQL – acceptance quality limit, previously acceptable quality limit

APQP – advanced quality product planning

AS9100 – aerospace quality standard

ATP – acceptance test procedure

BOM – bill of materials

CAD – computer aided design

CAGE – Commercial and Government Entity code

CAM – computer aided manufacturing

CAPA – corrective and preventive action

CAR – corrective action report

CFE – customer furnished equipment

CFM – customer furnished material

CNC – computer numerical control

COA/C of A – certificate of analysis

COC/C of C – certificate of conformance or certificate of compliance

COTS – commercial off the shelf

CSM – customer supplied material

CT – center thickness

DFARS – Defense Federal Acquisition Regulation Supplement

DFMEA – design failure mode effects analysis

DPA – destructive physical analysis

DPAS – Defense Property Accountability System

DPPM – defective parts per million

DSS – data summary sheet

ECN – engineering change notice

EIDP – end item data package

ERP – enterprise resource planning

ESD – electrostatic discharge

ETV – edge thickness variation

FAI – first article inspection

FAIR – first article inspection report

FMEA – failure mode and effects analysis

FOB – free on board

FOD – foreign object damage

FW – face width

GFE – government furnished equipment

GFM – government furnished material

GFP – government furnished property

GIDEP – government industry data exchange program

GMIP – government mandatory inspection points

GSI – government source inspection

GSS – government source surveillance

HIC – humidity indicator card

IAQG – International Aerospace Quality Group

IAW – in accordance with

IOT – internet of things

ISO – International Organization for Standardization

ITAR – International Traffic in Arms Regulation

JIT – just in time

KPI – key performance indicator

MBB – moisture barrier bag

MRB – material review board

MSDS – material safety data sheet

NADCAP – National Aerospace and Defense Contractors Accreditation Program

NC – non conformance

NCM – non conforming material

NDT – non destructive testing

NIST – National Institute of Standards and Technology

OCM – original component manufacturer

OD – outside diameter

ODM – original design manufacturer

OEM – original equipment manufacturer

OTD – on-time delivery

PCB – printed circuit board

PDCA – plan, do, check, act

PEM – plastic encapsulated microcircuits

PFMEA – process failure mode and effects analysis

PID – product identification document

PL – parts list

PM – preventative maintenance

PPAP – Production Part Approval Process

PO – purchase order

QA – quality assurance

QAPP – quality assurance program plan

QC – quality control

QML – qualified manufacturers list

QPL – qualified product list

QTP – qualification test plan

QTR – qualification test report

RCA – root cause analysis

REACH – registration, evaluation, authorization and restriction of chemicals

RFI – request for information

RFQ – request for quote

RMA – return material authorization

RoHS – Restriction of Hazardous Substances

SCAR – supplier corrective action request

SDS – safety data sheets

SMP – supplier management process

SOP – standard operating procedure

SOW – scope of work

SPC – statistical process control

TDP – technical data package

TIR – total indicator runout

WI – work instruction

WIP – work in progress

XRF – x-ray fluorescence

iGaging Absolute Origin Digital Caliper Review

plus symbol

Pros

IP54 protection
2 year warranty

minus symbol

Cons

Reliability issues
Errors in measurement when the battery is low

Features

The iGaging Absolute Origin 0-6” digital calipers are made of hardened stainless steel. Capable of taking inside, outside and depth measurements like most calipers, they have an accuracy of +/- .001” or .02mm. They have a resolution of .0005” or .01mm. These calipers from iGaging are capable of measuring in inches and millimeters. Fractional measurements are available on a more expensive version of the same caliper. They also have a lock screw which makes taking repetitive measurements easier.

The display is not as large as some other caliper models but it is easy to read. Unfortunately there is no auto off or auto on feature for the display. Remember to turn the tool off after use. The iGaging caliper has been noted to have measurement errors when the battery is low. This wouldn’t be as much of an issue if there was some kind of indicator that the battery was low. The caliper comes with a spare battery which will help alleviate the problem but some of the reported errors could be quite hard to detect. 

 This digital caliper does come with some nice extras and features not always seen in its price range. Most importantly is IP54 protection. The IP stands for ingress protection. The 5 is the level of protection from solids such as dirt. The 4 is protection from liquids such as water or coolant. This equates to being protected from dust and from splashing water. Protection from contamination is not often seen with digital calipers in a budget price range. Even with more expensive name brand calipers, IP54 is not a common feature unless paying more for a specialty tool with this feature.

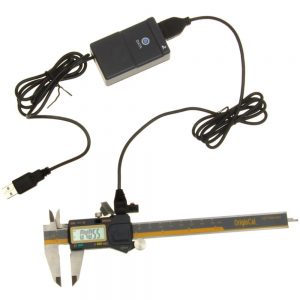
igaging digital caliper with spc cable

Additionally the iGaging caliper comes with a nice protective case and a SPC output. The SPC output allows the caliper to be connected to a computer for recording measurements. The version of the caliper that comes with the cable to connect to your computer is relatively expensive though. The cable more than doubles the cost of the caliper. 

 One of the best features of the iGaging Absolute Origin digital caliper is that it comes with a full 2 year warranty. Unfortunately, there is a possibility that you will need to use it. Plenty of other reviewers on Amazon have noted that the tool either stopped working altogether or gave erroneous measurements.

Verdict

The iGaging caliper has some very nice features such as IP54 protection and a SPC output. The errors in measurement that occur with a low battery and the general reliability regrettably outweigh them. The generous warranty helps make up for some of the tool’s shortcomings but ultimately a measuring tool such as a caliper needs to be dependable. The iGaging caliper lacks that dependability.

A Beginner’s Guide to Depth Micrometers

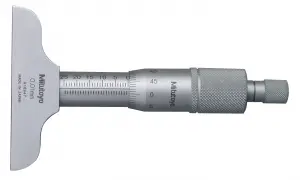
mitutoyo depth micrometer

What is a depth micrometer?

A depth micrometer (or depth mic) is a measuring tool commonly used to check precise measurements of slots, keyways, grooves and various other locations. They are a very accurate measuring device. 

Depth micrometers are commonly used to take measurements to an accuracy of .001″ or .0001″ in inches. Measurements in millimeters can be made down to .01mm or .001mm.

How to use a depth micrometer

Depth mics can be used to measure many different types of part characteristics. I will explain how to check a hole depth. 

Before using your micrometer, ensure that the measuring tool and surface to be measured are free of dirt, debris, chips, etc. The micrometer thimble should spin freely.  Place the tool on part over the hole. Spin the micrometer thimble until the rod extends to the bottom of the hole. Use the ratchet or friction stop if available on your tool.

depth micrometer rod
A depth micrometer rod

Note: The depth mic should be checked for accuracy whenever a rod is changed to measure a different size. It can be easy for something to get contamination in between the micrometer and the depth rod where they come together. 

Keeping things as clean as possible will help with this problem.

How to read a depth micrometer

I recommend a digital depth micrometer for ease of measurement especially if the measurer will only occasionally be taking readings with their micrometer. Unfortunately the price of a digital depth mic can be quite high so if you must use an analog micrometer then please keep reading. 

The most common varieties of depth micrometers read in increments of one thousandth of an inch (.001″) or one ten-thousandth of an inch (.0001″). The process of reading a measurement from either type is similar. Along the sleeve of the depth micrometer will be graduations similar to a ruler. 

The graduations at every fourth interval are most often numbered 0, 1, 2 and so forth. These numbers represent .100″ or one hundred thousandths of an inch. If using a depth micrometer with a 1-2″ rod, the graduation marked 6 would correspond to a measurement of 1.600″. The graduations between the numbers are each .025″ or twenty five thousandths of an inch. If we were to use a depth micrometer with a 4-5″ rod and obtained a measurement at the 3rd graduation after the .200″ mark, then our reading would be 4.275″. This would be the reading if the 0 on the thimble lined up exactly with the 3rd graduation after the .200 mark on the reading line. 

If instead the number ten lined up with the reading line and we could still see the 3rd graduation after the .200″ mark, then our measurement would be 4.285″. For micrometers that read to .0001″ we would additionally rotate the micrometer without turning the spindle to determine which numbers line up on the sleeve and thimble. If a number lines up on the thimble with the number 7 on the sleeve, our reading would now be 4.2857″.

Formula for depth micrometer readings

Base depth micrometer rod size + (.100″ x largest visible number) + (.025″ x graduations visible after the largest number) + (.001″ x reading from thimble) +(.0001″ x reading from sleeve for .0001″ micrometers)

Example for a depth micrometer with a 1-2″ rod

1.000″ + (.100″ x 4) + (.025″ x 2) + (.001″ x 3) + (.0001″ x 8) =

1.000″+ .400″ + .050″ + .003″ + .0008″ = 1.4538″

When to use a depth micrometer

Depth micrometers while very accurate have one downfall. Depth micrometers like most standard micrometers are most commonly found in 1″ measuring range increments (3-4″, 4-5″, etc.). For a depth micrometer, this means that multiple sized rods are needed to be capable of covering the measurer’s  measurement needs. Because of this depth micrometers are commonly sold in sets. 

A 0-3″ micrometer set will cover the needs of most applications while a 0-12″ set is more than most people, especially hobbyists will need.

What makes a good depth micrometer

A good depth micrometer needs two things: precision and accuracy. Some adjustments can be made with most depth micrometers to account for small errors in accuracy but nothing can be done to fix a tool that isn’t precise. 

Quality depth micrometers will turn smoothly without any drag. This is the telltale sign of a good tool. If your depth micrometer ever feels like it is rubbing internally, disassemble the micrometer and clean per the manufacturers instructions to eliminate any possible contamination that may be causing the issue.

Where to buy depth micrometers

Depth micrometers are available from a number of online retailers. For a more in depth guide of which depth micrometer is best for your situation, please see our reviews section

Some general advice, as usual for most products Amazon has a number of good options available. Walmart sells depth micrometers but we do not recommend any that they currently offer.

Are cheaper depth micrometers as good as expensive ones?

While some of the cheaper (made in China) type depth micrometers have gotten much better than they were in years past, they are nowhere near the same quality that you will see in a depth micrometer from one of the tried and true manufacturers such as Starrett or Mitutoyo. 

A depth micrometer is the type of tool that is best to purchase once. In most cases it can be more beneficial to search for a used option on Craigslist or Facebook marketplace. Ebay can also be a good alternative. For more information on the best depth micrometers for your application, see our Best Depth Micrometers article.

How to calibrate a 0-1" depth micrometer

  1. Verify that the micrometer is clean.
  2. Visually examine the micrometer for any condition that could cause errors in the calibration.
  3. Whenever necessary to disassemble for adjustment, use care and cleanliness to assure no damage to the internal threads of the tool.
  4. Spin the thimble until the depth rod is inside the tool.
  5. Place the tool on a surface plate and spin the thimble to extend the depth rod to the zero position. Use the ratchet or friction stop if available.
  6. Repeat the process by placing the depth micrometer on gage blocks and overhanging the tool to allow the depth rod to extend down to the surface plate.
  7. Check accuracy of the micrometer at various locations within the tool’s measuring range. Gage blocks which have been calibrated themselves should be use for this operation. Block sizes which are used should test the micrometer at different positions of the thimble and not only increments of .025″. This ensures the scale on the thimble is accurate.
  8. Adjustments can be made at this step as needed. Different depth micrometers have different procedures for adjustment. Consult manufacturer documentation for instructions regarding the adjustment of your micrometer if needed. If adjustments are made, the calibration procedure should be started over to verify the adjustments were adequate. 
  9. Calibration results are commonly recorded in a register or database for traceability of measurement history.

Related articles

A Beginner’s Guide to Calipers – Dial and Digital

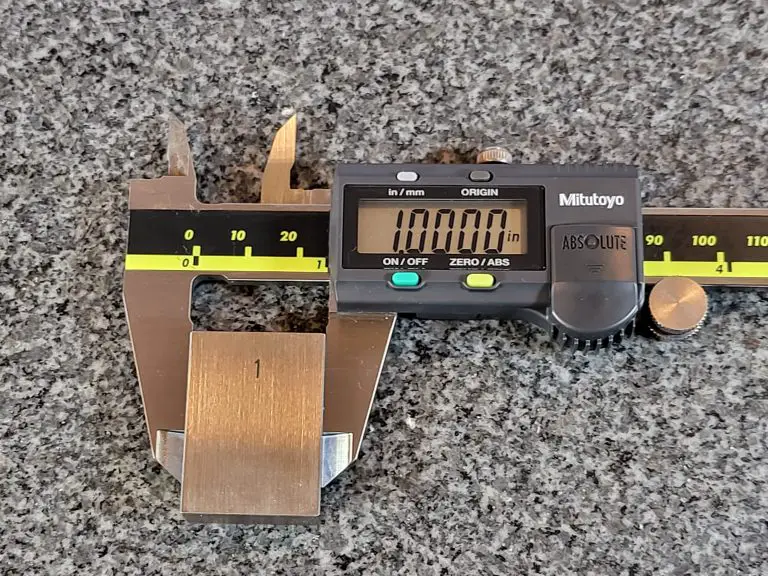
mitutoyo digital caliper measuring 1 inch block

What is a caliper?

A caliper is a measuring tool used to check precision measurements.

The biggest strength of calipers is how versatile they are.

Calipers come in many forms, including digital, dial and vernier versions.

They are commonly used to take measurements to an accuracy of .001″ or .01mm. 

What are calipers used for?

Below is a list of the most common caliper uses:

  • Inside measurements – hole sizes, slot widths
  • Outside measurements – lengths, widths, diameters, thicknesses
  • Depth measurements – depth of holes, slots, step locations
Many precision measuring tools such as micrometers or dial indicators are specialized and only take a single type of measurement. Calipers can take a larger variety of measurements and their measuring range is usually much larger than more accurate alternatives.

Types of calipers

There are three main types of measuring calipers. They are:

  • Digital calipers
  • Dial calipers
  • Vernier calipers

They all perform the same types of measurements and to the same level of accuracy. The main difference between the three types of calipers is the display/scale that is used to read measurements.

The display/scales for each type of caliper are shown below.

Digital calipers

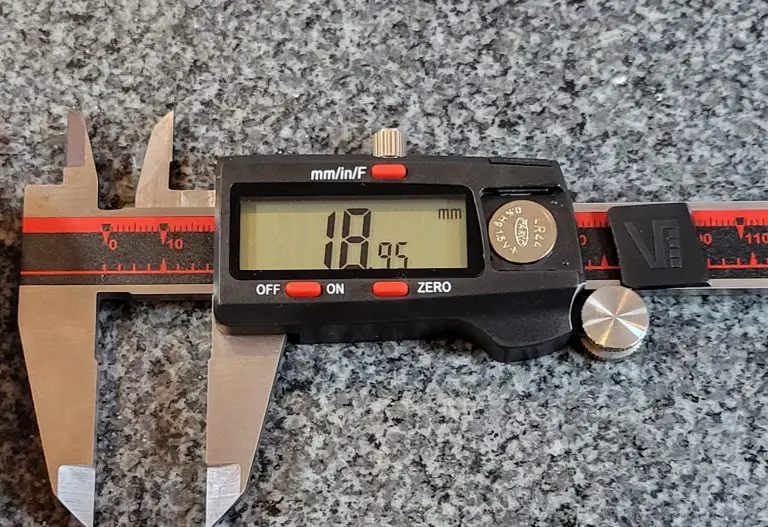
VINCA digital caliper display mm

Dial calipers

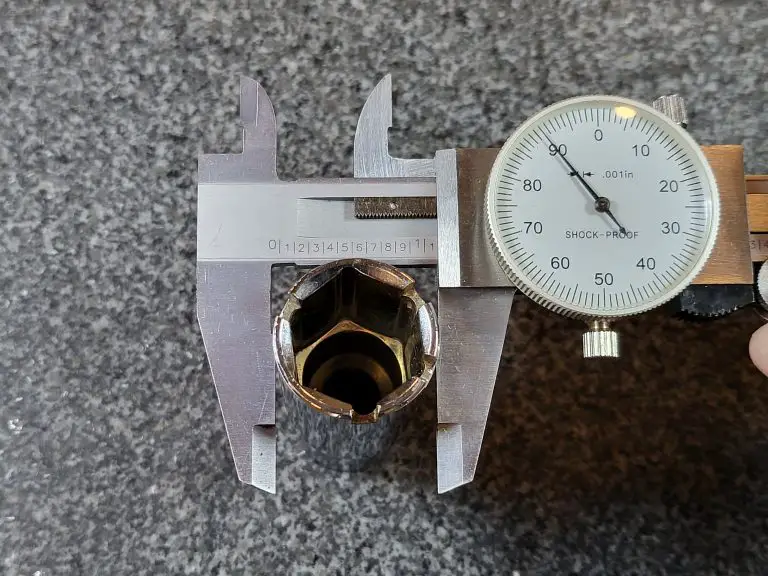
dial caliper taking an external measurement

Vernier calipers

closeup of spurtar vernier caliper measuring jaws

Parts of a caliper

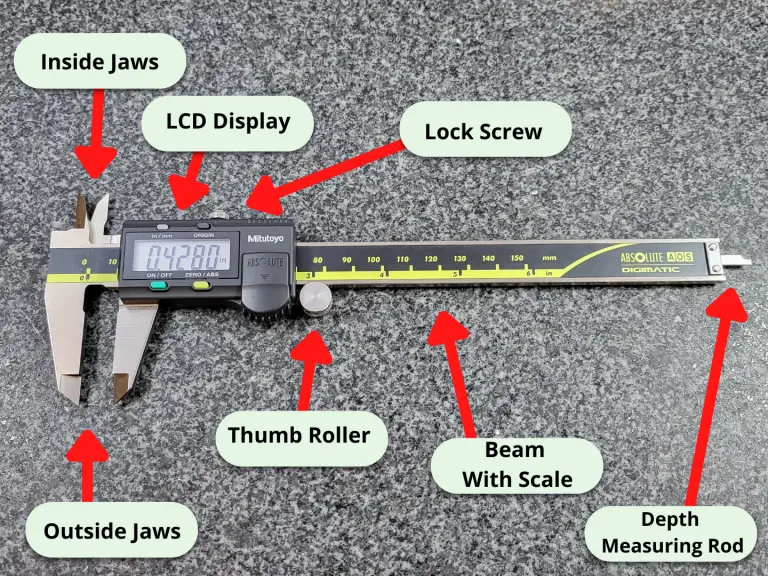
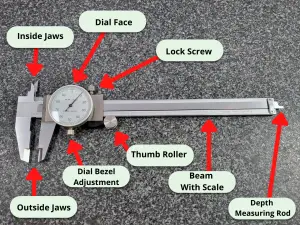
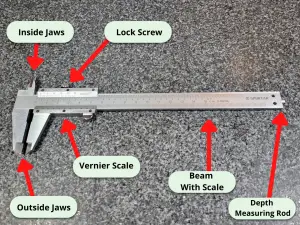
The parts are very similar on all three types of calipers; digital, dial and vernier.

You can see the slight differences in the pictures below.

Digital caliper parts

digital caliper with parts labeled

Dial caliper parts

dial caliper with parts labeled

Vernier caliper parts

vernier caliper with parts labeled

Calipers vs micrometers

outside micrometer

Micrometers are another kind of precision measuring tool.

Micrometers are more limited in what they can measure. See the two types of measuring tools compared below.

Micrometers

Calipers

Accuracy

0.0001"

0.001"

Measuring Range

1" increments

0-6"

Types of Measurements

Outside Measurements

Inside, Outside & Depth Measurements

How to use a caliper

a dial caliper with the different jaw measuring faces identified

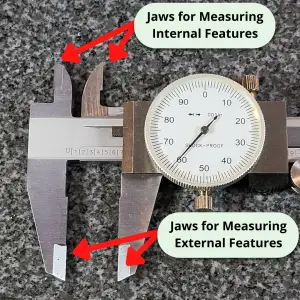
The most common type of measurement that calipers are used for is internal and external measurements.

To take a measurement with your caliper follow these simple steps:

  1. Before using your caliper, check to make sure that the measuring tool and surface to be measured are free of dirt, debris, chips, etc. The body of the caliper should slide freely along the scale or bar.
  2. For an outside measurement, slide the jaws of the caliper open until they are far enough apart to be placed over the part to be measured.
  3. Now proceed to close the jaws while trying to keep the jaws perpendicular to the surface being measured.
  4. Multiple measurements should be taken to verify that the caliper has yielded the true reading. For example, if a measurement is taken where the jaws of the caliper are not perpendicular to the surface being measured then the reading obtained can be larger than the true size.

Note: Do not exert a large amount of force on the caliper in the direction of measurement. This can cause the tool to flex and distort the true measurement. It is best to place the same amount of force that is used to zero the caliper.

How to read digital caliper

igaging ip54 digital caliper display inches

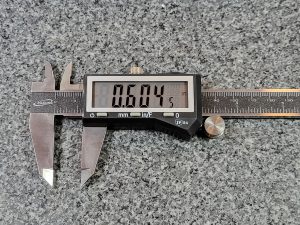
Reading a digital caliper is easy.

The digital readout display clearly shows the measurement value.

Because they are so easy to read, I highly recommend anyone who is looking to get started working with calipers starts with a good set of digital calipers first.

Digital calipers have the ability to quickly switch between metric and inch readings. Some also allow you to switch between fractional measurements as well.

How to read a dial caliper

a picture of a dial caliper with the instructions about how to read a measurement

Reading a dial caliper is easy, though not as easy as a digital caliper.

Because costs have come down substantially in recent years, I recommend purchasing a digital caliper if possible.

If a digital caliper isn’t in the cards either because of budget or because you are working with an inherited tool then keep reading.

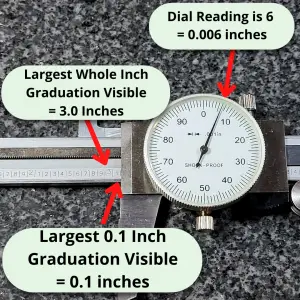
Dial calipers come in multiple varieties, but most have their measurement read in the same way. A reading is taken on the main scale and the dial face. The two readings are added together to get the final measurement.

Still need more info?

See our full guide to taking and understanding measurements with your dial calipers.

What makes a good caliper

Whether digital, dial or vernier, a good digital caliper needs two things: precision and accuracy.

Some adjustments can be made with most calipers to account for small errors in accuracy but nothing can be done to fix a tool that isn’t precise.

A quality caliper will move smoothly without any drag. This is the telltale sign of a good tool.

If your caliper ever feels like it is rubbing or dragging then it is most likely the result of damage from being dropped or contamination exposure.

Unfortunately if you caliper isn’t moving smoothly there isn’t usually much that can be done besides oiling the tool and sliding back and worth. Then wipe off the oil and repeat the process over again.

Make sure to consult the manufacturer’s instructions before performing this operation as calipers can vary and only use machine tool oil such as this one by Starrett.

Caliper calibration

Calibrating measuring tools such as calipers is important because it allows you to have confidence that your measurements are correct.

Check your calipers regularly to make sure they are accurate.

Related Articles