Reading a dial caliper doesn’t have to be difficult.
There are two main parts to using a dial caliper:
- Understanding the parts of the caliper
- Reading measurements from the tool
Parts of a dial caliper
It is going to be hard to use a dial caliper if you don’t know what the different parts of the caliper are called.
Here is a quick run through for anyone who doesn’t already know the parts of a dial caliper.

The jaws of the caliper are the parts that will come in contact with your part when taking a measurement.
There is one set for taking inside (internal) measurements and one set for taking outside (external) measurements.
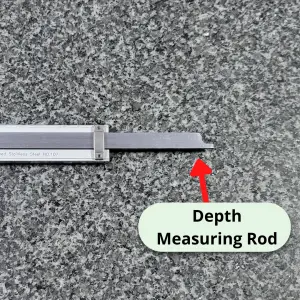
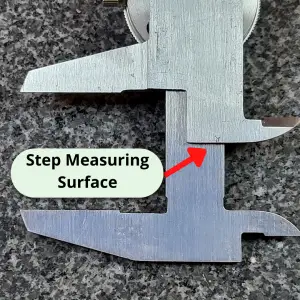
Most calipers can also take depth measurements with the depth measuring rod and step measurements using the back of the caliper.

Parts on the body of the caliper:
- Dial face – Half of your measurement will be read from the dial. The other half will be from the scale on the beam of the caliper.
- Lock screw – For locking the caliper in place. Measure, lock, read the measurement. Not needed with all measurements, but handy when working with parts that make reading your dial caliper difficult.
- Bezel adjustment – Allows you to spin the dial face. For use when zeroing your caliper.
- Thumb roller – Use this to apply an even amount of force when taking your measurement.

The beam of the caliper is the part that the body/dial face slides along.
The beam has a scale which is used to take half of the measurement. The scale reading gets added to the dial reading for your final measurement.
Reading your measurement
Now that we know what to call everything, let’s go through the steps to take a measurement with your dial caliper.
- Get ready to measure
- Measure your part
- Take a reading from the scale
- Take a reading from the dial
- Add the two readings
Step 1: Get ready to measure
Before you take a measurement with the dial caliper, make sure things are set up to allow you to get an accurate measurement.
You want:
- A clean caliper. No dirt, dust, crud, rust, etc.
- A working caliper. Inspect for damage. Make sure the lock screw is loosened and the caliper body slides freely.
- Good lighting. If you can’t see good, it will be hard to tell the difference between a 1.000″ and 1.001″. Proper lighting is your friend.
Step 2: Measure your part
Most dial calipers are capable of taking 4 types of measurements:
- Inside
- Outside
- Depth
- Step
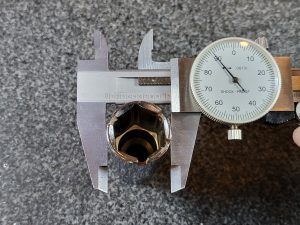
Inside measurement
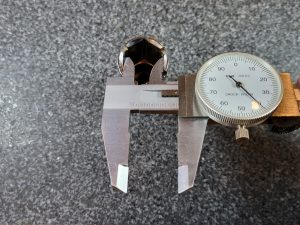
Outside measurement
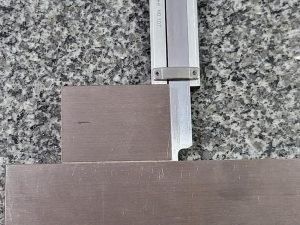
Depth measurement
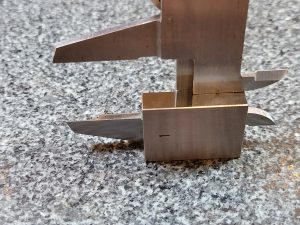
Step measurement
Make sure your not taking measurements off angle. If you have an angle on your part or your caliper, it can give you false readings.
With a little practice, it will be easy to get a feel for when your caliper is straight.
Step 3: Take a reading from the scale

The scale on the beam of the dial caliper has lines that mark the graduations.
Most dial calipers will have them in increments of one hundred thousandths of an inch (0.100″).
You will take the reading of the last visible graduation. In the picture above, the line that would equal 3.100″ is not visible. This means that the the measurement is under 3.100″. Because the line isn’t visible, our reading from the scale would be 3.000″.
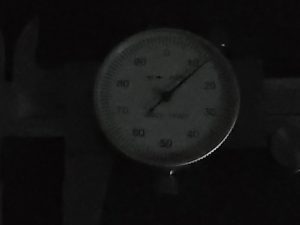
Step 4: Take a reading from the dial
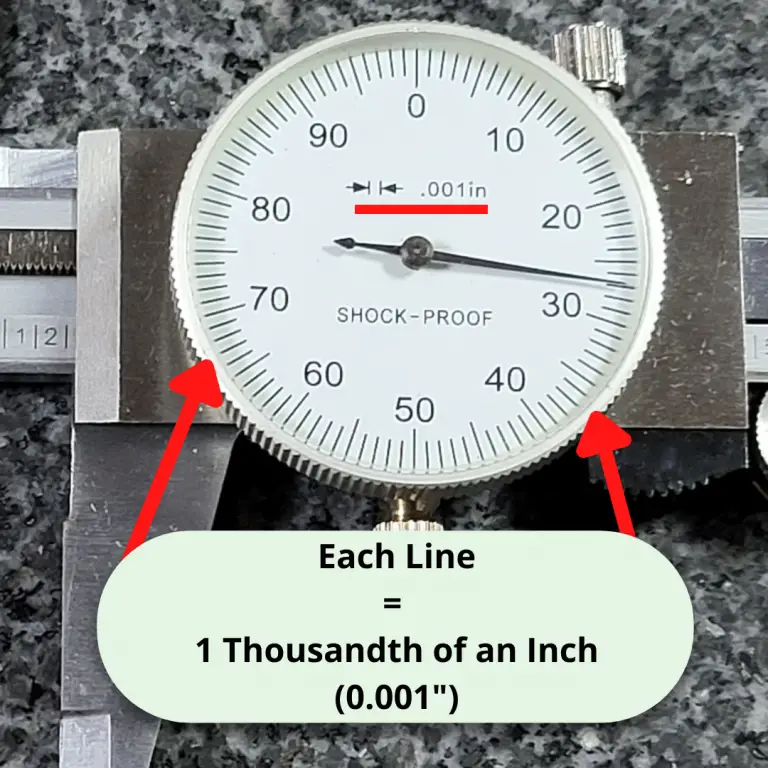
The dial face of most dial calipers has 100 graduations that each equal one thousandth of an inch (0.001″).
Simply count the number of lines. In the picture above, the dial reading is 0.027″.
Step 5: Add the scale and dial reading
Now you have your scale reading and your dial reading, add the two together.
Let’s try another example.
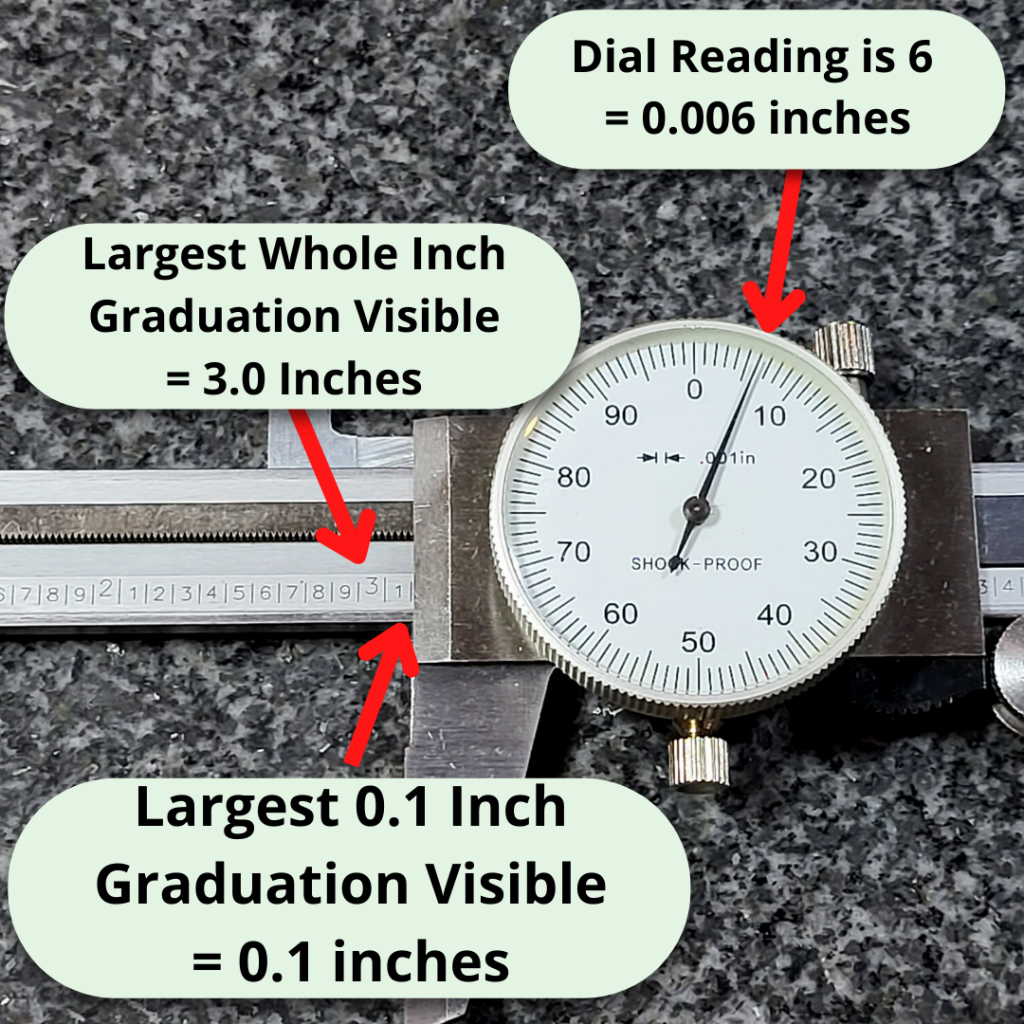
In the pic below, you can see that this time the 3.100″ graduation line is visible. This gives us a scale reading of 3.100″.
The needle of the dial is on the 6th graduation which equals 0.006″.
3.100″ + 0.006″ = 3.106″
Easy peasy lemon squeezy.
And if you still need more practice, check out the Dial Caliper Practice Quiz to make sure you have the process down.