Table of Contents
ToggleHow to use a dial caliper
Before using your caliper, check to make sure that the measuring tool and surface to be measured are free of dirt, debris, chips, etc. The body of the caliper should slide freely along the scale or bar.
For an outside measurement, slide the jaws of the caliper open until they are far enough apart to be placed over the part to be measured.
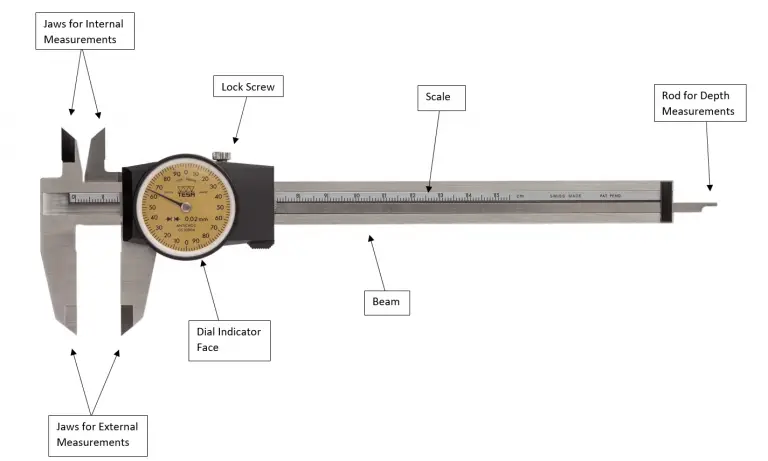
Now proceed to close the jaws while trying to keep the jaws perpendicular to the surface being measured.
Multiple measurements should be taken to verify that the caliper has yielded the true reading.
For example, if a measurement is taken where the jaws of the caliper are not perpendicular to the surface being measured then the reading obtained can be larger than the true size.
Note: Do not use a large amount of force on the caliper in the direction of measurement. This can cause the tool to flex and give an incorrect reading. It is best to place the same amount of force that is used to zero the caliper.
How to read a dial caliper?
Reading a dial caliper is easy, though not as easy as a digital caliper.
Because costs have come down substantially in recent years, I recommend purchasing a digital caliper if possible.
If a digital caliper isn’t in the cards either because of budget or because you are working with an inherited tool then keep reading.
Dial calipers come in a few varieties, but most have their measurement read in the same way.
Dial calipers have graduations along the bar that are in increments of 0.1″ or one hundred thousandths of an inch.
Often the 1,2,3, and so on whole inch increments are marked with a number and the 0.1″ increments will be marked with a line.
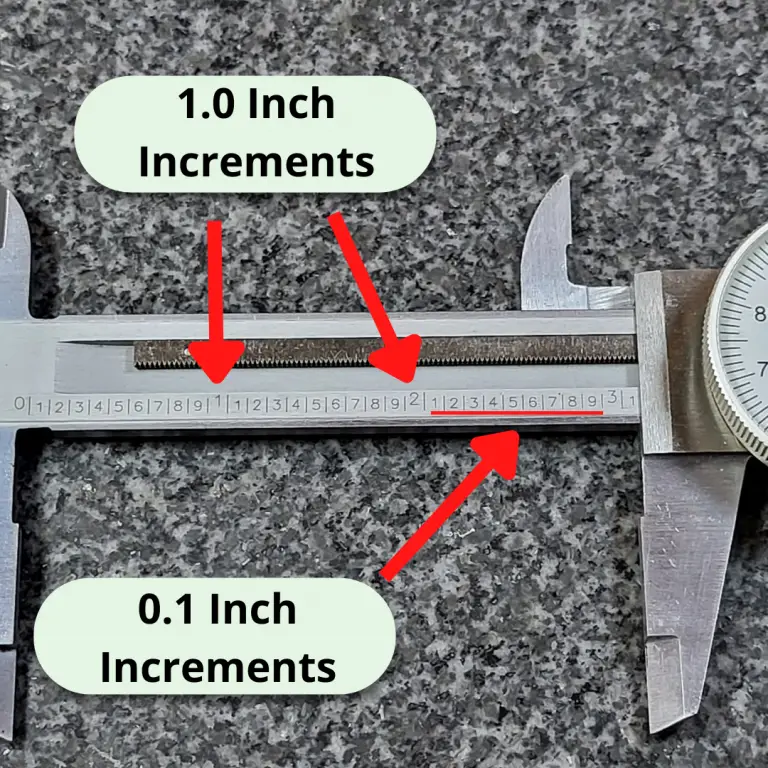
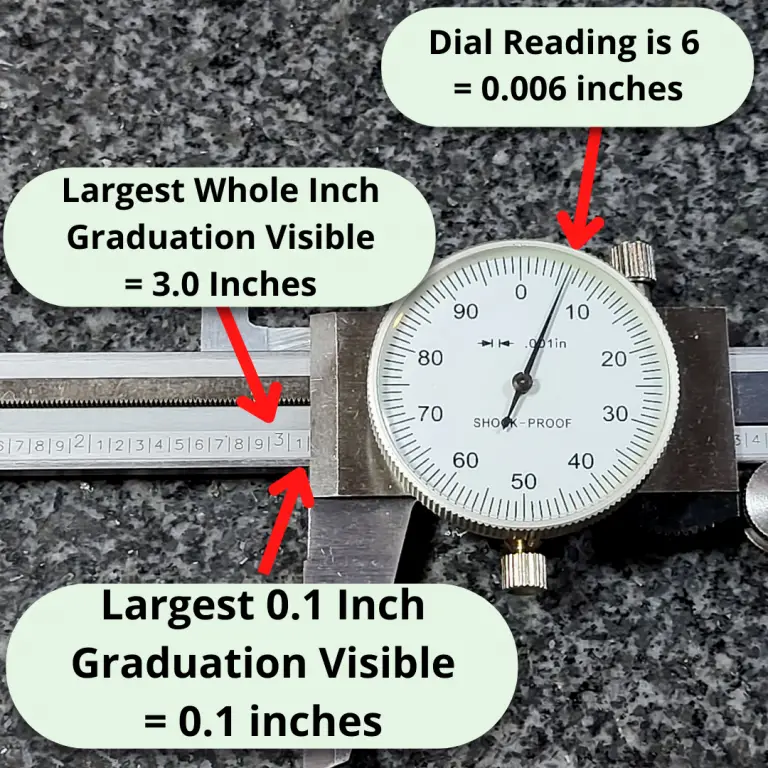
To read the caliper, combine the largest visible whole inch and 0.1″ increments on the beam with the dial reading.
Your reading = Largest whole inch + largest 0.1 inch + dial reading
In the example below, the 3 inch graduation (line) is visible. So is the 0.1 inch graduation after the 3.
If we add them together we get 3.1 inches. Now we need to add the dial reading to our beam reading.
The dial reading is 0.006 inches. 3.1″ + 0.006″ = 3.106″
The dial caliper measurement reading is 3.106″
How accurate are dial calipers?
A good set of 0-6″ dial calipers is accurate to +/- .001”. Any 6 inch calipers which are less accurate should be ignored.
As the measuring range of the caliper gets larger, the accuracy of the caliper will often be reduced. Pay attention to the specs because it isn’t uncommon for a 24″ set of calipers to only be accurate to +/- 0.002″.
If you are in need of accuracy that is greater than this, you will need to find a nice set of micrometers for your application.
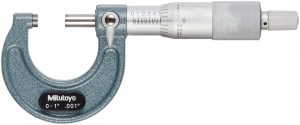
Micrometers are commonly available with an accuracy of +/- .0001”. Some cheaper sets of micrometers will not quite meet this accuracy, but you can rest assured that a set from the most well-known manufacturers such as Starrett and Mitutoyo will more than meet this standard.
Dial calipers sacrifice some accuracy to gain versatility in measurement.
Dial vs digital calipers
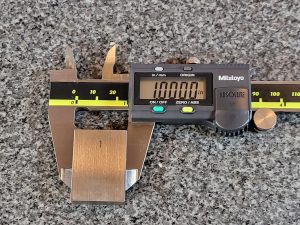
Both dial and digital calipers have their advantages. For dial calipers, their lack of batteries mean they are always ready to take a measurement.
Digital calipers have the benefit of taking instant measurements as well as switching between units at the press of a button.
There is no difference between the accuracy of digital and dial calipers and they are both available with similar measuring ranges. Ultimately, the choice between which is better comes down to a matter of preference.
For a more complete guide to the differences between dial and digital calipers see our guide on the topic.
