Measuring calipers can be extremely capable measuring devices when in the right hands.
Knowing the limitations of your calipers and how you affect them is what will make you the “right hands” for the job.
I’m going to run you through the different aspects that affect caliper accuracy. I’ll start with the most basic topics and work from there so feel free to skip ahead if you already know about a subject.
Table of Contents
ToggleSize of calipers
0-6" calipers
The most common type of measuring caliper is a 0-6” caliper. If you are working in metric, this will be a 0-300mm caliper.
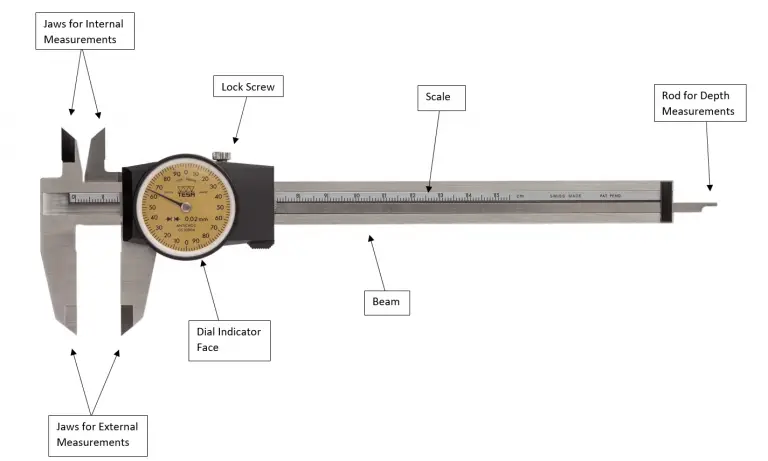
There is some variety in what they are capable of but in general they will be able to measure inside, outside and depth measurements over a 6” measuring range.
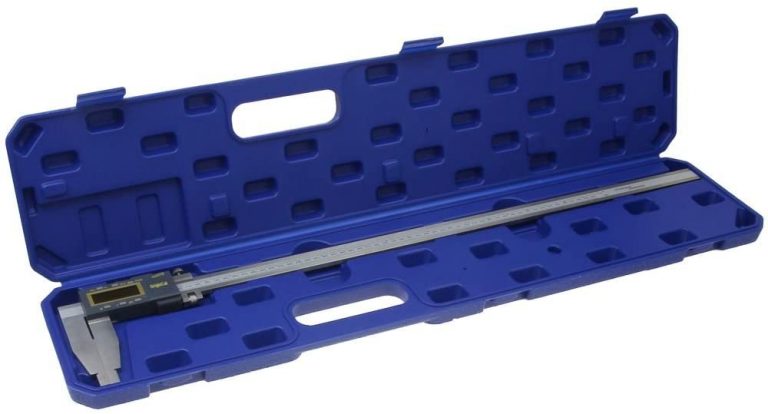
Larger and smaller calipers
Calipers do come in many different size measuring ranges. They are used much less often but you will still run into them.
0-12” calipers are the next logical choice when it comes time to measure a bigger part. The reason you wouldn’t use them all the time is because they are big and can be awkward to use.
0-24” calipers have the same issue and are even more awkward. Typically, you would only use the larger calipers in a situation where you could not use a caliper.
There 0-4” and 0-8” varieties that can be found as well and all types of specialized measuring ranges can be special ordered.
Larger calipers will be more expensive than small calipers. The added expense is for accuracy. It gets much harder to maintain the accuracy seen in smaller calipers over larger measuring ranges.
Note: Calipers with larger measuring ranges tend to be less accurate. For example, the same Mitutoyo caliper in a 0-6” version has a specified accuracy of +/- 0.001” and the 0-24” version has an accuracy of +/- 0.002”. They are only half as accurate. This only gets worse when you realize larger calipers from lesser known manufacturers may be even less accurate.
Types of calipers
There are three main types of calipers. They are very similar with the main difference being how the actual measurement is read.
Vernier calipers
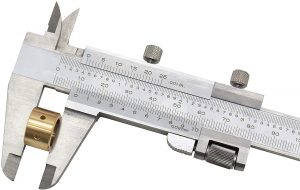
Often referred to as simply “verniers”, these calipers have multiple scales on the face of the tool that are used together to take your measurement reading.
Because they do not have any internal mechanisms, they are the most durable type of caliper and most likely to remain accurate.
Verniers are the most difficult type of caliper then it comes to reading a measurement, especially for beginners. While they are not necessarily difficult to use, they take a little more understanding than using a dial or digital caliper.
Dial calipers
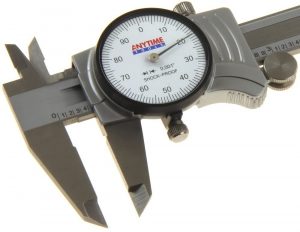
Dial calipers use a geared system to spin a needle on a dial. They have an easy to ready scale on the body of the caliper. This scale is often in .100” increments. The distance between the rulings makes them easier to read compared to the small lines which are used on a vernier.
The scale reading is used with the reading from the needle on the dial face of the tool to calculate your measurement.
Dial and vernier calipers are very similar in cost. Both do not require batteries which means they are always ready to take a measurement.
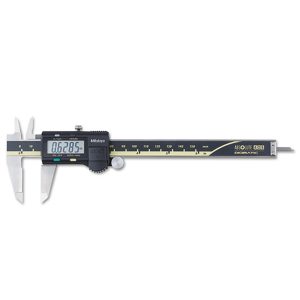
Digital calipers
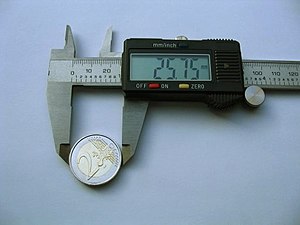
Digital calipers use electronic sensors to give a measurement reading. They are easily the simplest caliper to take a reading with.
The values get read off the LCD display like an alarm clock.
At one time they were very expensive and still somewhat are. In recent years, they have dropped in price and gotten more reliable. Tools made in China and other lower labor cost countries have improved in quality, though they can be hit or miss when compared to established tool and gauge companies.
There are many digital calipers available which are not nearly as accurate as they would lead you to believe. This is because their resolution is finer than their accuracy.
Typical accuracies for different types of calipers
A caliper should be accurate to .001”. There are cheap ones or shoddy quality ones that will fail to meet this accuracy but when most people think about calipers, they expect it to be accurate to .001”.
Accuracy is similar across the different types of 0-6” calipers and it may look like digital calipers have better resolution but that isn’t exactly true.
Often digital calipers will have displays that read out farther than they are accurate to. There isn’t any point taking a reading to 5 tenths of an inch or .0005” if the tool isn’t accurate to that level.
Be careful. Some digital calipers will make you think they are more accurate than they actually are.
How cost affects accuracy
Small calipers are easier to make than large ones at the same accuracy. To get a caliper accurate to .001” at 6” will be much easier than at 24”. This is why the cost goes up quickly for larger calipers or their accuracy goes down.
Some calipers will sacrifice accuracy to keep costs down. Some budget level calipers do not meet an accuracy of +/- 0.001” for a 0-6” caliper. Pay attention to the specified accuracy when comparing different tools.
Keep in mind that if something seems too good to be true then it probably is such as a cheap, large range caliper that claims accuracy to +/- 0.001”.
What tools are more accurate than a measuring caliper?
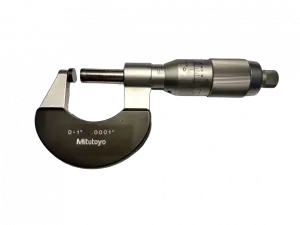
Micrometers are another tool frequently used by people who also use calipers to take measurements. The typical accuracy of a micrometer is a tenth of an inch or .0001”. This is 10x more accurate than a caliper.
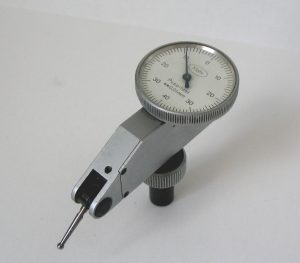
Dial and test indicators are another type of tool used in machine shops. They usually have dial faces with a needle, or occasionally you will find digital versions.
The accuracy of these indicators varies from .001” for many dial indicators to .00001” for test indicators. Test indicators can be 1000x more accurate than dial indicators and calipers.
Accuracy vs resolution
Resolution is the how finely your tool will give for a reading. It is not how accurate it is.
Imagine you measure a box.
A less capable digital caliper may measure the length of the box at 6.5005”. The problem is that the caliper may only be accurate to +/- 0.001”. This means you could take that same caliper and measure the same box again, in the same exact location and get a reading of 6.4995” or 6.5015”
Tips for increasing your accuracy using calipers
Know what accuracy you need
The first step is knowing how accurate of a tool you need. You might not need a caliper at all. You might need a micrometer to measure down to a tenth (0.0001”). Maybe you can get away with using a good tape measure.
I don’t know. Only you can decide what accuracy you will need.
General advice would be to get a caliper with an accuracy of +/- 0.001” or better.
Be careful how you hold your caliper
You affect the accuracy of your caliper a lot.
You want to make sure that the jaws of your caliper sit flat when you take a measurement. If they are cock-eyed when you use them, the readings will be larger than the actual size.
Luckily, for outside measurements, such as the length or width of a part, this is easy to do. You can gently rock, again I said gently, and you will feel the caliper settle in when it sits flush.
Inside measurements are slightly more difficult because the jaws do not have a flat spot to settle into. Still, you will want to use the same rocking motion, but be even more careful with it.
Repeatability
No matter what type of measurement you plan to take, take multiple readings to develop an assurance that your measurement is accurate. It is not uncommon to take a measurement and get a reading, only to take two more measurements that are both 0.005” off.
At this point you would want to take more measurements to verify that your first measurement was indeed wrong. Maybe it was dirt, or you had the tool at an angle. Either way, verifying your repeatability will help you take more accurate measurements.
Depth measurements are easy to get wrong
Outside and inside measurements aren’t too bad but depth measurements are where things get tricky.
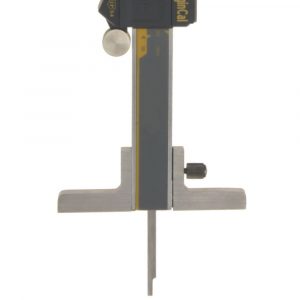
Not all calipers will have the ability to take depth measurements. However, for those that do it is easy to get bad readings when using them to take depth readings.
The shape of the caliper makes them top heavy which means they have a tendency to want to tilt. If your tool moves even just a small amount, it will throw your measurement off by quite a bit.
There are attachments that you can get for your caliper to help steady your tool when taking depth measurements, but they are not a perfect solution.
Another factor affecting accuracy is that the depth measuring rod on a caliper can easily get bent or otherwise out of alignment. This is a common occurrence and even brand-new calipers can come from the factory unable to make accurate depth measurements.
Depth measurements are the most difficult type of measurement to take with a caliper and also the most difficult aspect for a tool maker to build accurately.
Be consistent with your measurements
The amount of force you use when taking measurements with your calipers will change your readings. This is called your “touch”.
If you take a measurement using a small amount of pressure on the caliper and then do the same measurement squeezing the caliper shut and holding it with some force, you will see that your readings can easily vary by a thousandth or two (0.001”-0.002”).
The easiest way to practice being consistent with the force you use to take measurements is to check the same thing over and over.
Checking the accuracy of your caliper
Cheaper calipers can be accurate, but not every cheap caliper will be. Premium tools from Mitutoyo, Starrett or other well-known manufacturers can be off too, but the odds are much less likely.
The problem is that you won’t know the caliper is accurate until you check it. This process is called calibrating. If you don’t have access to everything you need to calibrate a caliper, a less precise version of the process would be called zeroing.
Zeroing your caliper
Zeroing your calipers requires you to close them all the way and reset the zero point.
Zeroing procedure
Make sure your tool is clean, especially the jaws of the caliper.
Slide the caliper closed.
For a digital caliper, hit the origin button – this will sometimes be labeled differently (such as Zero) based on the manufacturer of the caliper.
For a dial caliper, loosen the bezel lock screw, twist the dial until the needle reads zero and then lock the bezel lock screw again.
Once you have reset the zero location, make sure to verify it. Do this by opening the calipers up and then closing to the zero position again.
You want to verify that the caliper reads zero each time. The amount of pressure you put on the tool affects the measurement so make sure to use the same amount of force to close your caliper.
Consistent, gentle movements will help you get the most accurate readings out of your tool.
At this point you know your caliper is accurate at the zero location. What is not known is how that same caliper will measure at another location. It may be perfectly accurate at zero but off by ten thousandths or 0.010” at 6 inches.
This process is for your external jaws only and it is entirely possible that your jaws for measuring internal measurements such as holes may not be aligned with the external jaws. The zero location may be different for your internal and external jaws.
This is why ideally you would calibrate your calipers to verify their accuracy over the whole measuring range. Calibration requires additional equipment so many people won’t take the extra step.
What is important is to consider is what level of accuracy you need for your measurement.
Precision measuring tools = be gentle
These things are not hammers. You need to treat them gingerly. They won’t shatter into a million pieces when you set them on a bench but banging them or dropping them means you’re going to have a bad time.
The most common types of damage, all of which would affect accuracy are
- Shock to the internal workings. This can cause excess drag in the mechanism or simply give bad measurements.
- Damage to the jaws of the caliper such as nicks or burrs. Even a very small nick can cause your measurement to be off. The inside measurement jaws are more likely to be damaged than the outside measurement jaws.
- The depth measuring rod can get bent or otherwise damaged and give bad readings. The rods tend to be long and thin which means it doesn’t take much force to damage them.
Calibration
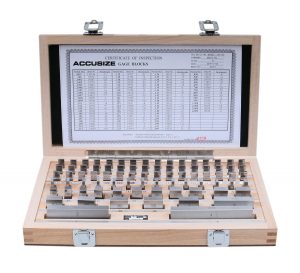
Calibration involves taking a known length standard such as a set of gauge blocks and using them to check the accuracy of the caliper over its whole measuring range.
You would check the caliper at 0 inches, 6 inches and at random intervals between the two. This is the super simplified version of a calibration procedure. If you want a more detailed instruction, then check out our guide to caliper calibration.
Related articles
For more information check out these related articles: