Table of Contents
ToggleWhat is a counterbore?
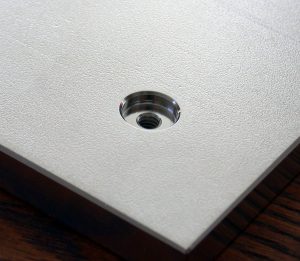
A counterbore is a circular hole with a flat bottom which coincides with another hole. The counterbored section allows a bolt head or other fastener to be recessed.
What does a counterbore look like?
Counterbore symbol
The GD&T callout for a counterbore is shown below. The counterbore symbol will often be used together with the diameter symbol and the depth symbol. Older blueprints may specify a counterbore with the notation CBORE instead of the counterbore symbol.

If you want to type the ⌴ symbol, hold the ALT key and press 9012. See this list for other common keyboard shortcuts for GD&T and blueprint symbols.
How to dimension a counterbore


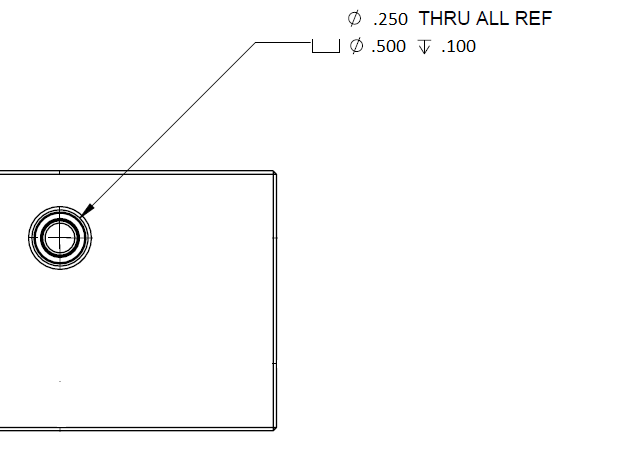
A counterbore is dimensioned by including the diameter of the counterbore along with specifying the depth. The two ways to specify the depth are to specify how deep the counterbore is or the thickness of the remaining material. Both methods are acceptable and commonly seen.
In the example below, the part has a .250 hole and a .500 diameter counterbore to a depth of .100.
How to measure a counterbore
Counterbores can be measured with many different types of gauges. The simplest inspection tool to use, assuming the tolerances aren’t too tight, would be a caliper.
Pocket comparators, gage pins, and depth micrometers are other types of measuring equipment that are frequently used to measure counterbores.
Counterbore vs countersink
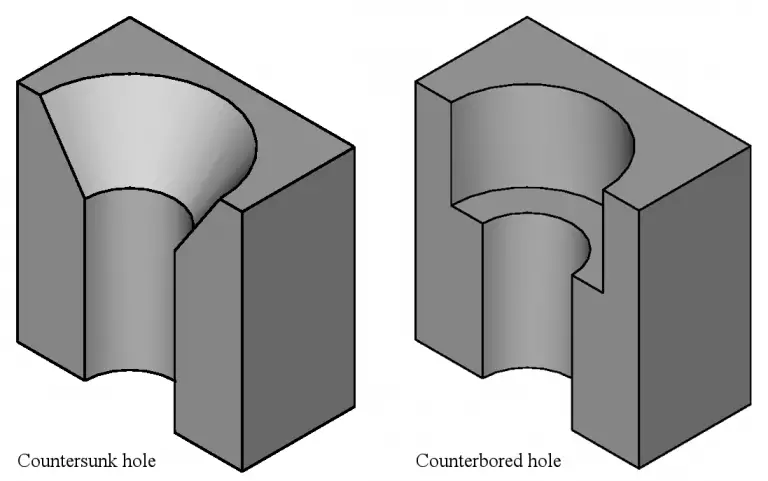
The difference between a countersink and a counterbore is that a countersink has an angled bottom and a counterbore has a flat bottom. The angle of the countersink can vary with many different angles used such as 82°, 90° and 100°.
Counterbore vs spotface
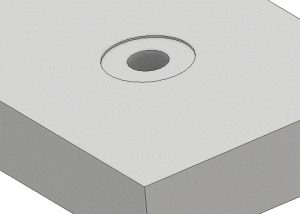
A counterbore and a spotface are very similar. A counterbore is used to recess a fastener while a spotface is used to create a flat surface located allow a fastener to be used. A spotface is used to let a fastener sit flat and in a specific location. A spotface is basically a shallow counterbore.
Want to learn more?
GD&T is a complicated subject and understanding it correctly can be the difference between a perfect part and scrap.
The best way to learn GD&T is from experienced teachers who can break down the material into manageable pieces.
Luckily, we know someone.
And MachinistGuides.com readers get an exclusive discount on training!
Related Articles
For more information see these related articles:
