Best Telescoping Gages

Telescoping gages are an extremely useful measuring tool for checking all types of internal features on a part. 

They are a perfect complement to a nice set of outside micrometers. It’s important to have a quality set of micrometers and for many, it’s a necessity to have a quality set of telescoping gages.

The best telescoping gages are made by the usual suspects. Both Mitutoyo and Starrett have a long history of making quality telescoping gages. But who wins out? Read on to find out.

Best overall

Starrett S579HZ Self-Centering Telescoping Gauge

starrett telescoping gage set
Starrett telescoping gages

Measuring tools by Starrett are typically referenced as the gold standard when it comes to telescoping gages, but it is debatable whether they are good enough to warrant the added cost when compared to the Mitutoyos. Both are great sets.

The Starrett set gets the edge by a small margin. Like so many other precision tools, the importance of the “feel” of the tool can not be overstated. 

The locking mechanism works exceptionally smooth and the spring action is everything you would hope for also. 

Telescoping gages are very much a “feel” tool and as a result the smoothness of the internal workings is of the utmost importance. Just like their micrometers, the telescoping gages by Starrett work exactly as intended and do it very well while being extremely accurate.

Runners-up

Mitutoyo 155-903 6 Piece Telescoping Gage Set
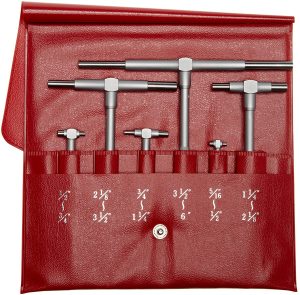
mitutoyo telescoping gage set
Mitutoyo telescoping gages

Please note that I am basically a big Mitutoyo fanboy. They just make excellent measuring equipment. Starrett does too, but through their whole catalog I believe Mitutoyo is generally of higher quality.

That’s one reason to take note that the Starrett telescoping set won our best overall here. They are just that good.

Basically everything that was said about the Starrett set applies to this set from Mitutoyo. The Starrett set is a little bit smoother and feels just a touch more solid. 

In saying that though, it is hard to imagine being disappointed in either set and the Mitutoyo set comes at a decent price reduction compared to the Starretts which is why it warrants mentioning even though it got beat out by the Starrett set.

Pick one. Go with whichever one is your precision gauge manufacturer of choice and you won’t be sad you did. Treat it right and you’ll have a tool your grandchildren can use. Both Starrett and Mitutoyo are heirloom quality.

Anytime Tools Telescoping Bore Gauge Set
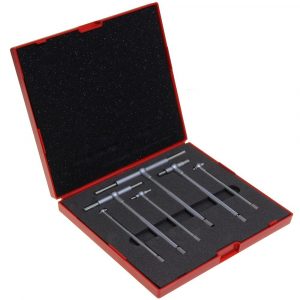
anytime tools telescoping gage set with case
Anytime Tools telescoping gages

If you absolutely must go with a budget brand, Anytime Tools has a decent track record. They won’t be the same heirloom quality tools as you find from Starrett and Mitutoyo, but they do work well for most people.

If you need to measure to tolerances tighter than .001”, I recommend getting either the Starrett or Mitutoyo set. If .001” is close enough, then go with a cheaper set.

One thing I always say when going with super budget tools is to check them when you get them. If they don’t work as intended or are inaccurate, then send them packing. Most online retailers have lenient return policies.

As a side note, I only wish some of the top tier toolmakers would catch on and provide a case similar to the cheaper units. For whatever reason, telescoping gages have historically come in a strange plastic sleeve holder. These sleeves simply do not provide the amount of protection most would want for a precision measuring instrument.

Frequently asked questions

What is a telescoping gage?

Telescoping gage parts
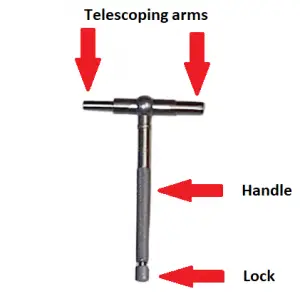
telescoping gage with parts labeled

A telescoping gage is a tool used in conjunction with a micrometer to measure the size of internal holes, slots, and similar features.  They are usually sold in sets which cover a specified measuring range.

Some varieties have two telescoping arms while others have one. They are simply different styles of the same tool and neither style is preferable to the other.

What are telescoping gages used for?

Telescoping gages are used to measure internal features of a part such as a hole diameter or a slot width. They are versatile and capable of covering a large measuring range, especially when compared to other internal feature measurement tools such dial bore gages and inside micrometers.

What is the measuring range of a telescoping gage?

Telescoping gages come in many different sizes.  Typically, they are purchased as sets with a range of 5/16” or ½” up to 6”. Smaller sets are available also and individual gages may be purchased as well.  

Some typical individual gage measuring ranges are listed below.
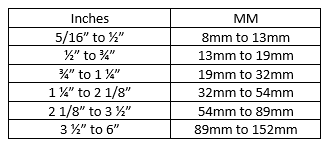
telescoping gage size list

How accurate are telescoping gages?

The accuracy of any telescoping gage depends on multiple factors. The accuracy of the micrometer that is used together with the telescoping gage affects the accuracy most of all.

Additionally, the quality of the telescoping gage, as well as the cleanliness and surface finish of the measured part play a role as well. Parts with a rougher surface finish will not be measured as accurately as those with a smoother surface finish.

The skill of the tool user is another factor in the accuracy of a telescoping gages. Some experienced machinists claim to measure to an accuracy of .0002” while many would argue that .001” is the limit when it comes to telescoping gages. Personally I believe that .0005″ is a more easily attained accuracy with some practice.

The best way to improve your accuracy using telescoping gages is to measure the feature multiple times (3-5) to build confidence in the repeatability of your measurement.

A good way to practice this skill is to measure calibrated ring gauges repeatedly and compare your readings to those of the known ring gauge size.

How to use a telescoping gage

To use a telescoping gage, compress the measuring arms and insert them into the feature to be measured. Gently rock the tool until you feel it “center up” on the feature. Rock it through the hole one time only.

Lock the tool and gently remove the gage from the hole or slot and measure the distance between the measuring faces with a micrometer. Be gentle with your micrometer measurement because excessive force can cause the telescoping gauge to give a smaller reading.

Do you need to calibrate telescoping gages?
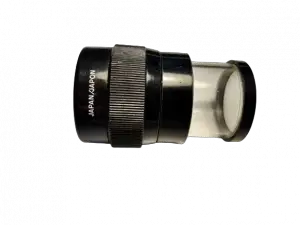
eye loupe
A pocket comparator used for visual inspection

Telescoping gages do not need to be calibrated. They should however be inspected to verify they are in good working order.

This inspection should consist of:

  1. Verifying the spring mechanism is in good working order
  2. Verifying the locking mechanism is in good working order
  3. Visually inspect for flat spots or other signs of wear on the contact ends. An eye loupe or pocket comparator come in handy for this check.

As noted in our accuracy section, checking a known ring gauge can allow to develop some certainty that the tool is working as intended.

Telescoping gages vs inside micrometers
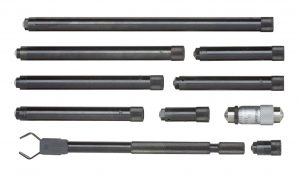
mitutoyo inside micrometer set
Mitutoyo inside micrometer set

Inside micrometers provide more accuracy than telescoping gauges but they do it at the expense of ease of use. 

In most instances you will find that a set of telescoping gages will provide readings that are accurate enough and quicker to use or a dial bore gage will be much more accurate and still faster to use, especially in high volume shops. 

Inside micrometers have their uses, but many will find them not needed.

Telescoping gages vs dial bore gages
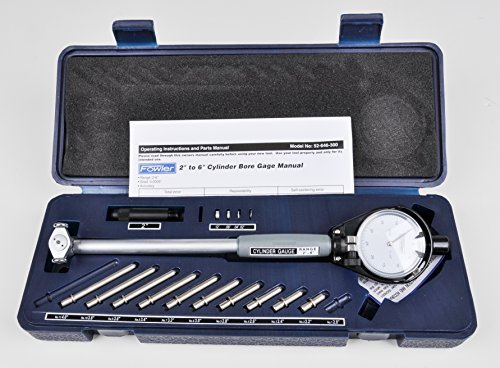
fowler dial bore gage set in case
A dial bore gage set

Dial bore gauges are more accurate than telescoping gauges. The accuracy of a dial bore gauge will depend upon the accuracy and resolution of its dial indicator.

Telescoping gages will be accurate to about a thousandth (.001”), possibly more in the hands of an experienced user. Dial bore gauges can easily be found that are accurate to a tenth (.0001”) or better.

The measuring range of dial bore gages varies but is generally quite a bit smaller than that of the telescoping gages or an inside micrometer set.
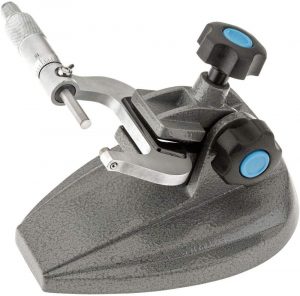
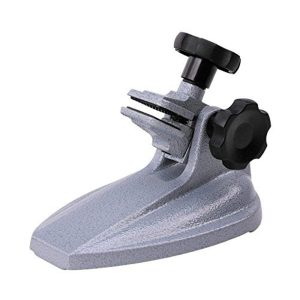
Best Micrometer Stands

Micrometer stands are simple devices that serve a very important purpose. They give you a hand and no, I do not mean complement your super awesome machining skills.

They work to free up a hand that would otherwise be used to hold a part or measuring tool. Their most frequent application is to hold micrometers for use in high volume manufacturing. In addition to this, they are often used by hobbyists and home machinists in their pastime pursuits.   

These simple tools should be easy to get right….right? See our very short list of the best micrometer stands to find out.

Best overall micrometer stand

Grizzly Industrial G5727 - Micrometer Stand

Grizzly Industrial makes some very good tools for their price. Their tools are made in Taiwan and China, but the company is based in America.

They have quality control personnel at the manufacturing facilities to inspect the tools before shipping them stateside. This is likely the key to how they have been able to provide good tools at a reasonable price.

This micrometer stand from Grizzly is a solid piece of equipment. It is solid, heavy and clamps well without issue. There have been some reports that occasionally the stand doesn’t operate as smoothly as expected but most report that a little oil fixes it up quick.

Overall, the Grizzly stand easily beats out the straight from China copycat competitors and does it while keeping the cost much lower than the premium tool manufacturers.

Honorable mentions

Mitutoyo 156-101-10 Micrometer Stand

Best of the best but at a price.

It should be no surprise that Mitutoyo makes our list of the best micrometer stands. They make excellent micrometers as well as other dimensional measurement equipment. Across the board they make excellent tools and gauges. The only downfall of this is that their quality comes at a price.

When it comes to measurement equipment such as micrometers, calipers and indicators, the quality is worth the price.

When it comes to simple tools, the nicer stuff just isn’t worth the price.

The Mitutoyo micrometer stand is a nicely finished, version of exactly what it should be. It’s a clamp with a solid base to keep things steady.

While simple in design, it does exactly what it sets out to do. And it does it consistently. Tools like this will last multiple lifetimes if not treated right. Yet it still doesn’t justify the price.

If budget is of no concern, then go with the stand from Mitutoyo. For everyone else, think about going with one of our other picks for a slight downgrade in quality and a big difference in price.

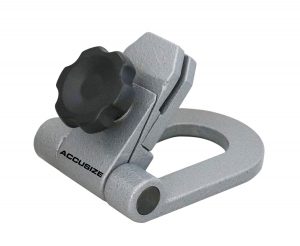
Accusize Industrial Tools S907-C153 Micrometer Stand

A nice budget friendly option.

The Accusize micrometer stand has a solid base which provides good stability and non-slip feet to make sure it stays right where you want it without the need for clamping it to your workbench. However, it can still be clamped if you want 100% assurance that this puppy won’t move.

It should be obvious from the photo, but it isn’t as heavy or big as our other options, so it loses a little in stability. It makes up for it though with its small, almost portable size. 

This stand from Accusize folds flat allowing it to be stashed away easily when not in use. A welcome feature for those of us with cluttered workbenches.

The S907-C153 isn’t the end all, be all of micrometer stands but for the price it certainly does a respectable job of keeping your tool in place.

Frequently asked questions

What is a micrometer stand?

outside micrometer
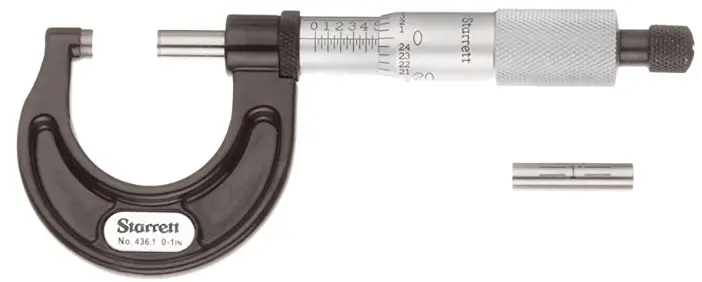
A standard outside micrometer

A micrometer stand is a tool used for holding measuring equipment and various objects for precision work. The angle of the stand can be rotated to find the best position for working.

The heavy base of the stand keeps things steady. In addition, the stand can be clamped to a table or workbench to provide more stability.

How do you use a micrometer stand?

Micrometer stands are pretty simple. Basically, it is a two-way clamp.

There is a clamp for holding the tool in place, as well as a clamp for rotating the holder and adjusting the angle. Once clamped, the base steadies the object while allowing the user to keep two hands free. They also have the added benefit of insulating the object being held to varying degrees of heat.

Why would you use a micrometer stand?

A micrometer stand will allow you to free up your hands for precision work such as soldering PCBs or measuring tight tolerances, especially in high volume.

Another benefit is limiting the amount of heat transfer from the user, to either the object they are measuring or to the measuring device itself.

Thermal expansion will cause things to expand. This isn’t a good thing when trying to take measurements down to very tight tolerances.

A good micrometer stand will help insulate your tools from your body heat and give you more accurate readings.

Related articles

For more information check out these related articles:

Best Micrometer Sets for Machinists and Hobbyists

Not many tools get as much inspection use as a micrometer. As a result, the first inspection tool purchased by many is a good micrometer or a micrometer set. 
Because of their expense, they are not tools that you will want to buy more than once. The good thing is that if chosen carefully, they will last a lifetime or more. As the saying goes, “buy once, cry once”. 

Now take a look at the best micrometer sets available, many of which have been best in class for many, many years.

Best micrometer set

Starrett ST436.1CXRLZ 0-6" Outside Micrometer Set

When it comes to the standard analog micrometers, nobody makes them like Starrett. The most important aspect of a micrometer is its accuracy and these mics by Starrett are extremely accurate and repeatable.

As long as you exercise due care in your measurements, you can expect them to be accurate to .0001”. While it is true that many other manufacturers have been able to create a tool that is capable of the same accuracy, few come close to the build quality of a Starrett micrometer.

It can be hard to quantify the “feel” of a tool. In this case, these mics just feel right. The weight is nice without being too heavy. More importantly, they have a nice balance to them that never seems to get in the way of your measurement.


The finish of both the frame of the micrometer as well as the sleeve has always been excellent. The knurling on the thimble and ratchet provides the perfect amount of grip.

Speaking of the ratchet, I have always found that Starrett makes the best ratchets. Ratchet preferences can vary from person to person but the thing that is nice about these ratchets is they are extremely consistent. Between mics in a set, the ratchets will all feel the same.

Starrett has been making these same micrometers for quite some time and largely without change. If it ain’t broke, don’t fix it.

The one downfall of these micrometers is that the quality does come with a price. For this reason, I have included a second choice in the Mitutoyo set below. It can also be worth considering the best digital micrometer set if you need more accuracy and can live with a smaller measuring range.

Used versions of these tools can be an excellent choice also because all of the choices noted here, from both Starrett and Mitutoyo, have a long history of being quality measuring tools. They have been mostly unchanged through the past couple decades.

As a side note, the case that comes as part of the set is as well made as the micrometers themselves.

Mitutoyo 0-6" Outside Micrometer Set

This set of micrometers form Mitutoyo checks all the boxes. They are accurate, consistently well-made and reliable. They are only a small step below the set by Starrett. While they might not be the absolute best micrometer set available, they might be the best value because the price is substantially lower than that of the Starrett set.

For comparisons sake, if the micrometer set from Starrett is a Rolls Royce, then the set by Mitutoyo is a Cadillac. This is certainly reflected in the price difference.

The main difference between the sets is in the feel of the mics. The finish of the Mitutoyo set is nice, but not on the same level as that of the Starrett set. Also, I have always found the ratchet mechanism and balance of the mics by Mitutoyo to be very good but not as great as the Starretts.

I feel like this might sound like the Mitutoyo set is not that great but in reality, they are excellent. They just aren’t quite as good as the Starretts. However, they are much better than all the other micrometers out there and they come with a much smaller price tag.

Best digital micrometer set

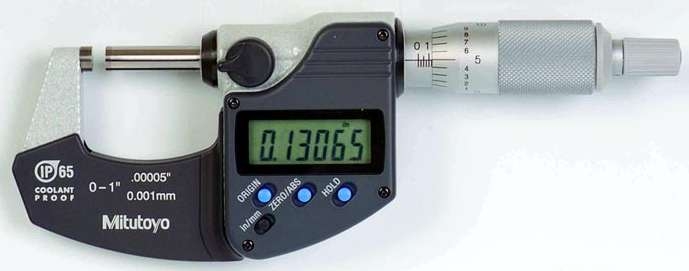
Mitutoyo 293-961-30 Digimatic Micrometer 0-4”

I absolutely love the Mitutoyo Digimatic micrometers. They are easily the most accurate normal micrometers out there. Sure, you can find specialty mics with indicators built in that will be more accurate, but they will be more expensive and less user friendly.

If given the choice, I would use Mitutoyo Digimatic mics for all micrometer measurements. They are quick to read and extremely accurate.

The only knock I could give them is that some might find them a little bulky. Personally, I have never found this to be the case, but they are larger than your average analog mic.

Digital micrometers also make a great choice when working in both inch and metric units. The ease with which they switch measuring units saves time and eliminates any potential conversion miscalculations that might occur by the user.

Another great feature of the Digimatic mics that is not common among other digital micrometers is that the batteries seemingly last forever. No, not literally but even with heavy use it feels like it.

The sole reason they didn’t make the best overall micrometer set is that the set includes less micrometers and is limited to measuring sizes up to 4”. If this isn’t a problem for your applications then think about taking a good, hard look at the Mitutoyo Digimatic mic set. They are an absolute top of the line set.


Best budget micrometer set

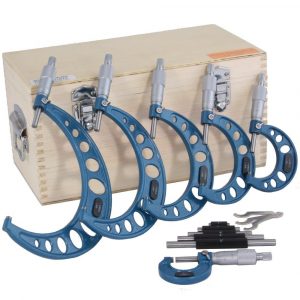
Anytime Tools 0-6” Outside Micrometer Set

In recent years, some of the Chinese made micrometer manufacturers have greatly increased their quality. Anytime Tools is a prime example of this. They have been able to create tools for a fraction of the price of a traditional micrometer while largely maintaining the accuracy and quality seen with more well-known manufacturers.
The improvement in Chinese made micrometers is so great that some American tool manufacturers have been outsourcing their tools to other countries.

With regards to accuracy, they claim to be accurate to .0001” as you would expect from a good micrometer. In practice, they aren’t quite there all the time. It would be safe to count on .0002” accuracy. If you are looking for more than that then make sure to verify the accuracy when you receive them.

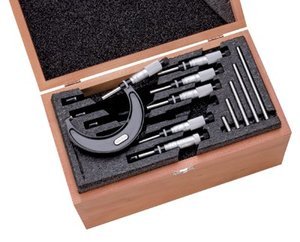
The Anytime Tools set comes with all the standard micrometer set accessories including reference standards for verifying their accuracy and a wooden case. The case isn’t as nice as what comes with more expensive sets, but it is just a box after all. It holds all of the included mics and closes to keep out the elements. It makes a perfectly acceptable storage solution.

The feel of this set isn’t quite as nice as those from Mitutoyo and Starrett but the reduction in price can not be overlooked. This set could be purchased along with a set of gage blocks to verify their accuracy and the price tag would still be well under the cost of other quality sets.

I would never recommend going cheap when it comes to your precision measuring tools if they are critical to your job. The one exception is, if you are a hobbyist or just entering the machining trade, this micrometer set from Anytime Tools makes a great starter set that just might meet all of your current and possibly future measurement needs.

Things to consider when purchasing a micrometer set

How big of a set to get

It all comes down to the sizes you plan to measure. Usually, the required measurements are skewed towards the lower end of the measuring scale. A 0-1” micrometer will be the size used most often. The 1-2” micrometer will be the 2nd most used micrometer and so on.

As the sizes get larger, they will see substantially less usage. Even in a high use environment such as a machine shop, a 5-6” micrometer or 11-12” micrometer will rarely be used.

My recommendation would be to not buy a larger set than you need. A good micrometer set is not cheap and therefore you should ensure the tools will get used. You don’t want a box full of expensive paperweights.

Unless you know that you absolutely need it, I would never recommend purchasing a set larger than 12”. A 0-6” set makes a good starting point for most people and if you think you can get away with something slightly smaller then go for it.

It is better to buy a higher quality 0-3” set than it would be to have a 0-6” set where the 4-6” mics never get used.

Accuracy

Accuracy and repeatability are the most important qualities in a micrometer. It is possible to find a wide variety of accuracies available in micrometer, especially when it comes to older used tools.

You should look to get a micrometer with an accuracy of .0001” or better. I have included a cheaper, slightly less accurate budget set above, but you should only go with that set if price is your primary concern and you know that the reduction in accuracy is acceptable for your measurements.

I have never known anyone to regret purchasing a more accurate tool.

Analog vs mechanical counter vs digital

Each type of micrometer has its pros and cons.

Analog mics are always ready to go. You never need to worry about dead batteries and aren’t quite as susceptible to contamination (coolant, etc.) when compared to digital micrometers.

Digital micrometers are easier to read, quicker to take measurements and allow the user to easily switch between measurement units. Additionally, they allow the user to switch their zero location at will. There are many instances were comparison measurements need to be taken. Digital micrometers allow these types of measurement to be taken quickly without the added need for manual calculations.

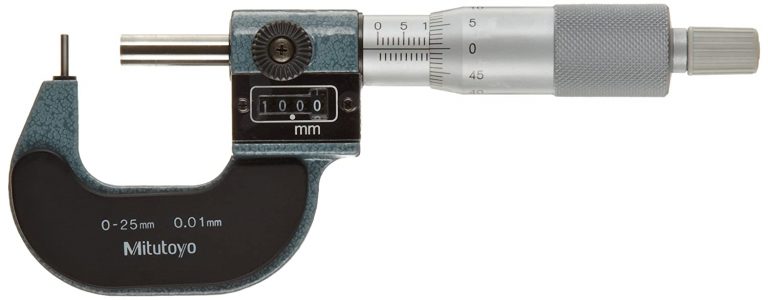
mitutoyo mechanical counter micrometer
Mechanical counter micrometer

I do not recommend the mechanical counter micrometers. They add another mechanism that can malfunction simply don’t provide enough of an added benefit to justify their use. Electronic digital micrometers can be found for the same price as the mechanical counter versions.

Go with a standard analog micrometer or a solid digital version and skip the  prone mechanical counter varieties.

Cases

Cases are all about protection. You don’t need anything too fancy when it comes to cases. The standard wooden case that comes with most micrometer sets is more than capable of storing your tools.

The case gives the tools a place to stay with protection from the elements (there can be a lot in the air when machining) and also a safe storage option. Too often a micrometer left on a workbench gets bumped and ends up hitting the floor.

Keep your tools safe and make sure to put them away when not in use so they remain accurate for years to come.

Carbide vs steel tips

Steel tips
Carbide tips

Carbide tipped micrometers provide increased wear resistance. In general, I have not found them to provide an added benefit to hardened steel.

Please note that carbide can be more brittle as a result of the added toughness which means they are susceptible to chipped measuring faces. If cared for properly, this will likely not be an issue, but it is something to keep in mind.

The main case for carbide tips would be when dealing with particularly abrasive materials.

For most users, both carbide and steel tipped micrometers will be more than adequate.

Calibrated or not

There are manufacturers and sellers out there who offer calibrated micrometers for an added cost. This is not an item that is worth paying extra for.

The micrometers should be made accurate from the start. Calibration only gets you documented evidence that your tool is verified as accurate using a reference standard that is traceable to NIST. If this is something you require then you likely already have a set of calibrated gage blocks that will allow you to do the calibration on your own.

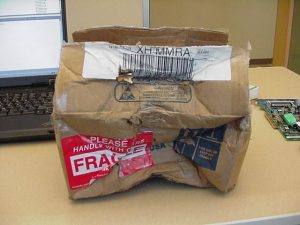
Shipping companies are not always gentle with your packages so keep in mind that it would be entirely possible to pay extra for calibration and have the calibration voided by shock from shipping.

Skip the calibration upcharge and verify your micrometers on your own.

Summary

Choosing a micrometer set is not an easy decision. Even the cheapest options cost a pretty penny. The most important things to consider is the accuracy you need as well the size of the set you require.

If they will be used daily, don’t be afraid to splurge and pick up a heirloom quality set from Starrett or Mitutoyo. They really are worth it and built to last. 

Related articles

For more information check out these related articles:

Anytime Tools Dial Caliper Review

plus symbol

Pros

Price point
Customer service
No batteries required

minus symbol

Cons

Not "shock proof"

Features

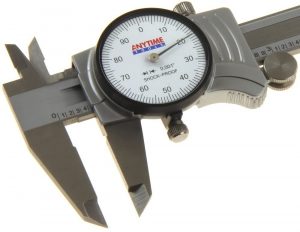
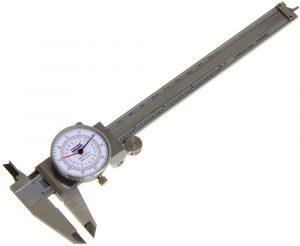
The Anytime Tools dial caliper is built to last, thanks mainly to its surprisingly solid construction. The hardened stainless-steel frame means it is rust-resistant, which is nice when the shop or garage it gets used in doesn’t always stay the cleanest.  A sturdy build is great, but there are many other reasons why this precision measuring tool is a great buy.

This dial caliper from Anytime Tools has precision and accuracy in line with what you would expect to get from tools at a much higher price point. It is capable of taking internal, external, depth and step measurements with an accuracy of .001”. This means it competes directly with tools from companies like Starrett, Fowler and Mitutoyo.

If you need something more accurate, then look for a quality micrometer to get your measurement accuracy down to .0001” or better.

As a bonus to the sturdy build noted above, the tool is noted as being “Shock Proof”. While it might be a little more rugged than many other dial calipers, I wouldn’t recommend a drop test or something similar. It is a precision measuring instrument after all. Treat it like it is.

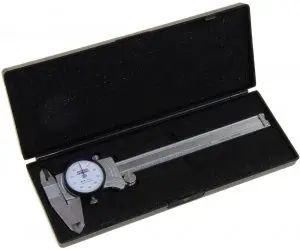
Luckily, the tool comes with a decent case to protect it when not in use. Again, this is a standard feature found on more expensive calipers, but one that is not always seen with tools in the same price range as this caliper from Anytime Tools.

anytime tools dial caliper dial face

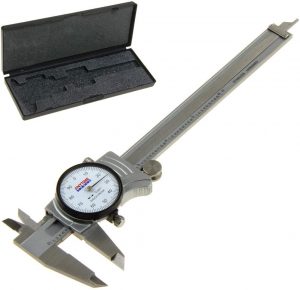
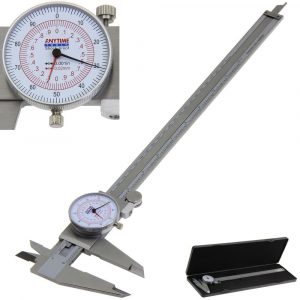
While the dial face is only protected by plastic, this is normal in most dial calipers nowadays. The Anytime Tools dial caliper has a nice, easy to read dial face as well as graduated scale on the body of the caliper.

Being easy to ready means the caliper is simple to use and the fact that it doesn’t require batteries like digital calipers do allows it to always be ready to use. No more problems dealing with dead batteries. This is great when the tool only gets sporadic or occasional use.

Nothing is more frustrating than needing to take a critical measurement and finding out that your batteries are dead. At best it means a trip to the store for a random battery size. At worst it means waiting a couple days for fresh batteries to arrive.

Please note that there are multiple versions of this dial caliper available and this review is based on the single scale 6” version. Many manufacturers make calipers in a wide variety of sizes. While they are all solid choices, there are some model specific notes below.

Dual unit scale version

The dual scale version of the 6” dial caliper takes measurements in both inches and millimeters. A black scale is used for the imperial units and red is used for the metric ones.

Generally, if you need to take measurements in both units then I would recommend a good digital caliper but if you are determined to stick with an analog caliper for any reason, then they make a good choice.

0-12" Dial caliper

6” dial calipers are a pretty standard fare. Many manufacturers have been able make a solid tool. As the caliper gets larger, it gets much harder to have a device capable of taking accurate measurements.

The 12” version of Anytime Tools caliper maintains the .001”/.02mm accuracy across the whole measuring range while maintaining the budget friendly price point similar to the 6” version.

This 12″ dial caliper also gives measurements in both inches and millimeters.

Verdict

The Anytime Tools dial caliper is a solid measuring device. It is reasonably priced and has features and accuracy that are comparable to tools that cost twice as much. 

The dual unit version is a welcome convenience for those who will be working both inches and mm and the 12″ version does a great job of including premium features while maintaining the budget friendly price just like the 6″ caliper. 

In short, all three versions are solid choices for a quality dial caliper.

Things to consider when purchasing a caliper

Digital vs dial vs vernier calipers

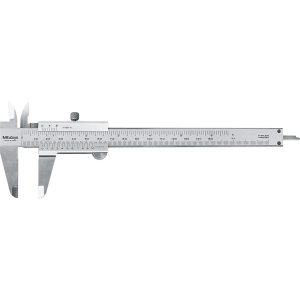
mitutoyo 6 inch vernier caliper
Vernier caliper
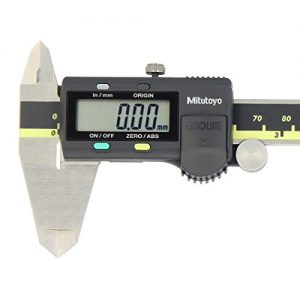
mitutoyo digital caliper display
Digital caliper

Quality measuring calipers are available in both analog and digital versions. There was a time where the digital versions were much more expensive than their dial and vernier counterparts. In recent years though, things have changed. The price difference has switched somewhat. Budget friendly digital calipers can be found for less than a budget analog caliper.

Whether you go digital or analog is really just a matter of preference. Some like having a tool that is always ready to use without the need for special batteries. Others like the simplicity of reading a digital display which saves them from having to use a scale and/or dial reading to calculate the measurement. Neither is difficult to use. Go with whatever you are comfortable using.

Measuring range

Calipers come in a wide range of sizes. The standard size is a 0-6” caliper but they can frequently be found in 0-4”, 0-8”, 0-12” and 0-24” varieties. One thing to think about is that as the tool gets larger, they can be more difficult to take measurements with. A 24” caliper can be unwieldy to use when trying to take a one-inch measurement.

If you think you will need a caliper with a larger measuring range such as a 12” or 24” version, then it is best to go with a 0-6” caliper and also a separate larger caliper. This will allow you to easily measure smaller sizes. For most users, measurements under six inches will make up the majority of their work. The larger calipers can then be used for the less frequent, larger measurements.

Accuracy

The accuracy of most calipers is fairly comparable. Unless you purchase an absolute bargain basement unit (something all plastic or similar), the accuracy of your caliper will be .001” or .02mm. If you need something more accurate then you will need to look for a micrometer instead.

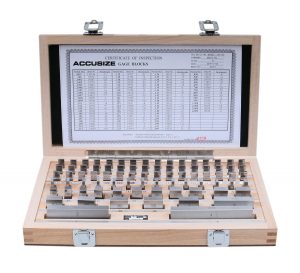
gauge block set
Gage block set

I do recommend verifying the accuracy of your caliper by checking the calibration. Using a good set of gage blocks to check the calibration/accuracy is the best way to go.

If you don’t have access to a set of gage blocks then any known reference standard (known ball bearing, gauge pin, plug gage, etc.) can provide some confidence that the tool is accurate. Ideally, you will want to verify the tools accuracy across the whole measuring range. It is not uncommon for a tool to get damaged and give a correct reading for a 1” measurement while being multiple thousandths off at another interval such as 4.5”.

Used vs new

If they are treated well, a used caliper will be as good and accurate as a brand-new tool. In fact, many tools made 50 years or more ago are still in use and working well. The only caveat would be that you will want to verify the accuracy of a used tool before purchasing it.

Many times, a person in the machine shop industry will be getting ready to retire and will look to sell their prized tools. Knowing the history of a tool, and more importantly, knowing it was cared for can provide some certainty that you will be getting a quality tool.

Calibration certificates

Do not, I repeat do not bother spending the extra money to get a calibration certificate with your caliper. They should be accurate regardless. Furthermore, the calibration cert only guarantees the tool was accurate at the time of calibration.

box damaged in shipping
Please handle with care

Have you seen how delivery drivers handle your boxes? Anything can happen in between the time of calibration and when the tool reaches you. Shipping companies don’t exactly have a reputation for being careful with packages during shipment.

Check it when you receive it and skip the added expense of calibration certificates.

Contamination protection

Standard dial calipers are pretty resilient to most normal forms of contamination that they will see such as oil and coolant. I still highly recommend keeping them as clean as possible. Keeping them in a case and even in a locked toolbox is always a good idea. Also be more wary of contaminants such as metal chips, dirt and debris. They are more likely to cause issues with your tool. A stray metal chip can cause your caliper to skip a tooth on the gear. This will lead to false measurements.

Data transfer

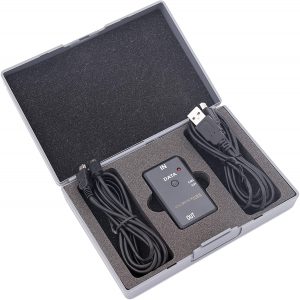
vinca data transfer cable in case
Data transfer cable

Data transfer is a nice feature but most often only something that a business will use. With that being said, you won’t find any data transfer capabilities on a set of analog calipers such as the Anytime Tools dial calipers. If data transfer is something that you require then find yourself a good digital caliper. However, keep in mind that sometimes the cable to make the data transfer costs more than the caliper itself.

Related articles

Chamfer and Chamfering Guide [Learn Quick]

What is a chamfer?

a picture of a chamfered part
A chamfered corner

A chamfer is an angle on the edge of a workpiece.

They are created for mainly for protecting the chamfered object as well as anyone who might come in contact with the object.

The edge can be the outside of the part, where a hole breaks through a surface or where any two surfaces meet. 

Notice the chamfered edges in the picture above.

chamfered cube

The cube above has chamfered corners where all the main faces intersect.

Chamfering those intersections reduces the sharpness of, or softens the corners. 

Types of chamfers

Leg length chamfers

The most common way to spec a chamfer is by giving its leg length size and the chamfer angle.

In the picture of a triangle below, the legs are the a and b sides of the triangle.

right triangle with sides and angles identified

If no angle is given, the chamfer angle would be assumed to be 45 degrees. This can be a dangerous assumption though. It is always best to confirm the chamfer angle when not directly specified.

Face width chamfers

Occasionally, a chamfer will be specified as being measured as a face width. This can be seen abbreviated as F.W. on some blueprints. 

In the picture below, the leg length of the chamfer would be the length of the a and b sides. These would be equal in a 45 degree chamfer. The length of the c side would be the face width of the chamfer. 

right triangle with sides and angles identified

If a chamfer is called out as a face width, then it is to be measured along the hypotenuse of the chamfer. 

To convert a leg length dimension to face width simply multiply the leg length value by 1.414. To convert from a face width dimension to a leg length dimension, reverse the process and divide by 1.414. 

It should be noted that these conversion factors only work if the chamfer is at 45 degrees (the most common chamfer angle). If you need to calculate the face width of a chamfer at a different angle use a triangle calculator.

Chamfers compared to similar features

Chamfer vs bevel

A chamfer and a bevel are the same, especially in the case of machining.

Some will debate this point and argue that a chamfer takes the sharp corner off the part and that a bevel would do the same but all the way to the opposite side surface.

While there are some diagrams available online that will show this as true, this is incorrect. Merriam-Webster clearly defines a chamfer and bevel as the same thing.

Chamfer vs break edge

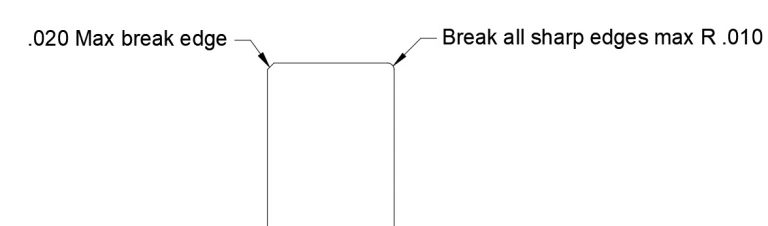
break edge blueprint examples
Break edge callouts

Chamfers are often left as an afterthought for blueprint drafters. 

Many times they have no functional requirement but are merely added to protect the part and anyone who might come into contact with it from damage. Deburring an edge is very similar.

In cases where the requirements are not strict, you will often see a break edge or break all edges requirement listed.

This means the sharp edge should be removed from part, but it is not directly controlled. In cases where a break edge is specified, the drafter is generally looking for a chamfer size of .010″-.020″ and sometimes even less.

Break edge callouts will rarely be identified with an angle associated with them.

Chamfer vs countersink

Countersink Blueprint GD&T Symbol two lines pointing down
Countersink blueprint symbol

Countersinks are chamfers applied to a round feature such as a hole. 

The main difference between chamfers and countersinks is that chamfers are usually specified at 45 degrees and countersinks have a larger variety of common angles.

Countersink angles are also specified as the angle between two opposite sides of the feature. This results in the angle spec being doubled. A 45 degree chamfer would often be listed as a 90 degree countersink. Common countersink angles are 82, 90, 100 and 120 degrees.

Chamfer vs deburr

As I noted above, a deburr callout is very similar to a break edge. Deburring is the act of removing a sharp edge and often raised edges along the feature. 

Tiny bits of raised metal can be quite dangerous. Deburring will remove these sharp bits. Similar to break edges, deburr callouts are usually pretty loosey goosey.

Chamfer vs fillet

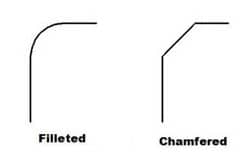
chamfer vs fillet comparison

A fillet is a rounded or radiused corner and a chamfer is a straight cut. Notice the difference in the picture above.

Chamfers do not have to be a 45 degree angle as shown in the picture above, but this is certainly the most common configuration.

How to specify chamfer dimensions

Dimensioning chamfers is done with a call out that specifies the length of the chamfer along with the angle of the chamfer. If no angle is given the chamfer is assumed to be at 45 degrees. 

Chamfers can also be specified by giving both legs of the chamfer such as:

Chamfer all edges .025″ x .025″

Chamfer notation example #1

chamfer callout blueprint note

If the example above read “Chamfer all edges and corners .030”, the callout would be the same as it is written currently.  Angles other than 45 degrees are used, but are much less frequent. 

Chamfers are often specified in the notes of a blueprint such as in the example above.

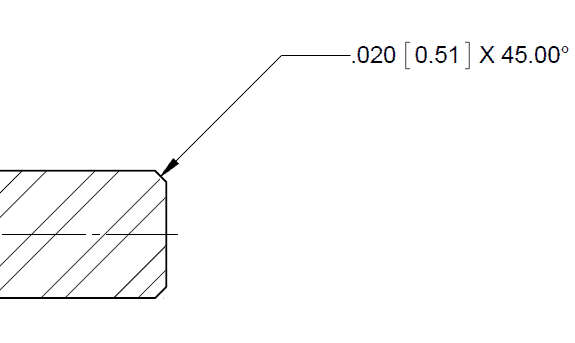
Chamfer notation example #2

chamfer callout blueprint example

In this example, the chamfer would have a leg length of .020″ and a chamfer angle of 45.00 degrees.

Measuring chamfers

How to measure the size of a chamfer

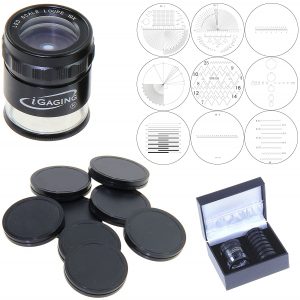
igaging pocket comparator with reticles and case
Pocket comparator, otherwise known as an eye loupe

A chamfer length or depth can be measured utilizing many different pieces of measuring equipment. Optical comparators and CMMs are often used in industry, but if you are reading this you will likely want to measure your chamfer with a gauge called a pocket comparator, often referred to as an eye loupe. 

The pocket comparator uses a magnifying lens and reticle to enable the user to measure the size of the chamfer.

How to measure the angle of a chamfer

Chamfer angles are often assumed to be the same angle as the tool used to generate them. The most common chamfer angle is 45 degrees. 

Depending on the part geometry, different tools can be used to measure a chamfer’s angle. The angle can be calculated using the triangle calculator referenced above or a protractor can be used. 

Want to learn more?

GD&T is a complicated subject and understanding it correctly can be the difference between a perfect part and scrap.

The best way to learn GD&T is from experienced teachers who can break down the material into manageable pieces.

Luckily, we know someone.

And MachinistGuides.com readers get an exclusive discount on training!

Related Articles

Ultimate Guide to ISO 9001 Quality Objectives

What are quality objectives?

tablet with goals on it

Quality objectives are goals that are tied to the quality policy of an organization. They are key performance indicators used to measure items identified as being very important to the business. Generally, they are performance metrics tied to items such as delivery, quality, and/or safety.

Does ISO 9001 require quality objectives?

The 2015 revision of ISO 9001 requires that an organization has quality objectives. Section 6.2 of the standard describes the requirements.

Per the ISO standard, the quality objectives must coincide with the quality policy. They also must be measured, monitored and communicated. This means you must pick a criterion, set a goal, measure it over a certain timeframe and communicate the results.

 For example:

  • Criterion = number of customer returns
  • Goal = less than 10 returns
  • Timeframe = per quarter
  • Communication = report the results at management review and to all employees

The communication part can be misleading slightly. The most important people to communicate the results to are the members of the management who are responsible. In the example above, this would likely be someone in a quality control management role.

Communicating to all employees is often done through posting the results on a bulletin board somewhere so the employees can see the quality objective performance.

Who is responsible for the quality objectives?

Management is responsible for setting the quality objectives. Depending on the size of the organization, top management may be responsible or lower-level management may be involved. Smaller businesses are more likely to have heavy involvement from top management.

How do you write a good quality objective?

A good quality objective will follow the rules of SMART. Quality objectives should be specific, measurable, attainable, relevant and time bound.

smart goal banner

Specific = customer returns

Measurable = # of customer returns

Attainable = 10 customer returns per quarter because we know our average is 11

Relevant = customer returns are relevant because it ties into our quality policy with regards to doing the job right

Time bound = per quarter

In summary, our SMART quality objective in this example is customer returns with a goal of 10 per quarter.

Setting a goal is important. Make sure your goals are not too easy or too hard. You want to reasonably be able to attain them, but they should be forcing you to continuously improve.

Not every quality objective needs to be related to customer satisfaction or continuous improvement but having quality objectives that are will link them to your quality policy, an ISO requirement.

How many quality objectives should you have?

The answer to this question will be specific to each organization. However, a good starting point would be to have approximately five quality objectives. See the examples below to get an idea of where to start.

Quality objective examples

The quality objective examples below could apply to both manufacturing companies along with service providers.

Quality Objective

Example Goal

On-time delivery to customer

> 95% on-time delivery

Customer returns

< 10 returns per quarter

Supplier on-time delivery

> 95% on-time delivery

Supplier returns

< 5 returns per quarter

Safety incidents

0 safety incidents per quarter

How often should you review your quality objectives?

Your quality objective performance should be reviewed minimally at every management review meeting. Organizations handle management review in different ways. If you are just getting started then think about starting with quarterly management reviews.

Performing reviews quarterly will allow the organization to address any issues that may arise in a timely manner.

What should you do if you don't meet your quality objectives?

If you don’t meet your quality objectives, you should think about starting corrective action activities. If you miss your quality objective by .1% it doesn’t necessarily require that you generate a corrective action. Continually missing the objective or missing the objective by a substantial margin would be more worrisome and cause for creating a corrective action.

Can you add, remove or change your quality objectives?

Yes, you are free to change your quality objectives as you see fit. You should make sure they are relevant to your organization and its goals (including quality policy). Remember the ISO requirements as listed above when making changes including adding or removing quality objectives.

Quality objectives vs key performance indicators (KPIs)

Every quality objective is a KPI but not every KPI is a quality objective.

Quality objectives are more of an overall picture of the organizational performance such as overall on-time delivery. KPIs can be something much smaller in scope such as customer support response time.

Ultimately, an organization will need to identify the KPIs that are the most important to them and track them as quality objectives. See the examples above to give yourself some ideas of what constitutes a quality objective.

Quality objectives vs quality policy

A quality policy is basically a mission statement. The quality objectives are the items that are measured, monitored and communicated within an organization to ensure that the business is meeting its quality policy.

Related articles

Ultimate Guide to ISO 9001 Quality Policies

To get ISO certified there are many requirements which must be met. One of these requirements is establishing a quality policy. A quality policy shouldn’t be complicated. It should be simple to understand and easy to communicate throughout your organization.

What is a quality policy?

A quality policy is similar to a mission statement. It describes how a business or organization will strive to provide the best products or services possible. At times it may include other components such as environmental concerns, but the core message still remains. Do it right. Do it on-time.

What is the purpose of a quality policy?

A quality policy is important because it communicates to the stakeholders such as your employees, suppliers, and customers what your goals are with regards to your business.

Does ISO 9001 require a quality policy?

The 2015 revision of ISO 9001 explicitly requires a quality policy. Per the ISO 9001 standard, the quality policy must include a commitment to meeting applicable requirements and continuous improvement.

Applicable requirements include items such as state and federal regulations, ITAR, OSHA and any other industry relevant requirement.

There are also requirements to make sure that the quality policy is documented, communicated, and understood within the organization.

Who will establish and maintain the quality policy?

org chart example

Top management is responsible for establishing and maintaining the quality policy. Physical and electronic documents are often created and updated by quality personnel or a management representative, but ultimately the members of management at the top of the org chart are the ones who must set the quality policy.

How often should the quality policy be reviewed?

The quality policy needs to be periodically reviewed to ensure its continued suitability for the organization. This can be done by reviewing the quality policy at every management review meeting.

Once established, it won’t need to be changed often unless there is a large organizational change.

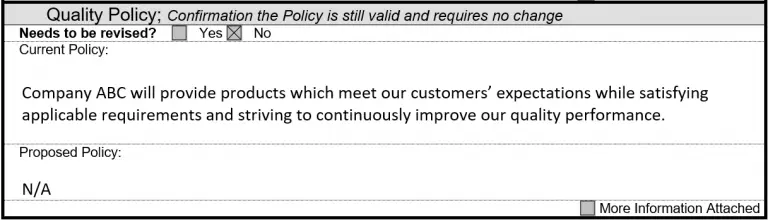
Review of the quality policy can be something as simple as a check box like the one below.

quality policy review in management review

Leave a section below the checkbox where you can talk about changes to the quality policy when they do happen.

How to write a quality policy

Keep it simple and make sure to include a statement about continuously improving. Think about what your customers want.

If there is something else that is vitally important to your organization, then it may be worthwhile to include in your quality policy. Examples of this would be environmental or safety concerns.

If you are just getting started with ISO 9001, I recommend keeping it as basic as possible while still describing what is important to your business. If an auditor were to come in and take issue with your quality policy, it would be an easy fix.

How to communicate your quality policy

Communicating your quality policy to your customers and suppliers is easy. Include the quality policy on your company’s website.

Communicating your quality policy to your employees can be a little more challenging. Emails, group meetings, and one on one training sessions are all effective ways to communicate your quality policy.

group meeting
Group meetings are excellent training tools

Teaching employees about your quality policy should also be a component of your new hire onboarding process.

Once established, you will need to train existing employees to the newly created quality policy. Additionally, periodic retraining can be used to keep the quality policy fresh in their minds.

Think about implementing an annual training schedule to communicate the quality policy to your employees.

Quality policy vs quality manual

Your quality manual is the overall view of your quality system. The quality policy is one small component of that system. A vitally important part, but still a small part.

Quality policy vs quality objectives

The quality policy is your mission. The quality objectives are the measurable items you will monitor to make sure you meet that goal.

The “measurable” part is important.

Some common quality objectives are items such as on-time delivery percentage, number of customer returns, supplier on-time delivery percentage, supplier returns, non-conforming material statistics (scrap) and/or safety incidents.

Super simple quality policy example

The example below is as pared back as possible while still including the essential components of a quality policy.

“Company ABC will provide products which meet our customers’ expectations while satisfying applicable requirements and striving to continuously improve our quality performance.”

Quality policy example for manufacturing

We will supply products and services that meet or exceed our customers’ requirements on time, every time. By continually improving the effectiveness of our quality management system (QMS), we strive for excellence in everything we do.

Quality policy example for service business

It is the policy of Company ABC to provide a service that continually meets or exceeds all customer quality and delivery expectations while abiding by all regulatory requirements.

Company ABC will strive to continually improve its process quality and efficiency.

Related articles

Ultimate Guide to Micrometer Calibration

Outside micrometers are easily one of the most common measuring tools in the machinist’s toolbox. They are so common that they are usually referred to as simply micrometers or mics. For the rest of this post, I will follow the same convention.

A side note, specialty micrometers such as depth micrometers or inside micrometers are more often referred to by their whole name.

Now that you are on a first name basis with your micrometer, let’s think about calibrating it.

So just how important is it to have a properly calibrated micrometer?


outside micrometer
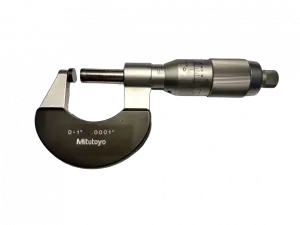
0-1" standard micrometer

Considering a 0-1” micrometer is likely the most used inspection tool in the shop… pretty darn important.

Please note that some of what follows might be overkill for a hobbyist but it is certainly still good practice.

Now, let’s learn more about micrometer calibration.

Why do micrometers need to be calibrated?

Micrometers need to be calibrated to ensure their accuracy.

Because they are used for critical measurements, it is important to make sure that any readings taken with the micrometer are correct.

During the calibration process, the micrometer is checked with a standard, such as a gauge block, to verify it is accurate across its entire measuring range.

How often should you calibrate a micrometer?

There are many factors to consider when determining how often to calibrate your micrometer. The visual below lists some of the most common factors.

Micrometers can be calibrated at many different intervals. When setting the calibration frequency, you should take into account factors such as:

  • How the tool will be used? Is the micrometer being used to measure critical product dimensions?
  • How tight are the tolerances it will be used to measure?
  • Will it be subjected to stresses such as heat, humidity, pressure, physical stress or other environmental?
  • How much usage will it see?
  • What is the tool’s past calibration history?

Where I work we take all of these factors into account and develop our calibration intervals based on them. We group tools into different intervals.

The most important tools are calibrated every four months or sooner. Less critical tools are calibrated on a yearly schedule. Occasionally, tools which see little use and have an excellent calibration history get calibrated at a more extended interval.

It all depends on what works for your shop. If you are unsure of where to start, calibrate more frequently and then adjust based on usage and calibration history over time.

Think about all of these factors when determining how often you will calibrate your micrometer.

What equipment do you need to calibrate a micrometer?

Calibration of your micrometer requires only a known length standard such as a gauge block, an adjustment spanner and your micrometer.

Additional supplies such as gage oil and task wipers will also come in handy but aren’t required.


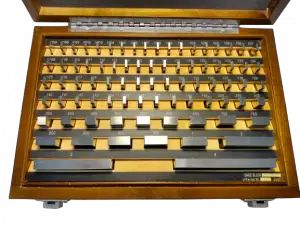
gauge block set
Gauge block set

Gauge blocks should be chosen that are at a minimum four times more accurate than your micrometer.

If your micrometer reads to a tenth (.0001”) like most common micrometers, then you will need gauge blocks that are accurate to 25 millionths of an inch (.000025”).

This 4:1 requirement started with the military specification, or mil spec MIL-STD-45662. This specification defined the calibration requirements for companies.

This requirement is a minimum requirement. Using gauge blocks that are 10 times more accurate than the micrometer is even better.

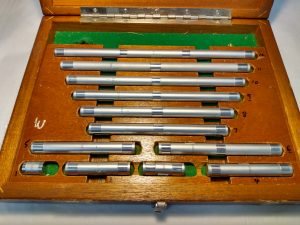
length standards set
Length standard set

Note: For larger micrometers, length standards are often used in place of gage blocks.

Do I need to buy a micrometer that is already calibrated?

No, buying a micrometer that is already calibrated is not required.

In fact, I recommend not purchasing a micrometer that comes with a calibration certificate. The certification process costs extra and adds no extra value.

You will want to check the calibration of the tool once you get it anyways. Shipping companies aren’t always gentle and just because it was in calibration at the time of shipping does not ensure it is in calibration when received.

What do I need to maintain for calibration records?

At a minimum, your records should include calibration labels for your tools and a database where you record calibration information.

Free and printable calibration labels are available on our calibration labels page. All types of stickers are included for everything from tool calibration labels to do not use labels.

What information should the calibration label include?

Calibration labels should include at least the calibration date along with the next calibration due date. It is also a good idea to include the person who calibrated the tool and the tool #.

Note: It is acceptable to place a label on the box of a measuring tool if it isn’t practical to place on the tool such as is the case with a set of gauge blocks.

calibration label
Example calibration label

What information should be included in the calibration database?

The calibration database can come in many forms. Card systems, spreadsheets, database files and specialty programs are often used to maintain calibration records.

The following information should be recorded in the calibration database:

  • Who performed the calibration
  • Date calibration was performed
  • Master standard that was used for calibration
  • Calibration checks to be performed
  • Acceptable limits for calibration checks
  • Actual readings from the calibration checks
  • Next calibration due date

While it isn’t always a strict requirement, it is a good idea to think about recording the environmental conditions such as temperature and humidity when performing your calibration.

Example calibration procedure for a micrometer

  1. Read the entire procedure before beginning calibration
  2. If at any time in the calibration procedure a problem is identified, the problem will be corrected and the process will start over. If the problem can not be fixed, the micrometer will be taken out of service.
  3. Clean anvil and spindle faces along with all exterior surfaces.
  4. Inspect the micrometer for any damage or issues which might prevent accurate calibration.
  5. Close the micrometer using ratchet or friction stop if present.
  6. Hold the micrometer up to light and visually examine. If faces are not parallel, light will show between them. There should be no light visible between the faces of the anvil and spindle.
  7. Remove the spindle assembly.
  8. Clean and oil spindle and measuring screw.
  9. Reassemble the micrometer.
  10. Check measuring screw for wear by pushing thimble in and out. Do this in the direction of the measuring screw axis. There should be no movement.
  11. Close the micrometer by using the ratchet or friction stop if present to check the zero setting.
  12. Check accuracy with gage block(s) having accuracy not less than 0.000025 inch. Verify measurements at sizes that are not even intervals. Use sizes such as .206”, .456” or .784”. Avoid common sizes such as .250”, .500” and .800”. Verifying sizes that are not even increments of .025” will verify the scale around the micrometer.
  13. Place block or block combinations between anvil and spindle of the micrometer and close the micrometer using ratchet or friction stop if present. Use block combinations to check the accuracy of the instrument positions across the total measuring range.
  14. Record all above readings in the calibration database.

Steps 8 and 9 are not required but are good preventative maintenance for your tool.

Related articles

Best Micrometer Brands – New, Used and Everything In Between

Micrometers are incredibly accurate measuring tools. They get used for the most demanding measurements from engine work to reloading. Measurements that critical require tools that will ensure your project is done right.

When it comes to micrometers, the best manufacturers are the ones that consistently put out a quality product. These are those brands:

Best micrometer brand

Starrett

Starrett has been in the micrometer business for a very long time. It’s no surprise that they are capable of creating quality measuring tools at such a consistent pace. They nearly perfected the micrometer and have maintained that excellence throughout the years. Starrett is a good brand to look into when buying a standard micrometer.

You are very unlikely to come across a Starrett micrometer that doesn’t measure accurately without being subjected to a substantial amount of abuse. Their digital micrometers face some stiff competition that keeps them from being the top dog but their standard analog mics are the best of the best.


Best budget micrometer brand

Anytime Tools

Anytime Tools is new to the game. Started in 1999, they have really come on strong. 20+ years in the industry might sound like a long time but and when it comes to measuring tools many of the players in the game have been around for decades not years.  Starrett and Mitutoyo have each been making gauges for over 100 years.

Much cheaper than other micrometer manufacturers such as Starrett, Mitutoyo or Fowler, Anytime Tools is an American company but I am fairly certain they source their products from another country. The good thing is that it seems to have no effect on their quality. They are consistently producing tools comparable to other big name manufacturers and at a fraction of the price.

As a side note, Anytime Tools also owns iGaging which has also been producing consistent quality measuring instruments.

Best digital micrometer

Mitutoyo

Mitutoyo is hands down the best digital micrometer manufacturer. Their Digimatic line of digital micrometers blows the competition away. They come at a premium cost, but the price is worth it.  Mitutoyo digital mics are the standard by which all other micrometers should be judged.

The build quality and accuracy of Mitutoyo’s Digimatic micrometers is second to none. They are precise, accurate and hold up very well to all types of abuse they might encounter in a normal machine shop environment.

If you really want the best, consider their QuantuMike. Read our review to understand why.

Best budget digital micrometer brand

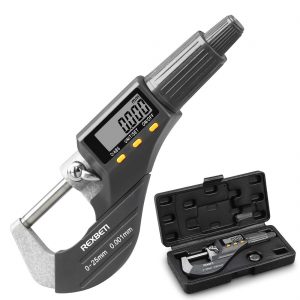
Rexbeti

Rexbeti is a newer competitor in the digital micrometer space. What they lack in experience they certainly make up for in quality.

While they can’t quite compete with the likes of Mitutoyo and their Digimatic micrometers, they do come pretty darn close at a fraction of the price. For most users, the .0001” accuracy of the Rexbeti digital micrometers will be more than sufficient.

One concern with just about all of the cheaper digital micrometers is that the battery life is much shorter than higher end models. Not a deal breaker but think about keeping some spares on hand so you know the tool is ready to go when you need it.

Also, if you won’t be using the micrometer frequently then think about taking out the battery between uses to save on battery life.

Best used analog micrometer brand

Starrett

We already covered Starrett’s long track record of producing excellent micrometers above. Just a reminder that this is a very good thing for anyone shopping for a quality used mic as well.

Very little has changed over the years with their standard micrometer line. There have been small variations in the frames and other components but nothing earth shattering. The most important aspect of their micrometers hasn’t changed. The accuracy has consistently been excellent.

While it would be great to purchase a brand-new micrometer and care for it lovingly from day one, sometimes you just want to save a little cash. The good news is that as long as you verify the accuracy of the tool, there is very little reason to expect that a used micrometer would perform any differently than a new one.

In fact, a huge portion of Starrett micrometers made decades ago are still measuring good as new. They aren’t the only ones either just one of the most consistent. For some more used micrometer recommendations see other brands to consider section below.

Best used digital micrometer brand

Mitutoyo

Digital micrometers are different from your standard analog micrometers. They have changed substantially over the years.

The earliest digital micrometers were not nearly as reliable. If you are looking for a used digital micrometer, stick with something from Mitutoyo’s Digimatic line. They have been exceptional for many years.

There have been other good digital micrometers over the years from various manufacturers, but the quality has been kind of up and down. Some had battery life issues. Others are not nearly as accurate as you would hope. Battery life is easily remedied by keeping a spare in your toolbox. They are cheap enough nowadays.

When it comes to any micrometer, analog or digital, accuracy is the most important factor.

At the risk of sounding like a broken record, check the accuracy of any used tools before purchasing.


Please note there are also an assortment of mechanical digital micrometers on the market. Some people like them. I have never been that person. Their greatest positive is that they don’t require batteries. Unfortunately, all of the mechanical digital micrometers I have used were not precise enough for my taste. They are not something that I recommend but mechanical digital micrometers are an interesting tools nonetheless.

Other brands to consider

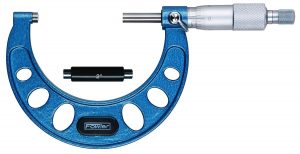
fowler micrometer
Fowler micrometer

While we have listed the absolute cream of their crop in their respective categories, there are many other brands to consider.

The hard part is that unfortunately many brands which were known for their quality in years past have moved manufacturing to new locations and quality has suffered as a result.

This can make it difficult to know whether their tools are quality or trash because they simply aren’t consistent.

I recommend the following brands for both new and used tools. Still make sure to verify their accuracy whether buying new or used. You never know how the previous owner or the UPS man treated them.

  • Fowler
  • Brown and Sharpe
  • Etalon

Things to consider when buying a micrometer new or used

Check the specified accuracy

Most micrometers should be accurate to .0001”. Some of the best such as the Mitutoyo digital mics listed above are good to .00005”. That’s twice as good and going to be overkill for most users.

One thing to watch out for is that some older micrometers are only accurate to .001”. If you only need accuracy of .001” then go with a caliper instead. They provide more versatility in your measurements. You should be buying a micrometer for extreme accuracy. Avoid mics that are only accurate to .001”

Check the accuracy yourself

gauge block set
Gauge block set

Micrometers are precision measuring tools. Because their accuracy is so important, it is essential that its accuracy is verified before purchasing if used or immediately after receiving the tool if new.

Take a known standard such as a set of calibrated gauge blocks and check the tool at various steps across its measuring range.

For example, if you have a 0-1” micrometer, try to check it at 0.000”, .250”, .500”, .750” and 1.000”. Sometimes this might not be possible but it is good practice to check at random intervals. Many times, users will only check the tool at the two ends of the measuring ranges, in this case 0.000” and 1.000”. In most cases, this is sufficient but if you can check intervals in between it will be a better verification of the accuracy.

How to care for your micrometer

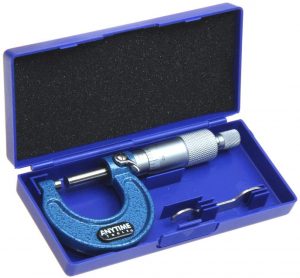
anytime tools 0-1" micrometer in case
The best type of micrometer case

Look for a micrometer with a case. For used tools, this is a great indicator that the tool was well cared for. A case doesn’t need to be anything fancy.

I have seen used tools with purple velvet lined cases. They were actually the worst. The velvet, felt or whatever the material was gets dirty with oil and coolant eventually. A simple, easy to clean plastic case is the best type to have.

If you keep your micrometer in a case or toolbox, you will be handling 95% of the care needed. You would think that a tool as precise as a micrometer would be a delicate instrument. In reality, they are quite rugged.

Keep your mic clean and out of harms way and it will measure accurately for many years to come.

Do I need a calibration or NIST traceable certificate?

No, a calibration certificate is not needed. You need to verify the accuracy yourself and should make sure to do it regularly.

The best practice is to check the accuracy every time you use the micrometer. You should always assume that the janitor at your shop or your kids in your garage have knocked the tool on the floor and put it back in its place hoping no one will be any wiser.

A calibration certificate only certifies that the tool was accurate somewhere else. It doesn’t do you any good in your shop.

Tips for finding a quality used micrometer

Don’t be afraid to explore Craigslist or Facebook for cheap micrometers. Yard sales and estate sales are another good option for budget tools.

In most cases, people will price them one of two ways. Either same as brand new or dirt cheap.

Do not buy used at like new prices. If it isn’t a quarter or a third of the new price then avoid the deal. You would be better off spending a little more and knowing the history of the tool.

If you can find a good cheap used micrometer there is no reason to believe it won’t last for years to come.

If there are any tips we forgot please let us know and share them in the comments below.

Related articles

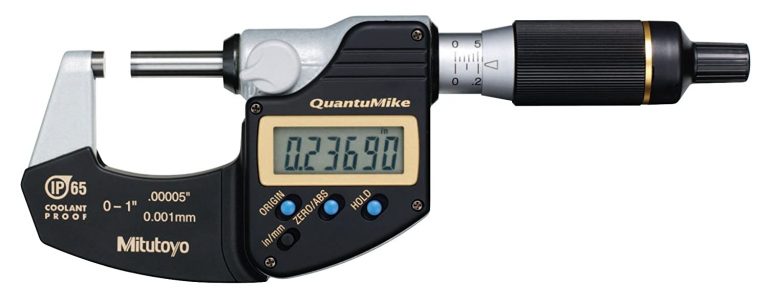
Mitutoyo QuantuMike Review

plus symbol

Pros

Fast
Accurate
Special

minus symbol

Cons

Case is simply standard

Summary

Straight to the point. The Mitutoyo QuantuMike digital micrometer is an excellent inspection tool. It does everything an ordinary micrometer does but four times faster. Simply put, this is a top of the line measuring tool but the quality comes at a price.

Let’s get into the features.

Features

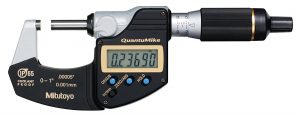
The QuantuMike has a big easy to read LCD display. It reads measurements in both inches and millimeters. Inch and metric values are switched at the press of a button.

Speaking of buttons…

The buttons on this micrometer and frankly all of the Mitutoyo Digimatic micrometers I have used, pull off something that seems very simple but in practice isn’t. The buttons are both easy to use and hard to press on accident. What this means is that your measurements are never lost because you accidentally hit the origin button. It can be hard to describe how the feel of a tool plays into its quality. In this case the QuantuMike just feels good.

Build quality

The build of the QuantuMike digital micrometer is excellent. None of the plastic and metal components of the mic seem cheap or flimsy. It’s solid. One potential negative is that some may find the weight of tool a little on the heavy side. I have never found this to be the case but all of Mitutoyo’s Digimatic micrometers are balanced differently than a normal, non-digital micrometer which might feel strange to some. It may take a little getting used to but once it clicks, you won’t want to go back to a standard mic.

Battery

Battery life for the QuantuMike is listed at 2.4 years. That seems a little long to me, but in practice the standard SR44 battery lasts long enough that I don’t think about it and just try to keep an extra battery on hand. This has been my experience with what I would call a medium amount of use in your standard machine shop. If you are going to use it in your garage sporadically, then I would venture to guess the battery will die of old age before being drained.

Protection from the elements

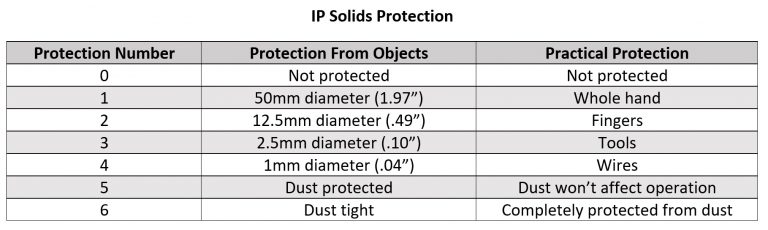
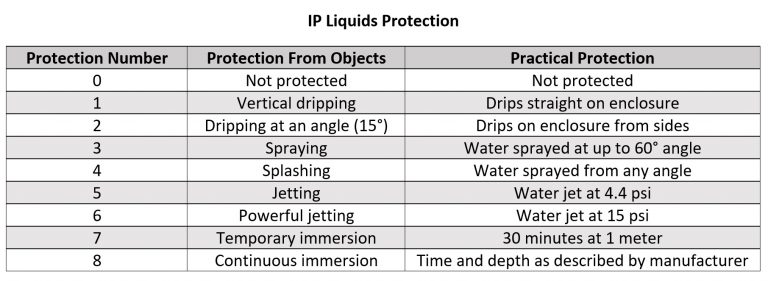
The QuantuMike has an IP rating of IP65. IP stands for ingress protection and the two numbers tell you how well protected from solids and liquids the instrument is. Protection from dust and coolant is what you should look for in an IP rating.

The first digit, 6 in this case, is for solids protection and the QuantuMike is completely protected from dust. This is the highest level of solids protection on the IP rating scale.

The second digit, 5 for the QuantuMike, is for liquids protection. The QuantuMike is protected from water jets from any direction. 

The video below shows what level of protection this provides. I would not recommend recreating the test at home with something as nice as this digital mic. Practically, it means your tool will be safe from splashing coolant. However, you should still do your best to keep it clean and dry.

Speaking of clean and dry, the provided plastic case will help you keep it that way. The QuantuMike comes with a fairly standard plastic case but it gets the job done. I should also note that while not all micrometers come with a case, I would certainly expect one for a tool in this price range.

Accuracy

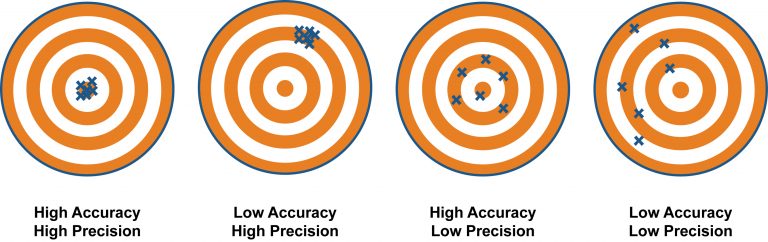
comparing high and low accuracy and precision

Let’s face it, accuracy is by far one of the most important qualities of a micrometer. It’s a measuring tool so it isn’t worth much if it won’t measure with accuracy and precision. Luckily the QuantuMike is extremely accurate. Boasting .00005”/.001mm accuracy, this micrometer is highly accurate and precise. Measurements repeat very well.

Speed

The standout speed of the QuantuMike is what sets it apart from other digital micrometers. Each revolution of the thimble moves the anvil in or out .080” or 2mm.

That is four times faster than a standard micrometer. Not the type of feature that matters to a hobbyist even though it is convenient, but for someone checking hundreds or possibly thousands of parts per day it can mean a huge amount of time saved.

Most machinists will use a 6” caliper or a 0-1” micrometer more than any other measurement device. It’s a good idea to have a quality set for these highly used tools.

Other features

  • Carbide tips
  • Thimble ratchet for consistent measurements
  • Measurement lock
  • Some versions have SPC output
  • 1 year warranty, 3 if registered with Mitutoyo

Verdict

The Mitutoyo QuantuMike digital micrometer is an excellent piece of measuring equipment. The precision and accuracy are top knotch. Battery life is looooooooooong and the speed of measurement is second to none. If you can afford it, you won’t regret it.

What to consider when buying a digital micrometer

Value

The price and the quality affect the overall value of a micrometer. The tricky part is that they really only come in two types, cheap and expensive. There isn’t much middle ground. The hard part is that price does not equal quality. Brands vary wildly in terms of quality. Mitutoyo is one of, if not the best micrometer manufacturer and their quality is in line with their prices. Expensive but worth it to the right user.

Accuracy

Anyone who wants or uses a micrometer needs an accurate measurement. The question is how accurate? Experienced users know the tolerances they need when it comes to a measuring tool. This micrometer measures to 0.00005” or .001mm and that is likely overkill for most people unless they work in a machine shop.

Many might not even know amount of accuracy they need. If this is the case, you would likely be perfectly fine going with a digital caliper. Like micrometers, calipers have a big range of prices. The difference is that calipers are quite a bit cheaper on the average than micrometers.

If you are just getting started when it comes to measurement, think about Mitutoyo calipers if your budget allows or this VINCA caliper. Mitutoyo is pretty consistent with their quality across most of their measuring tools but the VINCA caliper comes pretty close at a much cheaper price.

Absolute or incremental mode

Measurements can be taken in two forms. Absolute values or incremental values. Not all digital micrometers have incremental mode.

Absolute gives you a measurement from a zero point. For a 1-2” micrometer, the zero point would be 1”.

Incremental measures from a specific standard. Using the same 1-2” micrometer in incremental mode would allow the zero to be set at something other than 1”. The display would then read the deviation from the standard you are using such a set of gage blocks.

IP rating

Micrometers are usually rated at one of three IP ratings.

No rating which means there is no protection. Be especially careful around coolant.

IP54 means dust can get into the tool but it won’t affect it and that splashing water is fine. This is usually enough for most use cases.

IP65 is protected from dust and any amount of water that it would normally be exposed to. Anything over this is overkill.

ingress protection (IP) ratings solids description
ingress protection (IP) ratings liquid protection

Data ouput

An SPC output lets you send measurements to a printer or computer. Most won’t need this feature, but it could come in handy in a high volume machine shop.

Related articles